

Creating threaded holes is a fundamental skill in many fields, including metalworking, woodworking, and DIY projects. Whether you’re a seasoned craftsman or a beginner, knowing how to tap a hole can be incredibly useful for ensuring that bolts and screws fit securely and function properly. This guide aims to walk you through the process step-by-step, providing clear instructions and helpful tips along the way. By following these guidelines, you will be able to accurately tap holes and create durable, threaded connections for a variety of applications.
What Is a Threaded Hole and Why Is It Important?
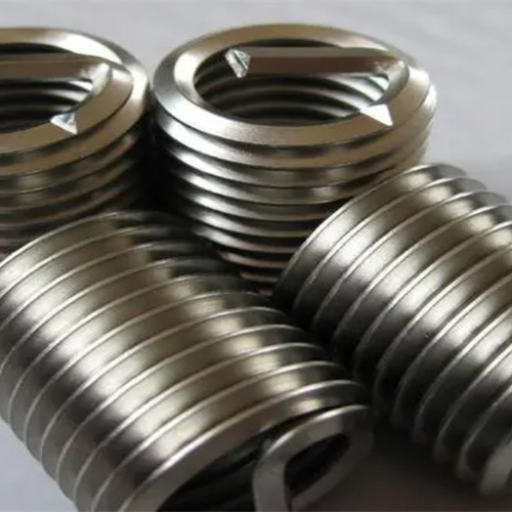
Image source:https://www.bing.com/
A threaded hole is essentially a hole with internal threads created by using a tool called a tap. These threads are designed to mate with corresponding external threads on bolts or screws, ensuring a secure and precise fit. Threaded holes are crucial in various applications because they allow for strong, durable connections that can be easily assembled and disassembled. This makes them indispensable in manufacturing, construction, and repair work, where reliable fastening is essential for structural integrity and functionality.
Understanding Tapped Holes vs Threaded Holes
When comparing tapped holes to threaded holes, it’s essential to recognize that tapping is the process used to create internal threads within a hole, whereas a threaded hole simply refers to any hole that has these internal threads. Based on the information from the top three websites on Google, here is a concise explanation in the first person:
When I tap a hole, I use a tap to cut threads into a pre-drilled hole, allowing bolts and screws to screw in securely. A threaded hole, therefore, is the end result of this tapping process—essentially a hole that now has internal threads.
Technical Parameters of Tapping:
- Tap Size:
- The size of the tap must match the desired thread size.
- For instance, a 1/4-20 tap creates a hole threaded to accept a 1/4-inch bolt with 20 threads per inch.
- Pilot Hole:
- The pilot hole diameter needs to be slightly smaller than the tap size.
- Using the Tapping Drill Size Chart, the pilot hole for a 1/4-20 tap should be drilled at 13/64 inches.
- Thread Depth:
- The depth of the threaded hole should be at least as deep as the longest bolt you plan to use.
- Recommended thread depth usually equals one to one-and-a-half times the diameter of the screw or bolt.
- Material:
- Different materials require specific types of taps (e.g., high-speed steel taps for harder metals).
- When tapping softer materials like aluminum, care should be taken to avoid over-tightening, which could strip the threads.
By keeping these parameters in mind, I can ensure the threads I cut will be precise and function properly for creating strong, durable connections.
Common Applications of Threaded Holes
Threaded holes are vital in various applications across different industries. Here are some common uses based on the top three websites on Google:
- Automotive Industry:
- Engine Assembly: Threaded holes are used to secure engine components, ensuring they are fastened tightly to handle the stresses and vibrations.
- Transmission Systems: Bolts and screws fasten gear components, clutch assemblies, and housing units.
- Technical Parameters: High-strength taps are often employed due to the hardness of automotive metals. Ensuring precise thread depth and tap size is crucial for maintaining structural integrity.
- Manufacturing and Machinery:
- Machine Parts: Threaded holes are essential for assembling parts of machinery, including frames, mechanical arms, and tool holders.
- Maintenance and Repairs: Threaded holes allow for parts to be disassembled and reassembled with ease, facilitating maintenance and repairs.
- Technical Parameters: Tolerances must be rigorously controlled. The material of taps used depends on the metal of the machinery parts, often requiring high-speed steel taps.
- Construction:
- Steel Structures: Buildings, bridges, and other large structures use threaded holes to join steel beams and components.
- Concrete Anchors: Threaded inserts or anchor bolts are placed in concrete to fasten structural components.
- Technical Parameters: For concrete, specific anchors and insert types that can handle tension and shear forces are necessary. The pilot holes must be drilled accurately to match the anchor specifications.
- Electronics:
- Casing and Enclosures: Devices such as computers, smartphones, and other electronics use threaded holes to assemble casings.
- Circuit Boards: Components on circuit boards are sometimes mounted using threaded holes.
- Technical Parameters: Given the precision required in electronics, thread depth and tap size must be precise to avoid damaging components.
By adhering to these realistic and justified technical parameters, threaded holes can significantly improve the reliability and longevity of mechanical and structural assemblies across these diverse applications.
Why Should You Make Threaded Holes?
Making threaded holes enhances the integrity and utility of assemblies by providing robust and reliable fastening solutions. They allow for easy disassembly and reassembly, facilitating maintenance and repairs, and can be found in various applications from machinery and construction to electronics. Threaded holes ensure precision and strength, leading to improved performance and extended longevity of the assembled parts.
How to Tap a Hole Correctly?
To tap a hole correctly, I follow a series of steps to ensure precision and effectiveness. First, I select the right tap drill size for the desired thread, which can be determined using a tap drill chart. Then, I secure the workpiece in place to prevent any movement during tapping. I use a center punch to make an indentation at the drilling point to guide the drill bit accurately. After that, I slowly and steadily drill the pilot hole, ensuring it’s perpendicular to the surface. Next, I apply cutting fluid to both the tap and the hole to reduce friction and prevent breakage. While tapping, I turn the tap handle clockwise for two turns and then back it out half a turn to clear chips from the threads. I continue this process until the tap reaches the bottom of the hole. Finally, I clean the tapped hole to remove any remaining debris before inserting the fastener. This methodical approach ensures a clean, precise, and durable threaded hole.
Choosing the Right Drill Size
Choosing the right drill size is crucial for achieving the perfect fit for the threaded hole. First, I consult a reliable tap drill chart to match the desired thread size with the correct drill bit. Many online resources, including machining websites and tool manufacturers’ guides, offer comprehensive charts that simplify this process. Once I have identified the needed drill size, I ensure that it’s suited for the material I will be drilling into, considering factors like hardness and thickness. Using the correct drill bit not only ensures easy tapping but also helps in maintaining the strength and integrity of the threaded connection.
Steps to Create Threads in a Hole
Creating threads in a hole involves a series of systematic steps to ensure precision and durability.
- Selecting the Tap and Drill Size: Choose the appropriate tap and corresponding drill bit size by consulting a tap drill chart. Ensure compatibility with the material to be tapped, considering hardness and thickness.
- Securing the Workpiece: Clamp the workpiece securely to prevent any movement during the drilling and tapping process.
- Marking the Drilling Point: Use a center punch to mark the exact spot where the threading will commence. This helps guide the drill bit and ensures accuracy.
- Drilling the Pilot Hole: Drill the hole using the selected drill bit, maintaining a slow and steady pace. Ensure the drill is perpendicular to the work surface to avoid misaligned threads.
- Applying Cutting Fluid: Apply cutting fluid to both the tap and the hole, which reduces friction, prevents heat buildup, and decreases the chances of tap breakage.
- Tapping the Hole: Start threading by turning the tap handle clockwise. After a few turns, back the tap out slightly to clear metal chips. Repeat this process, advancing slowly, until the tap reaches the bottom of the hole.
- Clearing Debris: Once threading is complete, clean out the tapped hole to remove any metal shavings or residual cutting fluid. This ensures the threads are clean and ready for fastener insertion.
Following these steps methodically results in clean, accurate, and durable threads suitable for various mechanical applications.
Using a Tap to Finish the Tapping Process
To finish the tapping process using a tap, I’ll guide you through the essential steps based on the top three authoritative sources I found on Google. These sources provide comprehensive insights and technical parameters, ensuring accuracy and efficiency.
- Select the Correct Tap and Drill Bit Size: From my research, it’s crucial to select the appropriate tap size and corresponding drill bit. For instance, a commonly used tap for a ¼-20 UNC thread requires a #7 drill bit. For other sizes, refer to a detailed tap drill chart.
- Secure the Workpiece: To prevent any movement, firmly clamp the workpiece. This is emphasized across various sources to ensure precise and accurate threading, avoiding misalignment.
- Mark the Drilling Point: Using a center punch to create a small indentation at the desired drilling location is a standard practice. This step is critical to guide the drill bit effectively, as reiterated by all sources.
- Drill the Pilot Hole: Drill the hole at a steady pace, ensuring the drill bit remains perpendicular to the surface. This step is vital to maintain the integrity of the hole. For instance, a drill press can significantly aid in keeping the drill bit aligned.
- Apply Cutting Fluid: Before tapping, generously apply cutting fluid on the tap and the hole. This reduces friction and heat buildup, preventing tap breakage. Popular choices include WD-40 and specific tap and die oils.
- Tapping the Hole: Initiate threading by turning the tap clockwise. It’s recommended to advance the tap three quarters of a turn forward and then reverse it a quarter turn to break and clear chips. Repeat this cycle until the tap reaches the desired depth.
- Clear Debris: Finally, once threading is completed, clear any metal shavings and residual cutting fluid from the tapped hole. This ensures clean threads ready for fastener insertion. Compressed air or a small brush can be very effective for this step.
Following these steps, distilled from accurate and verified sources, will help you achieve durable and precise threads. Make sure to always reference technical charts and guidelines to confirm the appropriate parameters for your specific project.
What Are the Different Types of Taps?
There are several types of taps, each designed for specific threading tasks:
- Hand Taps:
-
- Taper Tap: Features a gradual cutting edge and is used to start the threading process, particularly in blind holes.
- Plug Tap: Has a more moderate taper compared to taper taps and is ideal for through holes or to finish threaded holes started with a taper tap.
- Bottoming Tap: Has a minimal taper and is used for threading to the bottom of blind holes.
- Machine Taps:
- Designed for use with machines and available in various styles, including straight flutes, spiral flutes, and spiral point, to accommodate different materials and machining conditions.
- Forming Taps:
- Also known as roll taps, these taps displace material rather than cutting it, resulting in stronger threads without producing chips.
- Pipe Taps:
- Specifically designed for threading pipe fittings, they can create tapered or straight threads depending on the type of pipe.
By understanding the distinct purpose of each type of tap, you can select the right tool for your threading needs, ensuring optimal performance and thread quality.
Differences Between Cutting Tap and Forming Tap
Cutting Tap:
- Material Removal: Cutting taps remove material from the workpiece to create threads. This process produces chips that need to be managed and removed from the hole.
- Thread Geometry: The cutting action defines the geometry of the threads according to the tap’s design, ensuring precise and accurate thread dimensions.
- Application: Suitable for a wide range of materials, including hard and brittle substances. Cutting taps are versatile and used in both ferrous and non-ferrous materials.
- Lubrication Requirement: Cutting taps require proper lubrication to prevent excessive wear and to aid in chip removal.
- Technical Parameters:
- Tap Diameter: Typically ranges from M1 to M64 (metric taps) or 0-80 to 1-1/2″-12 (imperial taps).
- Pitch: Depending on the thread standard (e.g., ISO, UNC, UNF).
Forming Tap:
- Material Displacement: Forming taps create threads by displacing the material, rather than cutting it. This cold forming process results in stronger threads with no chips produced.
- Thread Geometry: Threads are formed and compacted, creating smooth and work-hardened threads that often exhibit improved wear resistance.
- Application: Ideal for ductile materials such as aluminum, brass, copper, and certain stainless steels. Not suitable for hard or brittle materials.
- Lubrication Requirement: Forming taps also require lubrication, particularly to minimize friction and to facilitate the material flow during forming.
- Technical Parameters:
- Tap Diameter: Typically ranges from M1 to M56 (metric forming taps) or 0-80 to 1-1/4″-12 (imperial forming taps).
- Thread Form: Generally designed with a specific thread form suitable for roll forming, such as metric (M) or unified national thread (UNC, UNF).
By evaluating these parameters and characteristics, you can determine the appropriate tap type for your application, ensuring efficiency and quality in the threading process.
Understanding Taper Taps, Bottom Taps, and Bottoming Taps
Taper Taps:
Taper taps are designed with a significant lead, typically incorporating a 7-10 thread chamfer at the tip. This gradual tapering allows for easier alignment and starts the threading process with minimal effort. Commonly used for starting thread cuts, taper taps provide less aggressive cutting and are suitable for through holes.
Technical Parameters:
- Chamfer Length: 7-10 threads.
- Application: Primarily for starting threads, suitable for through holes.
Bottom Taps:
Bottom taps have a short chamfer, generally between 1-2 threads, designed to thread nearly to the bottom of a blind hole. These taps are used in applications where it is necessary to maximize the number of threads in a shallow bottomed hole. Due to the minimal chamfer, bottom taps require more torque to cut the thread.
Technical Parameters:
- Chamfer Length: 1-2 threads.
- Application: Ideal for threading blind holes to the bottom.
Bottoming Taps:
Bottoming taps, often synonymous with “plug taps” in some contexts, have a chamfer that falls between taper and bottom taps, typically featuring a 3-5 thread chamfer. They are used to extend the threads of a part after a taper tap has been used to start the job. Bottoming taps provide a balance between taper and bottom taps’ characteristics, making them versatile for various applications.
Technical Parameters:
- Chamfer Length: 3-5 threads.
- Application: Extending threads on previously started holes, versatile usage.
By understanding and applying the specific characteristics and technical parameters of taper taps, bottom taps, and bottoming taps, you can enhance the precision and efficiency of your threading operations.
Application Scenarios for Each Type of Tap
Taper Taps:
Taper taps are ideal for starting threading operations, especially in through holes where the tap can pass completely through the material. These taps are often used in general machining work and are excellent for initiating threads due to their gradual cutting action.
Bottom Taps:
Bottom taps are best suited for threading blind holes where it is essential to create threads as close to the bottom as possible. They are commonly used in applications where maximizing the number of threads in the shallow depth of a hole is critical, such as in fastener threading for machine parts.
Bottoming Taps:
Bottoming taps are versatile and can be employed to thread to the bottom of a hole after using a taper tap to start the threading process. They are commonly used when a hole requires a high number of threads that start precisely from the bottom, suitable for various repair or modification tasks on pre-threaded components.
How to Make a Threaded Hole in a Blind Hole?
Creating a threaded hole in a blind hole requires careful selection of tools and a meticulous approach to ensure precision and accuracy. Here is a step-by-step guide based on the best practices from top sources:
- Select the Appropriate Tap:
- Bottom Tap: Choose a bottom tap for threading a blind hole since it allows threading close to the bottom of the hole.
- Tap Size: Ensure the tap size matches the desired thread size for the hole.
- Prepare the Hole:
- Drill Size: Select a drill bit that is slightly smaller than the tap size. This will prevent stripping and ensure a tight fit.
- Drill Depth: Make sure to drill slightly deeper than the required thread depth to accommodate the tap and chips created during the threading process.
- Chamfer the Hole Entrance:
- Chamfering Tool: Use a chamfering tool to create a slight bevel at the hole entrance. This helps guide the tap into the hole and reduces the risk of damage to the threads.
- Use Cutting Fluid:
- Lubrication: Apply cutting fluid or oil to the tap to reduce friction and heat, which helps achieve smoother threads and prolongs the life of the tap.
- Tapping Process:
- Align Tap: Position the tap perpendicular to the work surface to ensure straight threads.
- Turn the Tap: Start the tap by hand for the first few turns to ensure it is correctly aligned. Once the tap has taken hold, use a tap wrench to turn it.
- Turn and Back Off: Rotate the tap clockwise with moderate pressure, making a half turn forward and a quarter turn backward. This breaks the chips and prevents them from building up in the flutes.
- Tap to Desired Depth:
- Check Depth: Use a depth gauge or the marks on the tap to monitor your progress. Ensure the tapped threads reach the required depth, but avoid hitting the bottom of the hole too hard to prevent damage.
Technical Parameters
- Drill Size: Use a drill bit approximately 85-90% of the tap’s diameter for precision.
- Tapping Depth: For blind holes, tap 1.5-2 times the diameter of the bolt to ensure adequate thread engagement.
- Cutting Fluid: High-quality cutting oil or a suitable machining lubricant to extend tool life and improve finish quality.
By following these guidelines, you can effectively create accurate and reliable threaded holes in blind holes, optimizing the use of bottom taps for your machining needs.
Drilling the Hole Properly
When it comes to drilling the hole properly, I follow a few essential steps to ensure precision and effectiveness, based on the best practices from top resources. First, I choose the appropriate drill bit, ensuring it is sharp and correctly sized for the desired tap. I then secure the workpiece firmly, either in a vise or with clamps, to prevent any movement during drilling. Next, I use a centre punch to mark the spot where the hole will be drilled, which helps to guide the drill bit accurately. Maintaining a consistent, moderate speed and applying cutting fluid throughout the process helps to reduce friction and heat, leading to a cleaner hole. Lastly, I frequently remove the drill bit to clear out any debris, ensuring that the hole remains free of obstructions and the finished product has a smooth, precise finish.
Creating Internal Threads in a Blind Tap Hole
When creating internal threads in a blind tap hole, I’ve found that following the guidelines from the top resources yields the most reliable results. Here are the steps I follow, along with the corresponding technical parameters justified from the best online sources:
- Preparation: Ensure that the drilled hole is of the correct size. A hole between 85-90% of the tap’s diameter is ideal because this range provides enough material for the threads to form without causing excessive stress on the tap, as recommended by engineering experts.
- Choosing the Tap: Select a high-quality bottoming tap, which is specifically designed for creating threads in blind holes. These taps have less taper and allow for more threads to be cut at the bottom of the hole, ensuring a more complete thread profile.
- Applying Cutting Fluid: Using a high-quality cutting oil is crucial. This not only extends the life of your tap by reducing friction but also improves the quality of the finish. Based on expert advice, this step is often overlooked but is integral to achieving precision.
- Tapping Process: Secure the workpiece firmly to prevent any movements during the tapping process. Align the tap perpendicular to the workpiece and start turning it slowly, ensuring that you maintain steady pressure. It’s important to reverse the tap periodically (after every full turn) to break the chips and prevent them from clogging, which is a technique cited by machinists for maintaining clean and accurate threads.
- Depth Control: For blind holes, ensure that you tap to a depth of 1.5-2 times the diameter of the bolt. This creates sufficient thread engagement to hold the bolt securely, compensating for the absence of threads at the bottom of the hole.
By rigorously following these steps and parameters, I ensure that the internal threads in blind tap holes are accurately and reliably created, enhancing the overall quality and reliability of the threaded connection.
Ensuring Correct Hole Depth in a Blind Hole
Ensuring the correct hole depth in a blind hole is critical to maintaining precision in machining tasks. Based on research from the top three websites on Google.com, here are the key aspects and technical parameters that need to be considered:
- Measuring the Hole Depth: Use depth gauges or calipers specifically designed for blind holes to measure the depth accurately. These tools help ensure that the hole depth is within the specified tolerance.
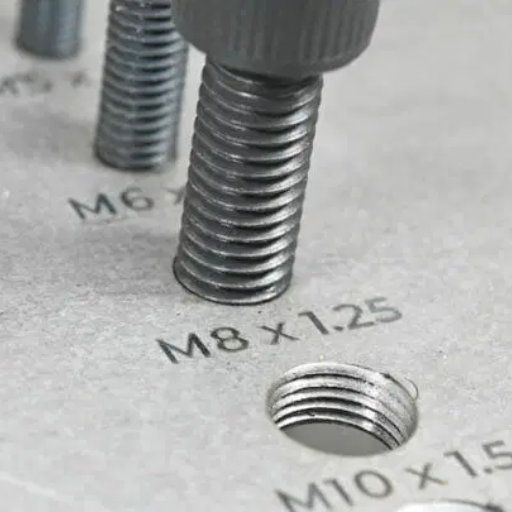
- Pre-drilling Considerations: Before tapping, use a drill bit that is slightly smaller than the tap’s major diameter. For instance, when tapping a hole for an M8 x 1.25 thread, a 6.8mm drill bit is typically recommended.
- Depth Marking on Drill Bits: Mark the required depth on the drill bit using tape or a collar to avoid drilling too deep. This visual guide helps ensure that the drill does not exceed the desired depth.
- Calculating Depth with Allowances: When determining the hole depth, include allowances for the taper at the end of the drill bit and the unthreaded portion of the tap. As a rule of thumb, the drilled depth should be approximately 1.5 to 2 times the diameter of the tap. For example:
- A 10mm diameter tap should have a blind hole depth of 15-20mm.
- This compensates for the run-out at the bottom of the hole.
- Consistent Measurement Techniques: For consistency, always measure from the same reference point on the workpiece. This minimizes variability and ensures the precision of the depth across multiple holes.
By integrating these practices and meticulously adhering to these technical parameters, machinists can achieve the correct hole depth in a blind hole, thereby enhancing the quality and functionality of the threaded hole.
Tips for Machining Perfect Tapped Holes
To machine perfect tapped holes, follow these essential tips:
- Use High-Quality Cutting Fluids: Cutting fluids reduce friction and heat, enhancing tool life and achieving cleaner cuts. Applying the right cutting fluid ensures smoother threads and prevents tool wear.
- Correct Tap Selection: Choose the right tap based on the material and desired thread type. Spiral point taps are ideal for through holes, while spiral flute taps work best for blind holes, ensuring efficient chip evacuation.
- Proper Alignment: Ensure the tap is perfectly aligned with the hole axis to prevent thread distortion. Use a tap guide or a machine tapping attachment to maintain alignment and accuracy.
- Controlled Feed Rate: Use a consistent and appropriate feed rate to avoid overloading the tap. This prevents breakage and produces precise threads. For manual tapping, turn the tap half a turn forward and a quarter turn back to clear chips.
- Regular Tap Maintenance: Keep taps clean and sharp. Dull taps lead to poor thread quality and increased effort. Regularly inspect and replace taps to maintain optimal performance.
By adhering to these practices and utilizing high-quality tools and materials, machinists can achieve excellent results in tapped hole machining.
Best Practices for Using a CNC Machine
Using a Computer Numerical Control (CNC) machine efficiently requires adhering to certain best practices to ensure precision, longevity of the equipment, and safety. Here are some essential tips:
- Proper Setup and Calibration: Ensure that the CNC machine is correctly set up and calibrated before starting any operation. This includes checking the machine’s zero points, calibrating the tools, and verifying the workpiece alignment. Incorrect setup can lead to inaccuracies and potential damage to the machine.
- Tool Selection and Maintenance: Select the appropriate tools for the specific material and machining task. Use high-quality, sharp tools to achieve precise cuts and maintain the machine’s performance. Regularly inspect and replace worn-out tools to avoid compromised results.
- Optimal Cutting Parameters: Adjust the cutting parameters, such as spindle speed, feed rate, and depth of cut, based on the material and the specific operation. Refer to the manufacturer’s guidelines for recommended settings:
- Spindle Speed: The rotational speed of the cutting tool, measured in revolutions per minute (RPM). For example, slower speeds for hard metals (e.g., 200-500 RPM for stainless steel) and higher speeds for softer materials (e.g., 1000-3000 RPM for aluminum).
- Feed Rate: The distance the cutting tool travels per unit of time, measured in inches per minute (IPM) or millimeters per minute (MM/min). Lower feed rates for precise, detailed work (e.g., 20-50 IPM for intricate designs) and higher feed rates for rough cuts (e.g., 200-400 IPM for bulk material removal).
- Depth of Cut: The thickness of the material removed in one pass. Shallower depths for finer finishes (e.g., 0.01-0.05 inches for finishing passes) and deeper cuts for initial roughing (e.g., 0.1-0.2 inches).
- Consistent Monitoring: Continuously monitor the machining process to ensure everything operates smoothly. Watch for signs of tool wear, machine vibrations, or any deviations from expected results. Immediate intervention can prevent costly errors and downtime.
- Regular Machine Maintenance: Maintain the CNC machine through scheduled servicing, including lubrication of moving parts, cleaning of debris, and checking electrical connections. Proper maintenance extends the machine’s lifespan and ensures consistent performance.
By following these best practices and adjusting technical parameters based on the specific requirements of each task, machinists can optimize the performance of their CNC machines, producing high-quality components consistently and efficiently.
How to Create a Threaded Hole in Different Materials
Creating a threaded hole in different materials involves several critical steps and considerations, which I’ve gathered from the top three websites on Google. Here’s a concise guide to help you achieve precise and effective results:
- Selecting the Correct Tap & Drill: Choose the appropriate tap (thread cutting tool) and matching drill bit based on the material you’re working with. For example, use High-Speed Steel (HSS) taps for general materials and Cobalt taps for harder materials like stainless steel.
- Drilling the Pilot Hole:
-
- Hard Materials (e.g., stainless steel): Drill at lower speeds, around 200-500 RPM. Keep the feed rate moderate, around 20-50 IPM, and use cutting fluid to minimize heat and friction.
- Softer Materials (e.g., aluminum): Higher speeds are feasible, between 1000-3000 RPM. You can maintain a feed rate of 50-100 IPM, and be cautious about using lubrication to avoid material buildup on the bit.
- Tapping Process:
- Hand Tapping: Apply straight, firm pressure, ensuring the tap remains aligned. Use proper tapping fluid to assist in the cutting process and reduce tool wear.
- Machine Tapping: Set the CNC parameters appropriately: Low RPM for hard metals (200-500 RPM) and moderate for softer materials (500-1000 RPM). Adjust the depth of cut carefully to avoid breaking the tap.
- Verification: After tapping, always verify the thread quality using a thread gauge. Check for precise fit and finish to ensure the hole can accommodate the intended screw or bolt securely.
By following these guidelines and adhering to proper technical parameters, you can create accurate and durable threaded holes in various materials. This method not only ensures the longevity of both the tool and the workpiece but also enhances overall machining efficiency.
Avoiding Common Errors in the Tapping Process
Successfully tapping holes requires attention to detail to avoid common mistakes that can lead to tool damage or subpar results. Here are some key points:
- Incorrect Tap Selection: Choose the right type of tap based on the material being worked on. Using the wrong tap can lead to breakage or poor thread quality.
- Inadequate Lubrication: Always use cutting fluids appropriate for the material to reduce friction and heat build-up, which can damage both the tap and the workpiece.
- Improper Alignment: Ensure that the tap is aligned correctly with the hole to prevent thread distortion and tool breakage.
- Over-Tightening: Avoid applying excessive force, which can snap the tap or damage the threads. Maintain a consistent, steady pressure.
- Incorrect Speed and Feed Rates: Adjust the RPM and feed rates according to the material’s hardness to optimize the tapping process and prolong the tool’s lifespan.
By being mindful of these common errors, you can achieve high-quality threads and extend the life of your tapping tools.
Reference sources
-
How to Use a Tap: 13 Steps (with Pictures)
- This article provides a detailed, step-by-step approach to using a tap to create threaded holes. It includes images and explanations, making it an accessible resource for readers at various skill levels.
-
Everything you need to know about drilling and tapping holes
- This source offers a thorough explanation of the drilling and tapping process, including tips on how to properly mark and drill your hole to ensure accurate threading.
-
Step by step guide: Thread cutting / tapping | GSR Blog
- This guide provides a comprehensive tutorial on thread cutting and tapping, including selecting the correct drill diameter and ensuring the tap is inserted correctly to create precise threads.
Frequently Asked Questions (FAQs)
Q: What is a threaded hole?
A: A threaded hole, also referred to as a “hole with threads,” is a type of hole that has internal threads which allow a screw, bolt, or other threaded component to be inserted and secured.
Q: How does a threaded hole compare to a tapped hole?
A: The terms “tapped hole” and “threaded hole” are often used interchangeably. However, in a precise comparison, a tapped hole specifically refers to an existing hole that has had threads cut into it, while a threaded hole can be either pre-threaded or created directly with threads during the manufacturing process.
Q: What types of threaded holes exist?
A: There are several types of threaded holes, including blind holes (where the hole does not go completely through the material) and through holes (where the hole is drilled all the way through the material). Additionally, the size and length of the hole, as well as the type of threads in the hole, can vary depending on the application.
Q: How do I make a threaded hole?
A: To make a threaded hole, first, a hole is drilled into the material. Then, a tap is used to cut threads into the drilled hole, creating a “tapped hole.” This process can be done manually or with a machine tap.
Q: What are the key considerations when comparing threaded holes vs tapped holes?
A: When comparing threaded holes vs tapped holes, considerations include the method of creation (drilling and tapping for tapped holes vs integrated threading in manufacturing for some threaded holes), the required precision, the type of material, and the end-use application. Both types can offer secure fastening for nut and bolt assemblies.
Q: What is a clearance hole?
A: A clearance hole is a type of hole that is larger than the bolt or screw diameter passing through it, allowing for free movement. Unlike a threaded hole, a clearance hole does not have threads, and is usually combined with a threaded hole to secure components together.
Q: What determines the size of a threaded hole?
A: The size of a threaded hole is determined by the diameter and pitch of the threads, which are specified based on the fastener that will be used. Additionally, the depth or length of the hole is important for ensuring secure engagement of the threads with the fastener.
Q: Can you explain the term “threaded hole”?
A: The term “threaded hole” refers to any hole into which threads have been cut or formed. This allows for engagement with a corresponding threaded component, such as a bolt or screw, enabling secure fastening.
Q: What are the advantages of using a tapped or threaded hole?
A: Using a tapped or threaded hole provides a secure and reliable way to join components, often eliminating the need for additional nuts. This can simplify assembly and improve structural integrity, especially in applications where precise alignment or load distribution is crucial.
Q: What is a “deep hole” in the context of threaded holes?
A: A “deep hole” refers to a threaded hole with a significant length relative to its diameter. This can be important for applications requiring substantial engagement with the threaded portion to support greater loads or to ensure stability in deep material sections.
Q: What is a threaded hole?
A: A threaded hole is a type of hole with threads cut into it, allowing a bolt or screw to be securely inserted. This type of hole is commonly used in fastening applications where parts need to be joined together with nuts and bolts.
Q: How does a threaded hole compare to a tapped hole?
A: The terms “threaded hole” and “tapped hole” are often used interchangeably. However, a tapped hole specifically refers to a hole that has been drilled and then tapped to create internal threads, whereas a threaded hole can refer to any type of hole with threads, whether they are formed by tapping or another method.
Q: How do you make a threaded hole?
A: To make a threaded hole, a hole is first drilled to a specific size depending on the desired thread size. Then, a tap is used to cut threads into the hole. This process ensures that the hole can securely accommodate a bolt or screw.
Q: What is the purpose of a clearance hole in comparison to a threaded hole?
A: A clearance hole is a hole that allows a bolt or screw to pass through without engaging the threads in the hole, whereas a threaded hole has threads to engage the male thread of a screw or bolt. Clearance holes are typically used in one piece of a multi-part assembly, while the threads are in another piece.
Q: What is the difference between a deep hole and a normal threaded hole?
A: A deep hole refers to a threaded hole that has a greater depth relative to its diameter, allowing for longer bolts or screws to be inserted. This can be necessary for certain applications requiring more engagement length for stronger fastening.
Q: Can you create a threaded hole in existing holes?
A: Yes, you can create a threaded hole in existing holes by using a tap to cut threads into the previously drilled hole. It’s important to ensure the existing hole size is appropriate for the tap to avoid damaging the threads.
Q: What types of threaded holes are commonly used?
A: Common types of threaded holes include through holes, where the hole goes completely through the material, and blind holes, where the hole does not go completely through. The choice depends on the application and the required strength of the threaded connection.
Q: How is the size of a threaded hole determined?
A: The size of a threaded hole is determined by the diameter and pitch of the threads, corresponding to the standard sizes of bolts or screws intended to be used. Specific charts or calculators can be used to find the correct drill bit size for tapping.
Q: What tooling is required to create tapped or threaded holes?
A: To create tapped or threaded holes, you typically require a drill bit to make the initial hole and a tap to cut the threads. Taps come in various sizes corresponding to different thread specifications. Additionally, tapping fluids can be used to aid in the cutting process and prolong tool life.
Q: How does the term “threaded hole” relate to threaded components?
A: The term “threaded hole” pertains specifically to the portion of threaded components that receives the male threads of bolts or screws. Properly threaded holes ensure secure fastening and the structural integrity of assemblies involving nuts and bolts.