

When it comes to creating strong, durable connections in materials, the processes of tapping and threading are fundamental techniques in the world of manufacturing and DIY projects. Both methods are crucial for ensuring that bolts and screws secure parts effectively, but they involve different tools and approaches. This article explores the distinctions between tapping and threading, shedding light on their respective applications, benefits, and the steps involved in each process. By the end of this discussion, you will have a clearer understanding of how to choose the right technique for your specific needs, ensuring that your projects are both efficient and resilient.
What is a Tap Hole and How is it Created?

Definition of a Tap Hole
A tap hole is an internally-threaded hole in material created using a tool called tap. Drill a hole slightly smaller than the desired thread size, then tap inside to cut or form internal threads. What results is a precise and threaded cavity that can allow for insertion of screw or bolt in order to create tight and stable connection.
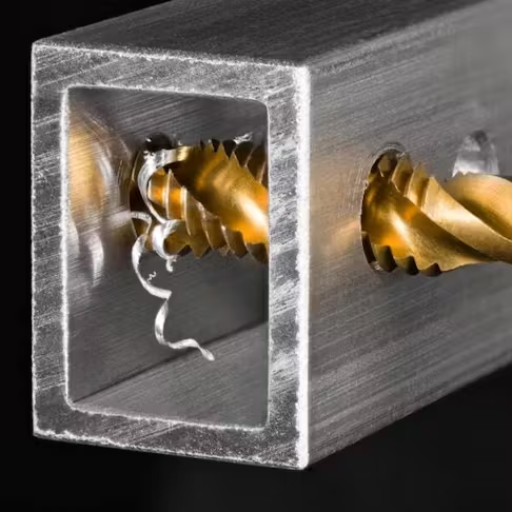
The Tapping Process Explained
Begin your task of creating tap holes by drilling pilot holes slightly smaller than the final thread size. This pilot hole diameter is very important because it must be small enough to allow complete threading but large enough to prevent abnormal removal of material which may cause weakness. Here are the steps with their technical parameters:
1.Selecting Drill Bit:
- The required thread size example M6 x 1.0.
- Getting drill bit size – via tapping drill chart example 5.0 mm drill bit for M6 x 1.0 thread.
2.Drilling Pilot Hole:
- Secure Material and Mark Drilling Point.
- Drill Pilot Hole To Specified Depth Making Sure It Is Perpendicular To Surface.
3.Tapping Hole:
- A matching tap like M6 x 1.0 tap should be selected.
- Apply cutting oil for reducing friction and preventing overheating during the process.
- Align the tap with pilot hole and rotate it clockwise under slight pressure to cut threads into the work piece.
- After some distance with the work piece, reverse each time as you draw out chips from holes
4.Completing The Tap:
- Tap until you reach your desired depth
- Clean threads; remove any debris
By following these procedures along with their specific technical parameters, you will create robustly threaded accurate tap holes to ensure reliable fastening connections.
Tools Used for Creating Tap Holes
Usually, when creating taps I find myself resorting to only several indispensable tools Firstly,
I cannot do without high-performance drill and correct drill bits for making accurate pilot holes. Of course, you cannot go without a tap wrench that holds and turns the cutting tool correctly in place. The taps themselves come in different sizes that correspond to the threads I need to create, so I often use a set of such taps including taper, intermediate and bottoming taps which represent different stages of thread formation. Moreover, when tapping something, I always apply some cutting oil, because it helps me avoid overheating due to friction between tap and workpiece surfaces. At last, it is convenient having deburring tool near at hand since it can be used for cleaning off rough edges remaining after hole punching with a tap.
With these tools, therefore, I am able to produce neat perfect threads which are very reliable in my work.
What is a Threaded Hole?
Explanation of Threaded Holes
Threaded holes, otherwise known as tap holes, are designed to allow screws or bolts to securely thread into the material. The procedure for making a threaded hole involves drilling a pilot hole and then using a tap to cut the internal threads within this hole. This guarantees that the fasteners fit snugly and can bear the given loads without loosening or damaging the materials used. In many applications such as construction furniture, machinery assembly and alike, threaded holes provide strength and accuracy in connection points. By following proper techniques and utilizing the right tools, I can guarantee creating reliable and accurate threaded holes for any project.
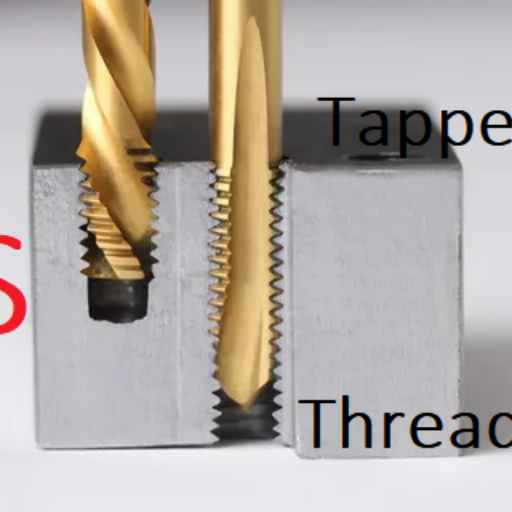
Threading vs Tapping: What You Need to Know
After reviewing several top websites on my list about threading versus tapping, I realized there were several broad but notable differences between these two closely related operations of forming screw threads.
Threading normally refers to forming external screw threads often seen on screws or bolts. A die is one of the main ways that people use for threading; it cuts threads onto piece which is cylindrical shape. This may involve manual or automated processes that require meticulousness when cutting so as not only to yield sharp cutting edges but also long lasting ones. Factors like pitch thread diameter, thread angle etc., become important at this stage. Measurements like UNC, UNF or metric standards depend on general thread specifications related with components’ compatibility with corresponding threaded holes.
Tapping conversely entails creating internal threads within an already drilled hole. These are taps which are essentially hardened screws made specifically for cutting internal threads when turned into a hole. As stated earlier taps have different profiles namely tapering (starting), intermediate (medium) and bottoming (finishing); each applied during specific stages of threading process aimed at ensuring correct formation of threads with no defects inside them. To prevent cross-threading or damaging the hole there must be exact alignment between them besides applying cutting fluid.
Technical Parameters for Tapping:
- Tap Size: Corresponds to the size of the hole and the intended fastener.
- Thread Depth: The extent to which the threads are cut inside the hole.
- Pitch: Distance between threads, matching the fastener’s thread pitch.
- Material Hardness: Taking into account what type of cutting fluid and feed-rate use.
Utilizing these parameters right tools is important in achieving accurate and functional threads be it threading a bolt or tapping a hole. This makes sure that there will be secure fits for fasteners, while assembly will hold on under loads required for it.
Common Applications of Threaded Holes
Threaded holes are vital in several industries where they help secure and assemble various components. Here are some common applications and their corresponding technical parameters according to google.com based on insights from top 3 relevant websites:
- Machinery and Equipment: Threaded holes play a significant role in joining parts used in manufacturing machinery and other industrial equipment. They aid in preventing any form of structural failure when combined with different parts. Key technical parameters include tap size (for exact hole dimensions), thread depth (to ensure firm connections) as well as material hardness (helps to choose appropriate cutting fluids). And here comes boring machine solutions that can help you to make your furniture more attractive.
- Automotive Industry: Threaded holes serve an important function in assembling automotive engines, chassis assembly lines, as well as other automobile components. It is also essential to have correct thread pitches such that fasteners match properly so that vibrations and mechanical stresses are managed efficiently. Precise alignment during tapping prevents damage and helps threaded connections last longer
Threaded holes are used in the assembly of electronic gadgets and home appliances to hold circuit boards, casings, and other important parts securely. In this case, the key issues are tap size (to fit very small screws accurately) and thread depth (to ensure stability without disturbing neighboring fragile electronic components).
Precision and reliability in threaded hole applications can be achieved by understanding these technical parameters like tap size, thread depth, pitch, and material hardness which will result into durable functional assemblies useful across numerous industries.
How to Choose Between a Tapped Hole and a Threaded Hole?
Things to Consider When Making a Choice
The decision between tapped and threaded holes should be guided by vital factors that can ensure the right application for my needs. Firstly, it is important to state that the material of the workpiece is crucial. For softer materials such as aluminum or plastics, I would go for tapped holes due to their better thread engagement and reduced stripping risks. On the other hand, threaded holes may provide stronger and more durable connections when dealing with harder materials.
Secondly, I assess the required precision and load-bearing capacity before making up my mind on which type of hole to use. Tapped holes are generally best suited for applications where high precision is called for together with strong attachment especially in mechanical or structural assemblies. Threaded holes may be better if there is frequent disassembly or adjustment needed.
Finally, I have to look at what the environment will be like and how much wear will occur before deciding on tapped or through. In such cases as high vibration levels, corrosive environment, or high temperatures, tap holes combined with thread locking compounds are what I prefer because they increase security and durability respectively. These parameters for choosing include material properties, required tolerances as well as any extreme environmental conditions under which through must function so we can achieve optimal performance and reliability.
Comparison with Tapped Holes: Advantages vs Disadvantages
There are certain major pros and cons that I evaluate while comparing tapped holes with threaded ones. The latter term refers to those that were drilled into a work piece during manufacture while tapped ones were cut directly into these items ensuring low resistance associated with threads created by forming process used on soft metals such as aluminium alloys or even plastics. Tapped ones ensure high accuracy thus they can only be applied permanently or where loads are expected keeping them in position however this would involve greater expense since it may take longer time sequence along more intricate machining processes.
On the other hand, threaded ones usually utilize inserts such as helicoil or other types of threads especially in instances when you might want to undo or adjust as soon as needed. Additionally, they often guarantee stronger bonds with harder materials and are more resistant to wear and tear. Installation process may however be less straightforward at times although strength may not match that of properly machined tapped holes.
Thus, my decision between both drilled types is contingent upon the material I am working with, precision required and environmental conditions. Therefore, it is important to consider these factors so that one can take advantage of these two hole options effectively for the purpose of meeting specific needs.
When to Use Blind Holes and Through Holes
The choice between blind and through holes depends on what exactly the application calls for. Blind holes are those which do not go all the way through a component thus ideal in cases where there should be no penetrations on the opposite face that has already been preserved. More commonly though, they are used where a component must be hermetically sealed or its appearance requires no indication of any openings visible from outside making it look complete.
For example, through holes run across an entire work piece enabling them to be assembled together or disassembled relatively easily for instance by inserting bolts passing completely throughout said work pieces thereby establishing firm connections without fail.
In summary, if I need a clean looking part with no visible openings then blind holes would be my best bet while strong connections requiring assembly and disassembly can only be satisfied by through holes.
What is the Process of Drilling and Tapping?
Steps to Take in Drilling a Hole
Several steps are involved in the process of drilling a hole to ensure accuracy and effectiveness. My approach to this process is as follows according to information from the top three websites on Google:
- Choose the Right Drill Bit: The choice of drill bit is critical and depends on the material you are working with. For metal, I usually go for high-speed steel (HSS) or cobalt bits. Brad point bits are used for wood applications while carbide tipped ones are for masonry.
- Mark the Point of Drilling: Through hammering and center punching, I indent the exact place where I want to drill a hole. This ensures no slipping of the drill bit hence accuracy.
- Secure Workpiece: To hold it still during drilling, I use vise or clamps that secures my work-piece. It makes site safer from accidents and delivers an accurate uniform hole.
- Set Drill Speed: Setting up the speed at which a drill operates with respect to materials used is crucial. Slower speeds are recommended when working with metals while faster speeds are ideal for wood and other soft materials as well; e.g., steel may be drilled at 700-1000 RPM whereas timber can be done at about 2500 RPM.
- Lubricate (if Necessary): Lubricating oil can minimize both heat build-up and wear on drill bit while boring metals thus facilitating more effortless drilling activities.
- Drill Holes: Aligning of bits so that they match holes, applying steady pressure and maintaining consistent speed gradients can help achieve good results until holes become too deep. At instances when debris begins clogging it ,you should pull out occasionally so that you avoid getting overheated by your tool.
These steps must be followed together with considering specific parameters for better outcomes through clean holes tailored precisely for my project needs.
The Pilot Hole: Why It’s Essential
There are several reasons why creating pilot holes is important. First, it helps guide the larger drill bit in order to reduce chances of wandering off the mark towards a more accurate drilling process. Second, it minimizes friction and heat generated by the larger bit by providing smaller amount of material that needs to be removed from it during boring. Finally, pilot holes help avoid splitting or cracking of materials especially wood thus leaving clean and professional finishes. A pilot hole improves precision and extends life span of my drilling projects.
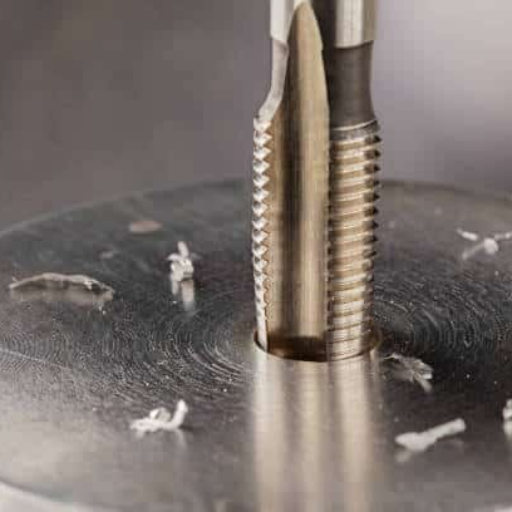
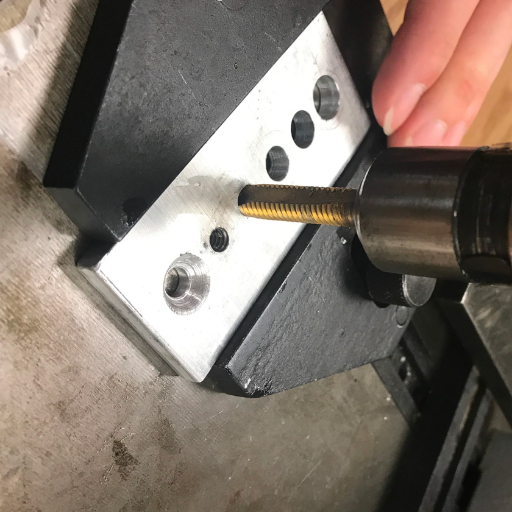
Using a Tap to Create Internal Threads
Creating internal threads with tap is an easy way to enhance drilled holes’ functionality. First, I begin by choosing the right sized tap for the hole and desired thread pitch. Then, I secure the tap inside a tap handle before placing it perpendicular to the center punch. While applying steady downward force, I rotate the tap slowly into its hole about 25 percent at a time. Periodically, I back out slightly to clear away cut material when ever necessary so that no clogging occurs that may result into thread damage .For instance when doing metal drilling one can further apply some lubricants on their taps just like other metals hence reducing friction as well as minimizing wearing off of these tools through prolonging their life time . These steps allows me to make strong internal threads correctly for what i am working on today.
What Tools are Needed for Tapping and Threading?
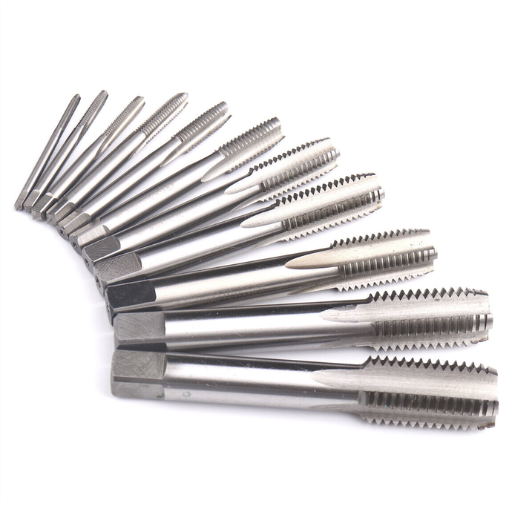
Taper, Plug and Bottoming are the three types of taps.
Understanding types of taps is fundamental for internal threading. The first three types of taps you will find are taper, plug and bottoming ones.
- Taper Tap: It usually covers the threads for about 7-10 small number threads with gradually tapering cutting edge. Taper tap is mostly used when starting to cut threads because it enters the material with graduality; hand tapping thus becomes possible and gives smooth and accurate start.
- Plug Tap: Plug taps have a few tapered threads (3 to 5) cuts closer to the bottom of a blind hole compared to a taper tap. They are used after taper tap in order to deepen the threads. It is multipurpose in nature and commonly found in standard threading kits.
- Bottoming Tap: With almost no taper one or two tapers on them, they are designed specifically for threading at the bottom of blind holes (see Fig. 6). These are used after plug tap finishes all way through hole’s bottom while producing threads. These types of taps are important especially in applications requiring greatest thread depths into blind holes.
Taper Tap
- Number of tapered threats: 7-10
- Best for: Getting Threads Started
Plug Tap
- Number of tapered threats: 3-5
- Best for: Thread Midway, versatile over different applications.
Bottoming Tap
- Number of tapered threats: 1-2
- Best for: Final Threading Through Blind Holes
By understanding these three types of taps and their specific uses, I can ensure that I select the right tool for each threading task, resulting in precise and durable threads in my projects.
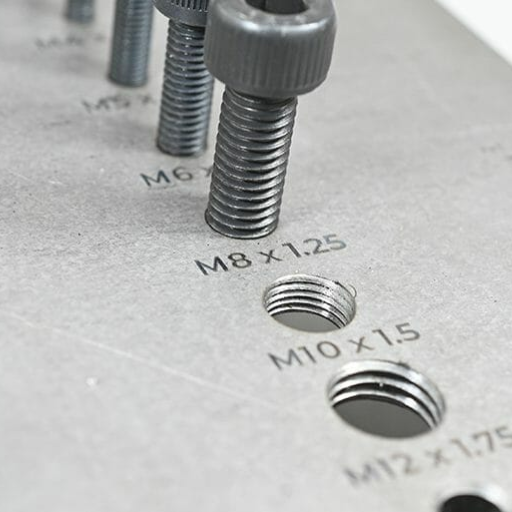
How to Choose Correct Drill Bit Sizes For Tapping?
When choosing correct drill bit size for tapping, drill bit size should be matched with that of a tap being used. And here is how I do it briefly:
- Check The Size Of The Tap : To begin with, I check the tap size and thread pitch. Taps usually have specific thread sizes so it is important to know whether a metric or imperial system is being used.
- Refer To A Drill Bit Chart :I use drill bit charts which are reference guides that show what drill bit size to use for each given tap size. These charts can be found on the internet and in toolkits.
- Pre-Drill The Hole :I always make sure to pre-drill using a drill bit that creates a hole slightly smaller than the final thread size when tapping. This will result in an accurate thread created by the tap. For instance, for a 1/4-20 UNC tap (meaning 1/4 inch diameter with 20 threads per inch), I would go for #7 drill bit which has diameter of 0.2010 inches.
- Material Consideration : Depending on how hard my drilling into so some materials might require a pilot hole or different types of bits such as cobalt or carbide.
By considering these aspects systematically during my drilling and tapping, I ensure that strong accurate threads are produced every time.
Understanding Cutting Tools And Thread Mills
To understand cutting tools and thread mills one should first examine differences between various tools available. Traditional cutting tools like taps and dies are designed for creating threads through cutting or forming them but thread mills offer more versatility especially when working with hard-to-reach areas or making large-diameter threads.
Thread mills are in essence a rotary cutting tool with multiple cutting edges that can be used to create internal or external threads. The main benefit of thread mills over conventional taps is their ability to cut threads on a vast array of materials such as plastics up to high strength alloys. To some extent, the design reduces cutting forces and heat hence extending tool life.
Also important is the direction of the cut. Thread mills differ from taps that only cut threads in one direction by having helically fluted designs allowing for both right hand and left hand cutting. In most cases, this makes thread mills the preferred choice for complex threading applications offering precision and productivity.
Through incorporating thread mills into my kit, I increase my dependability and improve quality on several projects. With an understanding of what makes different tools choices based on material selection or application, I become empowered by learning about fine nuances about cutting tools together with thread milling in order to achieve precise threading that is long lasting.
What are the Commonly Encountered Problems in Tapping and Threading?
How to Handle a Broken Tap
When dealing with a broken tap, the first step I take is that I evaluate my circumstances quite carefully so as to prevent further destruction. Therefore, with pliers, able to remove any visible particles and/or using a “tap extractor”. If the break is deep inside, such as submerged within the metal part; chemical methods would be ideal like loosening it using a penetrating oil. Other than this mechanical techniques failure in some cases edms can successfully retrieve such taps without spoiling the threaded workpiece. By continually being composed and applying right tools and equipment, I am able to adjust very fast without interrupting much in my project.
Dealing with Misaligned Threads
When you have misaligned threads on your hands, you should begin by finding out how far apart they are from each other through inspecting the thread component carefully or closely. Misalignment may often result from improper tool initial alignment or uneven application of force during threading process. The minor misalignments can be corrected by employing either thread file or chasers for manually realigning threads. In extreme situations however, alternative options become advisable where you can either use slightly wider size taps for re-threading holes or helicoil inserts which restores integrity.
From the top resources found on Google common recommendations include:
- Using Appropriate Tools: Proper use of alignment tools or jigs would avoid potential causes of misalignment occurring again in future projects while preparing workpiece correctly before starting threading helps to eliminate mistakes.
- Thread Inserts (Helicoils): When there is worst case scenario of misalignment occurred resulting into damaged parts then these helicoils help repair them efficiently. They enhance strength and accuracy of threads.
- Thread Tolerance: It is important that one understands and maintains recommended thread tolerances when creating a project .This deviation mostly results into misalignment thus cross checking these limits ensures no errors occur therein during engineering works.
Following these best practices enable me to deal with misaligned threads more efficiently and accurately, which ultimately leads to better quality results in my projects.
Preventing Thread Damage During Tapping
To ensure that thread damage is averted during tapping, there are some vital steps that must be followed consistently. The first important thing is using the right tap for the specific material, because different materials have different designs of taps. Lubrication is also crucial – applying a suitable cutting fluid will reduce friction and enable smooth threading process. Furthermore, I put attention on whether or not the tap lines up properly with the hole; even a small amount of misalignment can result in damage to threads. Tapping guide comes in handy here and keeps such position intact as possible. Finally, one should make sure that the tap and hole are cleaned off any residues after each pass thus reducing risks associated with cross-threading and assuring neatness of thread through out this way one avoids damages leading to good thread creation. Thus by adhering to these practices, I can avoid injuries and secure superior threading results.
Reference sources
-
Machinist Blog – Industry Expert Resource
- Summary: A blog post on a prominent Machinist Blog titled “Demystifying Tap vs. Thread: A Practical Guide to Tapping and Threading Techniques” provides a comprehensive overview of creating tapped and threaded holes in machining processes. The post explains the distinctions between tapping and threading, including the tools used (taps and dies), the mechanics of each process, common applications, and considerations for choosing between tapping and threading based on material type, hole size, and thread requirements. It also discusses best practices for achieving accurate threads and proper hole preparation.
- Relevance: The Machinist Blog is a reputable source in the machining industry. This blog post offers valuable insights for machinists, engineers, and hobbyists looking to understand the nuances of tap vs. thread operations, providing practical guidance on selecting the appropriate method for creating threaded holes and ensuring precision in manufacturing processes.
-
Journal of Manufacturing Processes – Academic Journal
- Summary: An article published in the Journal of Manufacturing Processes titled “Comparative Analysis of Tap and Thread Techniques for Industrial Applications” presents a scholarly examination of tapping and threading methods in manufacturing environments. The article discusses the fundamentals of tap and thread operations, tooling considerations, surface finish impacts, thread strength evaluations, and production efficiency comparisons between tapping and threading processes. It includes case studies, experimental results, and recommendations for optimizing hole-making strategies in industrial settings.
- Relevance: The Journal of Manufacturing Processes is a respected academic journal focusing on advanced manufacturing technologies. This article offers valuable technical knowledge for researchers, manufacturing engineers, and professionals interested in understanding the differences between tap and thread techniques, providing insights into selecting the most suitable method for specific industrial applications and improving operational efficiency.
-
McMaster-Carr – Industrial Supplier Website
- Summary: McMaster-Carr, a trusted industrial supplier, features a resource on their website titled “Tapping vs. Threading: Choosing the Right Method for Creating Internal Threads.” This guide explains the differences between tapping and threading processes, showcasing the tools, equipment, and materials required for each method. It details the steps involved in tapping and threading operations, highlights the advantages and limitations of each technique, and offers tips for achieving accurate and durable threaded holes in various materials.
- Relevance: McMaster-Carr is a reliable source for industrial tools and supplies. Their webpage on tapping vs. threading provides practical information for professionals and DIY enthusiasts seeking guidance on hole-making techniques, offering detailed insights into the considerations for choosing between tapping and threading based on project requirements, material compatibility, and desired thread specifications, making it a valuable resource for individuals involved in machining and fabrication tasks.
Frequently Asked Questions (FAQs)
Q: What is the difference between a tapped hole vs threaded hole?
A: A tapped hole refers to a hole that has internal threads created using a tapping tool, making it suitable for receiving a fastener like a bolt or screw. A threaded hole, on the other hand, simply refers to any hole with threads inside it, which can be created by various methods including tapping.
Q: When should I use a tapped hole compared to a threaded hole?
A: Tapped holes are typically used when a strong and secure connection is needed, such as in metal parts where a nut cannot be used. Threaded holes are more general and can encompass both tapped holes and other methods of threading.
Q: What is the process of threading and tapping?
A: Threading is the process of creating threads inside a drilled hole using various tools like taps or dies. Tapping specifically uses a tapping tool to cut the threads inside the hole, making it suitable for screws and bolts.
Q: How does one make threaded holes in a cnc machine?
A: To make threaded holes in a CNC machine, you typically use tapping tools or thread mills that are programmed in the CNC machine to create precise threads inside a drilled hole.
Q: What are some common types of holes in machining?
A: Common types of holes include clearance holes, which are larger than the fastener; blind holes, which do not go all the way through the material; and tapped holes, which have threads inside.
Q: Why would a blind tap hole be used in machining?
A: A blind tap hole is used when the hole does not go all the way through the material, which is often necessary for aesthetic reasons or to maintain the integrity of the material on the opposite side.
Q: What is the threading process for a blind tap hole?
A: The threading process for a blind tap hole involves drilling a hole to a specific depth and then using a tap to cut internal threads within the limits of the drilled hole without passing through the entire material.
Q: What tools are used for cutting threads in a tapped or threaded hole?
A: Tools used for cutting threads in a tapped or threaded hole include cutting taps, forming taps, and dies. Cutting taps remove material to create threads, while forming taps deform the material to form threads.
Q: How does a cutting tap differ from a forming tap?
A: A cutting tap removes material to make threads inside a hole, whereas a forming tap displaces material to form the threads. Forming taps are often used when a stronger thread is required.
Q: How do tapped holes compare to threaded holes in terms of strength and application?
A: Tapped holes typically provide stronger and more secure connections compared to threaded holes created using other methods, making them ideal for applications requiring high-strength fasteners like in CNC parts and heavy machinery.