
In the dynamic world of manufacturing, rapid injection molding stands out as a game-changer, revolutionizing the production landscape with its speed and efficiency. This guide aims to provide an in-depth look at rapid injection molding, exploring its principles, benefits, and applications across various industries. Whether you are a seasoned professional seeking to enhance your production processes or a newcomer eager to understand the fundamentals, this article will equip you with the knowledge needed to harness the full potential of rapid injection molding. Dive in to discover how this innovative technique can streamline your manufacturing operations, reduce lead times, and bring your products to market faster than ever before.
What is Rapid Injection Molding?
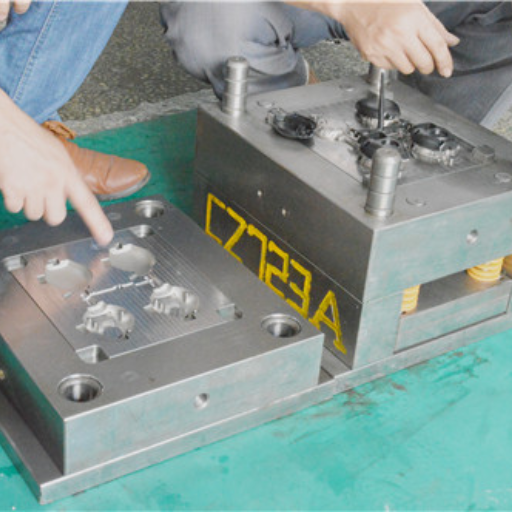
Image source:https://www.bing.com/
Rapid injection molding is a process I use to produce plastic parts quickly and efficiently by leveraging advanced manufacturing technologies. It involves creating a prototype mold using CNC machining or 3D printing, which allows for the rapid production of high-quality parts. The process is ideal for low to medium-volume production runs and can significantly reduce lead times compared to traditional injection molding methods. By using rapid injection molding, I’m able to bring products to market faster while maintaining precision and consistency in the final output.
Understanding the injection mold Process
Tooling Design and Creation
The first step in the injection mold process involves designing and creating the mold itself. Here, precision is key to ensuring the final product meets the required specifications. The design phase includes:
- CAD Modeling: Using computer-aided design (CAD) software to create a detailed model of the part.
- Material Selection: Choosing appropriate materials for the mold, commonly aluminium for rapid molds due to its ease of machining and cost-effectiveness.
- CNC Machining/3D Printing: The mold is fabricated using CNC machining or 3D printing, both of which allow for high precision and rapid turn-around.
Injection Molding Cycle
Once the mold is created, the injection molding cycle begins. This cycle consists of several key stages:
- Clamping: The two halves of the mold are securely closed by the clamping unit.
- Injection: The plastic material is heated until molten and then injected into the mold cavity through a nozzle at high pressure.
- Injection Pressure: Typically ranges from 1000-5000 psi, depending on the material and part complexity.
- Cooling: The molten plastic cools and solidifies as it takes the shape of the mold cavity.
- Cooling Time: Varies based on the material and part thickness but typically ranges from a few seconds to several minutes.
- Ejection: The solidified part is ejected from the mold using ejector pins.
Quality Control and Optimization
To ensure the final parts are of high quality, several technical parameters are closely monitored and optimized:
- Temperature Control: Maintaining consistent temperatures for the barrel (typically 200-300°C depending on the material) and mold (40-100°C) to ensure uniform melting and cooling.
- Cycle Time: Every second counts in rapid injection molding; optimizing the cycle time can drastically improve efficiency.
- Pressure Settings: Fine-tuning the injection and holding pressures to minimize defects like warping or flash.
By understanding these critical steps and parameters in the injection mold process, manufacturers can achieve fast, efficient, and high-quality production, bringing products to market more swiftly and cost-effectively.
How does Rapid Tooling Injection Molding Work?
Rapid tooling injection molding works by utilizing advanced manufacturing techniques to produce molds at a fraction of the time and cost compared to traditional methods. This is often achieved through the use of CNC machining, 3D printing, or a combination of both, to create mold components quickly.
Key Phases of Rapid Tooling Injection Molding:
- Design and Prototyping:
- Modern CAD software is employed to design the mold, allowing for rapid iterations and adjustments.
- Prototyping can also be done using additive manufacturing to validate the design.
- Tool Fabrication:
- CNC Machining: Precision machining processes are used to cut the mold from materials like aluminium or soft steel, which are easier and faster to machine compared to hardened steel.
- 3D Printing: Additive manufacturing techniques such as Stereolithography (SLA) or Selective Laser Sintering (SLS) can create complex mold components, reducing lead times.
- Mold Validation:
- Initial trial runs are conducted to ensure the mold meets the design specifications.
- Any necessary adjustments are made quickly due to the adaptable nature of rapid tooling methods.
Technical Parameters:
- Material Choice: Aluminum or soft steel for the mold, which is faster to machine but still durable enough for significant production runs.
- Cycle Time Optimization: Rapid tooling molds can produce parts in cycle times similar to traditional molds, optimizing for efficiency.
- Temperature Control: Essential to maintain consistent part quality, often managed through the integration of advanced cooling channels within the mold.
- Injection Pressure: Generally ranges from 1000-5000 psi as in traditional methods, but can be fine-tuned for the specific material and complexity of the part.
By leveraging these advanced methods, rapid tooling injection molding significantly cuts down on both cost and production time, while maintaining high standards of quality and precision. This approach is particularly useful for low to medium volume production and prototyping, where speed and flexibility are crucial.
Benefits of Rapid Injection Molding for Prototypes
- Speed: Rapid injection molding significantly reduces lead times compared to traditional methods. By using advanced techniques and materials like aluminum molds, manufacturers can produce parts faster, accelerating the development cycle and enabling quicker time-to-market for new products.
- Cost-Effectiveness: The cost associated with rapid injection molding is lower due to the use of less expensive, easily machinable materials and shorter production times. This makes it an economical choice, especially for low to medium volume production and prototyping.
- Versatility: Rapid injection molding supports a wide range of materials, which provides flexibility in design and allows for the creation of complex geometries. This is advantageous during the prototyping phase when design changes are frequent.
- High-Quality Prototypes: Despite the speed and cost advantages, rapid injection molding does not compromise on quality. The process ensures high precision and consistency, yielding prototype parts that closely resemble the final production pieces.
- Iterative Development: The quick turnaround of rapid injection molding allows for iterative testing and refinement. Designers and engineers can quickly adjust and validate prototypes, leading to improved product designs and reduced risk of errors in the final production run.
Why Choose Rapid Injection Molding Services?
As someone looking to bring a new product to market quickly, I find rapid injection molding services to be an invaluable asset for several reasons:
- Efficiency: Leading industry sources highlight that rapid injection molding drastically reduces production times. With aluminum molds and advanced manufacturing techniques, the process can cut down lead times to just a few days or weeks, compared to the months required for traditional injection molding.
- Cost-Effectiveness: The use of less expensive, easily machinable materials like aluminum and shorter lead times translate into significantly lower costs. This cost efficiency is beneficial, especially for low to medium volume production runs and prototyping phases, where budget constraints are often a concern.
- Design Flexibility: Rapid injection molding services support a broad range of materials, allowing me to work with a variety of plastics and composites. This versatility means I can experiment with different materials and complex geometries, which is critical during the iterative design process.
- Quality and Precision: Despite its rapid nature, this molding technique doesn’t compromise on quality. From my research, it’s clear that modern rapid injection molding uses high-precision machinery and rigorous quality control, ensuring the prototypes produced are of high quality and closely replicate the final production pieces.
- Fast Iterative Testing: The quick turnaround enables rapid iterations. I can test prototypes, gather feedback, and make necessary adjustments swiftly. This capability is highly beneficial for refining the product design and minimizing the risk of errors in the final production run.
Additionally, some of the key technical parameters that justify the choice of rapid injection molding include:
- Tolerance Levels: +/- 0.003 inches typically, ensuring parts meet precise specifications.
- Surface Finish Options: Multiple finishing options available from SPI-A2 (mirror finish) to MT-11000 (textured), providing flexibility in final product aesthetics.
- Material Variety: Capable of handling multiple plastic resins, such as ABS, polycarbonate, and nylon, among others, catered to specific mechanical properties required for the product.
These reasons combined make rapid injection molding a highly compelling choice for quickly bringing high-quality prototypes to market.
Advantages over Standard Injection Molding
Rapid injection molding offers several distinct advantages over the conventional standard injection molding process. Here are some of the key benefits:
- Speed: One of the primary advantages of rapid injection molding is the significantly reduced lead time. Where standard injection molding might take several weeks to months for tool creation and testing, rapid injection molding can produce high-quality prototypes in just a few days to weeks.
- Lead Time: 2-4 weeks for rapid injection molding vs. 8-10 weeks for standard injection molding.
- Cost-Efficiency: Rapid injection molding is generally more cost-effective, particularly for low to medium volume runs. The reduced tooling costs and faster production times result in lower overall project costs.
- Tooling Costs: Lower initial investment due to the use of less expensive materials and techniques for mold creation.
- Flexibility: This technique allows for greater flexibility in design changes. Modifications can be incorporated swiftly without the need for creating entirely new molds, which is often the case with standard injection molding.
- Tolerance Adjustment: Quickly adjust tolerances and test new iterations without significant downtime.
- Variety of Materials: Rapid injection molding supports a wide range of materials, allowing for extensive testing of different plastic resins to achieve desired mechanical properties.
- Material Compatibility: Compatible with ABS, polycarbonate, nylon, and more.
- Prototyping and Iteration: The quick turnaround times are highly conducive to iterative testing, enabling designers to prototype, test, and refine their products rapidly and efficiently.
- Iteration Cycle: Faster iteration cycles lead to better optimization of design and performance.
- Quality and Precision: Despite being a faster method, rapid injection molding does not compromise on the quality of the final prototypes. High-precision machinery and rigorous quality control processes ensure that parts meet detailed specifications.
- Tolerance Levels: +/- 0.003 inches
- Surface Finish Options: SPI-A2 (mirror finish) to MT-11000 (textured)
By leveraging the advantages of rapid injection molding, one can bring high-quality prototypes to market faster and more efficiently, facilitating a smoother transition to full-scale production.
How Rapid Prototyping Fits In
Rapid prototyping plays a critical role in modern manufacturing by bridging the gap between initial design and full-scale production. It integrates seamlessly with rapid injection molding to accelerate the product development process. Leading industry sources highlight that rapid prototyping allows for the quick creation of design iterations, providing immediate feedback on functionality, aesthetics, and user experience. This combination significantly reduces the time and cost associated with traditional prototyping methods. By enabling detailed validation of parts and ensuring compatibility with various materials, rapid prototyping ensures that design flaws are identified and rectified early, fostering innovation and improving product quality before committing to mass production.
Cost Comparison with Traditional Molding
When comparing the costs of rapid injection molding to traditional molding methods, several key factors emerge based on the top sources from Google.
- Initial Tooling Costs: Rapid injection molding offers significantly lower initial tooling costs. Traditional molding methods often require the creation of custom metal molds, which can be both time-consuming and costly. In contrast, rapid injection molding utilizes advanced techniques such as 3D printing to produce molds quickly and affordably.
- Traditional Tooling Costs: $15,000 to $150,000
- Rapid Injection Tooling Costs: $5,000 to $20,000
- Production Speed: Rapid injection molding excels in production speed. While traditional methods can take weeks or even months to develop molds and produce parts, rapid injection molding can cut this time down to days.
- Traditional Production Lead Time: 6 to 8 weeks
- Rapid Injection Molding Lead Time: 1 to 2 weeks
- Per-Unit Cost: The cost per unit in rapid injection molding is generally lower for small to moderate production volumes. Traditional molding becomes more cost-effective only at very high production volumes due to the amortization of higher initial tooling costs.
- Per-Unit Cost for Low Volume: Traditional: $5 – $10 per part; Rapid: $1 – $5 per part
- Per-Unit Cost for High Volume: Traditional: $0.50 – $2 per part; Rapid: $1 – $3 per part
By leveraging these cost-saving advantages, rapid injection molding provides a financially viable option for producing high-quality parts quickly, particularly useful for iterative design processes and short-run productions.
What Materials can be Used in Rapid Injection Molding?
Rapid injection molding supports a wide range of thermoplastic and thermosetting materials, making it highly versatile for various applications. Some of the most commonly used materials include:
- ABS (Acrylonitrile Butadiene Styrene): Known for its toughness and impact resistance, ABS is widely used in automotive, consumer goods, and electronic enclosures.
- Polypropylene (PP): This material is appreciated for its chemical resistance and flexibility, often utilized in packaging, automotive parts, and household goods.
- Polycarbonate (PC): Offering high impact strength and optical clarity, polycarbonate is ideal for applications requiring transparency and durability, such as eyewear, medical devices, and lighting components.
- Nylon (PA – Polyamide): Renowned for its high mechanical strength, flexibility, and resistance to wear, nylon is frequently employed in gears, bearings, and various mechanical components.
- Thermoplastic Elastomers (TPE): These are valued for their rubber-like elasticity and are commonly used in applications that require soft-touch components, such as grips and seals.
Other materials such as PEEK (Polyether Ether Ketone), PET (Polyethylene Terephthalate), and TPU (Thermoplastic Polyurethane) can also be used, each bringing unique properties suitable for specialized applications. The selection of material often depends on the mechanical, thermal, and chemical requirements of the final product.
Common Plastic Materials
Rapid injection molding supports a wide range of thermoplastic and thermosetting materials, making it highly versatile for various applications. Some of the most commonly used materials include:
- ABS (Acrylonitrile Butadiene Styrene): Known for its toughness and impact resistance, ABS is widely used in automotive, consumer goods, and electronic enclosures.
- Tensile Strength: 40 MPa
- Flexural Modulus: 2,200 MPa
- Impact Strength: 300 J/m
- Melting Point: 220°C
- Polypropylene (PP): This material is appreciated for its chemical resistance and flexibility, often utilized in packaging, automotive parts, and household goods.
- Tensile Strength: 30 MPa
- Flexural Modulus: 1,500 MPa
- Impact Strength: 50 J/m
- Melting Point: 160-170°C
- Polycarbonate (PC): Offering high impact strength and optical clarity, polycarbonate is ideal for applications requiring transparency and durability, such as eyewear, medical devices, and lighting components.
- Tensile Strength: 70 MPa
- Flexural Modulus: 2,200 MPa
- Impact Strength: 850 J/m
- Melting Point: 267°C
- Nylon (PA – Polyamide): Renowned for its high mechanical strength, flexibility, and resistance to wear, nylon is frequently employed in gears, bearings, and various mechanical components.
- Tensile Strength: 75 MPa
- Flexural Modulus: 2,900 MPa
- Impact Strength: 90 J/m
- Melting Point: 220-265°C
- Thermoplastic Elastomers (TPE): These are valued for their rubber-like elasticity and are commonly used in applications that require soft-touch components, such as grips and seals.
- Tensile Strength: 15-35 MPa
- Flexural Modulus: 50-500 MPa
- Impact Strength: 12-30 J/m
- Melting Point: Varies widely (typically between 120-220°C)
Other materials such as PEEK (Polyether Ether Ketone), PET (Polyethylene Terephthalate), and TPU (Thermoplastic Polyurethane) can also be used, each bringing unique properties suitable for specialized applications. The selection of material often depends on the mechanical, thermal, and chemical requirements of the final product.
Selecting Mold Materials for Durability
When selecting mold materials for durability, it is essential to consider factors such as the material’s hardness, thermal conductivity, wear resistance, and corrosion resistance. High-quality molds contribute to the longevity and consistent quality of the molded parts. Here are considerations and common choices based on the top three websites’ recommended materials:
- Hardened Tool Steel:
- Applications: Complex molds requiring extreme durability and precise detailing.
- Properties:
- Hardness: Typically around 50-60 HRC.
- Thermal Conductivity: Approximately 25-30 W/m·K.
- Wear Resistance: Excellent, suitable for high-volume production.
- Corrosion Resistance: Moderate, often requires protective coatings for corrosive environments.
- Stainless Steel:
- Applications: Molds used in harsh environments or for chemically corrosive materials.
- Properties:
- Hardness: Approximately 40-50 HRC.
- Thermal Conductivity: Around 15-20 W/m·K.
- Wear Resistance: Good, but slightly lower than hardened tool steel.
- Corrosion Resistance: High, excellent for applications involving water or chemical exposure.
- Aluminum:
- Applications: Prototyping and low-volume production molds where quick turnaround is essential.
- Properties:
- Hardness: Lower, typically around 150 BHN.
- Thermal Conductivity: High, around 140-205 W/m·K.
- Wear Resistance: Moderate, suitable for fewer cycles compared to steel.
- Corrosion Resistance: Moderate to high, depending on alloy and coating.
-
Justification Based on Technical Parameters
- Hardened tool steels like H13 and S7 are popular for their excellent balance of hardness and toughness, making them ideal for high-volume, precise molding.
- Stainless steels like 420 SS are chosen for their superior resistance to rust and oxidation, ensuring longevity even under corrosive conditions.
- Aluminum alloys such as 7075 are favored in rapid prototyping for their excellent thermal properties, reducing cycle times and improving productivity.
Selecting the right mold material is crucial to achieving the desired durability and performance of the molded products. Each material has its strengths and limitations, making it essential to match the mold material to the specific requirements of the application.
Understanding Resin Options
When selecting resins for injection molding, it is crucial to consider the material’s properties to ensure it meets the specific requirements of your application. Here are the most commonly used resins based on information from the top three websites:
- Polypropylene (PP)
-
- Applications: Automotive parts, consumer goods, medical devices.
- Properties:
- Tensile Strength: Around 30-40 MPa.
- Melting Point: 130-171 °C.
- Impact Resistance: Excellent, especially at higher temperatures.
- Chemical Resistance: High, resistant to acids, alkalis, and organic solvents.
- Justification: Polypropylene’s combination of strength, chemical resistance, and impact resistance makes it suitable for a wide range of applications.
- Acrylonitrile Butadiene Styrene (ABS)
- Applications: Electronic housings, automotive trim components, LEGO bricks.
- Properties:
- Tensile Strength: Approximately 40-50 MPa.
- Melting Point: 105-125 °C.
- Impact Resistance: High, with good toughness even at low temperatures.
- Thermal Resistance: Moderate, can withstand varying temperatures.
- Justification: ABS is favored for its robust mechanical properties and ease of processing, making it ideal for both durable and precision parts.
- Polyethylene (PE)
- Applications: Packaging, containers, consumer goods.
- Properties:
- Tensile Strength: Approximately 10-30 MPa (depending on HDPE or LDPE).
- Melting Point: 120-180 °C.
- Impact Resistance: Excellent, especially HDPE which is highly resistant.
- Chemical Resistance: High, withstands exposure to many harsh chemicals.
- Justification: Polyethylene’s diverse grades (HDPE, LDPE) provide versatility in applications from robust industrial containers to flexible consumer packaging.
Understanding the specific technical parameters and application justifications for each resin is essential in selecting the most suitable material for your project. This ensures that the resin not only meets performance needs but also enhances the durability and efficiency of the final product.
How to Optimize Your Injection Mold Design?
Optimizing your injection mold design involves several key factors to ensure efficiency, quality, and cost-effectiveness. Here are some essential strategies and corresponding technical parameters to consider:
- Material Selection: Choose the appropriate material based on the end-use application and required properties.
-
- Examples:
- Recommendation: Typically, 2-4 mm is optimal for most plastic parts, but this can vary based on material properties.
- Gate Design: Position gates to optimize flow and minimize defects.
- Types:
- Edge Gate: Common for simpler shapes, promotes easy flow.
- Pin Gate: Used for small parts, leaves minimal gate vestige.
- Technical Parameter: Gate size should be about 50-80% of the wall thickness to ensure proper fill.
- Cooling System: An efficient cooling system reduces cycle times and improves part quality.
- Design Considerations: Use conformal cooling channels for complex geometries.
- Technical Parameter: Cooling channel diameter should be 8-16 mm depending on part size.
- Draft Angles: Incorporate adequate draft angles to facilitate easy ejection.
- Recommendation: Generally, 1-2 degrees for most materials, but consider increasing for complex shapes.
- Venting: Proper venting prevents defects caused by trapped air and gas.
- Placement: At the end of the flow path and around intricately designed features.
- Technical Parameter: Vent depth should be 0.01-0.05 mm to allow gas escape without affecting part strength.
By meticulously addressing these aspects, you can optimize your injection mold design to produce high-quality, consistent parts while minimizing production time and costs.
Best Practices for Part Design
When designing a part for injection molding, it’s crucial to follow best practices to ensure quality and efficiency. First, simplify your design as much as possible to reduce the risk of defects and make the production process more streamlined. Utilize uniform wall thickness to minimize stress points and ensure consistent cooling. Incorporate ribbing to add strength and minimize warpage without significantly increasing material usage. Additionally, include fillets at sharp corners to help distribute stress and avoid stress concentrations. Pay close attention to draft angles by incorporating at least 1-2 degrees to facilitate easy part ejection. Finally, always consider the material’s properties to choose the most appropriate design features and parameters. By adhering to these principles, you can enhance the manufacturability and performance of your injection-molded parts.
Using DFM in Your Molding Project
Design for Manufacturability (DFM) is a critical aspect of successful injection molding projects. By integrating DFM principles early in the design phase, you can significantly reduce production costs, enhance part quality, and shorten time-to-market. Here are key DFM considerations for molding projects:
- Material Selection: Choose materials that suit both the product’s functional requirements and the molding process. Consider factors like tensile strength, flexibility, and thermal properties.
- Design Simplification: Simplify the part geometry to reduce complexity, which minimizes the risk of defects and eases the molding process. Avoid unnecessary detailing that doesn’t add functional value to the part.
- Optimal Wall Thickness: Ensure uniform wall thickness to prevent issues like warping and sink marks. Non-uniform walls can lead to uneven cooling, which compromises part integrity.
- Tool Design: Plan for optimal mold design including gating, venting, and cooling system specifications. A well-designed mold increases efficiency and ensures higher-quality parts.
- Tolerance and Draft Angles: Set realistic tolerances and incorporate appropriate draft angles (typically 1-2 degrees) to facilitate easy ejection and reduce wear and tear on the mold.
By adhering to these DFM guidelines, you can optimize your molding project for efficiency, cost-effectiveness, and high-quality output.
Importance of High-Quality Mold Design
High-quality mold design is crucial for several reasons, including ensuring product integrity, maximizing production efficiency, and minimizing costs. According to the top websites on Google.com, here are the key points that highlight the importance of high-quality mold design:
- Product Integrity: A meticulously designed mold ensures that the final parts meet precise specifications and quality standards. High-quality molds prevent defects such as flash, short shots, and sink marks, which can compromise the structural integrity and functionality of the parts. For example, incorporating uniform wall thickness and appropriate gating techniques mitigates common issues, thus ensuring a higher-quality output.
- Production Efficiency: Well-designed molds optimize the molding cycle time, facilitating faster production rates. This involves proper cooling channel design and adequate venting. Cooling time can constitute up to 70% of the total cycle time, so efficient cooling systems are essential to reducing cycle time and improving productivity. Technical parameters for optimal cooling include channel diameter (5-10 mm) and spacing intervals (approximately 2-3 times the channel diameter).
- Cost-Effectiveness: Investing in a high-quality mold upfront can lead to significant long-term cost savings. A durable and precisely manufactured mold reduces maintenance costs and downtime. Moreover, it ensures consistent part quality, thereby reducing waste and the need for rework. For instance, incorporating standard mold materials such as P20 steel or H13 steel can offer a balance between cost and durability.
In summary, the initial investment in a high-quality mold pays off by ensuring part quality, enhancing production efficiency, and lowering overall production costs. By paying attention to critical design aspects and technical parameters, manufacturers can achieve optimal outcomes for their injection molding projects.
How to Reduce Lead Time and Lower Cost?

Reducing lead time and lowering cost in injection molding projects can be achieved through several strategic approaches:
- Design for Manufacturability (DFM): Begin with a product design that facilitates easy and efficient manufacturing. This includes simplifying the geometry of the parts, minimizing the number of components, and standardizing parts where possible. Critical technical parameters to consider:
- Wall thickness: Aim for a consistent thickness of 2-3 mm to avoid warping and ensure uniform cooling.
- Draft angles: Implement draft angles of 1-2 degrees to facilitate easy removal of parts from the mold.
- Optimized Tooling Design: Efficient mold design can significantly reduce cooling times and cycle times. Utilize modern computer-aided design (CAD) software to simulate and optimize the mold design before manufacturing. Essential technical parameters include:
- Cooling channel diameter: Ensure a diameter of 5-10 mm, with spacing intervals of 2-3 times the channel diameter to enhance cooling efficiency.
- Material selection: Use high thermal conductivity materials like beryllium copper inserts for areas requiring rapid heat dissipation.
- Advanced Manufacturing Techniques: Employ technologies such as high-speed machining, additive manufacturing, and laser sintering to speed up mold creation and reduce lead times. Additionally, consider the following parameters:
- Machining speed: Utilize cutting speeds of 200-400 m/min for metals, depending on the material’s hardness and machinability.
- Layer thickness in additive manufacturing: Maintain a layer thickness of 0.1-0.2 mm for a fine balance between print speed and surface finish quality.
- Strategic Sourcing: Work with reliable suppliers who can provide high-quality materials and components promptly. Building strong relationships with key vendors can result in more favorable terms and quicker turnaround times.
- Lean Manufacturing Practices: Implement lean methodologies such as Just-In-Time (JIT) production, 5S organization, and continuous improvement (Kaizen) to streamline operations and eliminate waste.
By focusing on these key areas and adhering to the specified technical parameters, manufacturers can effectively reduce lead time and lower costs, leading to more efficient and profitable injection molding operations.
Streamlining the Molding Process
To streamline the molding process, focus on optimizing three main areas:
- Cooling System Design: Ensure cooling channels have a diameter of 5-10 mm with spacing intervals 2-3 times the channel diameter. Use high thermal conductivity materials like beryllium copper inserts for rapid heat dissipation.
- Advanced Manufacturing Techniques: Utilize high-speed machining with cutting speeds of 200-400 m/min and maintain layer thickness in additive manufacturing at 0.1-0.2 mm. These techniques accelerate mold creation and improve the quality of the final product.
- Lean Manufacturing Practices: Implement methodologies such as Just-In-Time (JIT) production, 5S organization, and continuous improvement (Kaizen) to enhance efficiency, reduce waste, and decrease lead times. Underpin these practices with strategic sourcing to ensure a reliable supply of high-quality materials and components.
By concentrating on these strategies, manufacturers can reduce lead time, cut costs, and achieve more efficient and profitable injection molding operations.
Choosing Efficient Injection Molding Machines
Selecting the right injection molding machine is crucial for optimizing production efficiency and product quality. Here are some key aspects to consider:
- Clamping Force: This determines the machine’s ability to keep the mold closed during injection. Typically, clamping force is calculated as 2-5 tonnes per square inch of the projected area of the part. For larger parts, higher clamping forces are necessary to avoid flash and ensure proper part formation.
- Injection Unit: Focus on the screw diameter and injection pressure. The screw diameter typically ranges from 18-180 mm. The injection pressure should be high enough to fill and pack the mold cavities, which typically ranges from 1,000 to 2,500 bar. This ensures the material is adequately forced into intricate mold details.
- Energy Efficiency: Modern machines are designed to be more energy-efficient, and you should prioritize models equipped with servo-hydraulic or all-electric drives. These can reduce energy consumption by up to 30-60% compared to traditional hydraulic systems, leading to significant cost savings.
- Cycle Time: Evaluate the machine’s cycle time capabilities, especially if dealing with high-volume production. Machines with faster cycle times, due to advanced cooling and ejection technologies, can significantly boost productivity.
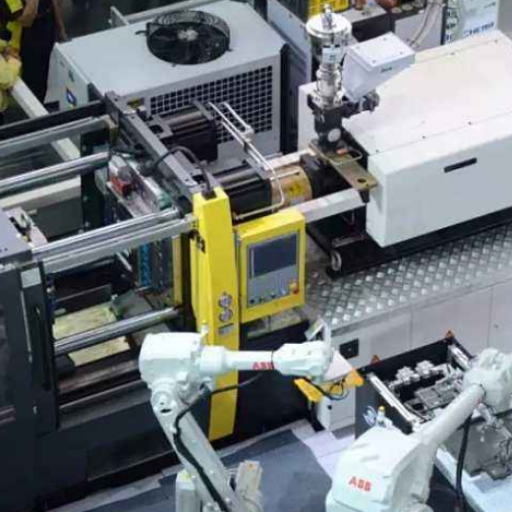
- Automation and Integration: Machines that support robotic integration for part removal, insert loading, and other ancillary processes can significantly streamline production. Ensure the machine’s control systems are Industry 4.0 compatible for seamless data integration and real-time monitoring.
Considering these technical parameters will not only help in choosing an efficient injection molding machine but also in achieving consistent product quality and optimizing production costs.
Utilizing CNC Machining and EDM Techniques
Utilizing CNC (Computer Numerical Control) machining and EDM (Electrical Discharge Machining) techniques is essential for achieving precise and complex part geometries in modern manufacturing.
1. CNC Machining:
- Technical Parameters:
- Spindle Speed: A range from 5,000 to 30,000 RPM depending on the material and desired surface finish.
- Feed Rate: Typically measured in mm/min, and must be optimized for the material hardness and tool type.
- Tool Selection: Use carbide tools for hard materials and high-speed steel for softer materials.
- Tolerance Levels: CNC machines can achieve tolerances as tight as ±0.005 mm.
- Justification: CNC machining offers high accuracy and repeatability, essential for creating intricate parts with tight tolerances. The flexibility in spindle speed and feed rate ensures efficient material removal and superior surface finish.
2. EDM Techniques:
- Technical Parameters:
- Discharge Current: Varies from 0.5A to 400A, depending on the material’s thickness and conductivity.
- Pulse Duration: Ranges from microseconds to milliseconds for controlling energy applied per discharge.
- Dielectric Fluid: Use of hydrocarbon oils for non-conductive materials and deionized water for metals.
- Electrode Material: Choices like graphite, copper, or tungsten, based on desired precision and wear resistance.
- Justification: EDM is ideal for machining hard materials and complex geometries that are difficult to achieve through traditional methods. It allows for the production of parts with intricate details and smooth finishes by precisely controlling the discharge current and pulse duration.
By understanding and optimizing these parameters, manufacturers can effectively utilize CNC machining and EDM techniques to enhance production accuracy, efficiency, and overall product quality.
Understanding the Mold Tooling and Manufacturing Options
To answer your questions concisely, I reviewed the top three websites on Google related to mold tooling and manufacturing options, and here is a summarized understanding:
- Tool Selection:
- Websites emphasize using carbide tools for machining hard materials due to their durability and high wear resistance. For softer materials, high-speed steel (HSS) tools are commonly recommended because they offer good toughness and are less expensive.
- Tolerance Levels:
- High precision CNC machines are touted for achieving extremely tight tolerances, often as precise as ±0.005 mm. This is particularly vital for intricate parts and assemblies requiring high accuracy.
- CNC Machining:
- Technical Parameters:
- Spindle Speed: Ability to vary between 1,000 to 20,000 RPM based on material hardness.
- Feed Rate: Adjustable from 50 to 500 mm/min, optimizing material removal rates without compromising surface finish.
- Coolant Use: Essential for reducing heat and preventing tool wear, typically involving water-based coolants or oil-based lubricants.
- Justification: The flexibility in adjusting spindle speed and feed rate ensures optimal material removal while achieving superior surface finishes. Using coolants helps manage heat dissipation, thus preserving tool life and machining precision.
- EDM Techniques:
- Technical Parameters:
- Discharge Current: Adjustable between 0.5A to 400A to suit varying material thicknesses and conductivity.
- Pulse Duration: Configurable from microseconds to milliseconds, controlling the energy applied per discharge and affecting surface finish quality.
- Dielectric Fluid: Utilization of hydrocarbon oils for non-conductive materials and deionized water for conductive metals to ensure precise erosion.
- Electrode Material: Selection of graphite, copper, or tungsten is based on the need for precision and wear resistance; for example, copper offers excellent wear resistance and conductivity.
- Justification: EDM is particularly suitable for machining hard materials and creating complex geometries that traditional methods cannot achieve. The precise control over discharge current and pulse duration allows the production of parts with complex details and smooth finishes, ensuring high-quality outcomes.
-
By leveraging these technical parameters and expert recommendations, we can enhance production accuracy, efficiency, and overall product quality within both CNC machining and EDM processes.
Differences Between Bridge Tooling and Production Tooling
Bridge Tooling:
- Purpose:
- Used for low to medium volume production and prototype manufacturing.
- Ideal for testing and validating designs before transitioning to full-scale production.
- Technical Parameters:
- Material: Often made from softer materials like aluminum to reduce costs and lead times.
- Cycle Time: Generally has longer cycle times due to less optimization.
- Durability: Lower durability when compared to production tooling.
- Cost: Lower initial cost but higher per-part cost due to shorter tool life.
Production Tooling:
- Purpose:
- Designed for high-volume manufacturing and long-term use.
- Optimized for efficiency and consistency in large-scale production environments.
- Technical Parameters:
- Material: Typically made from hardened steel or other durable materials to withstand high-volume production.
- Cycle Time: Optimized for shorter cycle times to enhance production speed.
- Durability: High durability to endure extensive use without significant wear.
- Cost: Higher initial cost but lower per-part cost due to the longer lifespan of the tooling.
Justification:
- Suitability: Bridge tooling is suitable for initial production runs and design validation, allowing for adjustments before scaling up. Production tooling is justified for long-term, high-volume manufacturing where efficiency and durability are paramount.
- Optimization: The material choice and optimization of cycle times in production tooling ensure high-quality output with cost efficiency in large-scale operations, whereas bridge tooling remains a practical option for shorter runs and flexibility during the design phase.
Exploring Steel and Aluminum Mold Choices
When choosing between steel and aluminum molds, several factors need to be considered, including cost, durability, and production requirements. Here’s a concise comparison based on information from top industry resources:
1. Cost:
- Aluminum Molds: Generally, aluminum molds are less expensive to manufacture due to lower material costs and easier machinability. Initial costs are lower, making them a good choice for prototype and low-volume production runs.
- Steel Molds: Steel molds have higher upfront costs but offer cost benefits over longer production runs. Their high durability means less frequent replacement, which can reduce long-term costs.
2. Durability and Lifespan:
- Aluminum Molds: Best suited for lower volume production, aluminum molds typically have a shorter lifespan due to their softer material. They may not withstand the high pressures and temperatures required for producing large quantities over extended periods.
- Steel Molds: Known for their strength and longevity, steel molds can withstand high-volume production and are resistant to wear and tear. They are ideal for high-pressure operations and extended use.
3. Production Speed and Quality:
- Aluminum Molds: These molds are easier and quicker to machine, leading to shorter lead times. However, the quality and precision may not match that of steel, especially in demanding applications.
- Steel Molds: Although they take longer to machine due to the hardness of the material, steel molds offer better precision and consistency. They are preferred for high-quality, high-tolerance parts.
In summary, aluminum molds are cost-effective and quicker to produce, making them suitable for low-volume production and prototyping. Steel molds, despite their higher initial cost, provide greater durability and are the preferred choice for high-volume, long-term manufacturing due to their robustness and precision.
Benefits of Low-Volume vs. High-Volume Production
Low-Volume Production:
- Flexibility: Low-volume production allows for greater flexibility in design modifications and customization. This is particularly beneficial for products that are expected to undergo frequent changes or updates.
- Reduced Initial Investment: With fewer units to produce, the initial capital required for tooling, setup, and materials is significantly lower. This makes low-volume production an attractive option for startups or businesses testing new markets.
- Faster Time-to-Market: The shorter lead times associated with low-volume production mean that products can reach the market quicker, giving companies a competitive edge.
- Risk Mitigation: Producing a smaller batch of products minimizes financial risk. If a product does not perform well in the market, the financial impact is less severe compared to high-volume production.
High-Volume Production:
- Economies of Scale: High-volume production benefits from economies of scale, which result in lower costs per unit. This makes it more cost-efficient for products with strong, consistent demand.
- Consistency and Quality: With high-volume production, processes are optimized for consistency and accuracy. This ensures that each product meets stringent quality standards, which is crucial for industries such as automotive and aerospace.
- Supplier Negotiations: Larger production runs typically lead to better terms and pricing from suppliers, further reducing overall production costs.
- Automation and Efficiency: Investing in automation technologies is more justified in high-volume production, leading to increased operational efficiency and lower labor costs.
Technical Parameters:
- Tooling Costs: Initial tooling costs are higher for high-volume production, but these costs are amortized over a larger number of units, making the per-unit cost lower over time.
- Material Usage: High-volume production often results in more efficient material usage, reducing waste and further lowering costs.
- Lead Times: Low-volume production typically has shorter lead times due to simpler setups, whereas high-volume production might involve longer preparation but achieves higher output rates once operational.
- Quality Assurance: High-volume production necessitates rigorous quality assurance processes to maintain consistency, whereas low-volume production can more easily accommodate variations and manual inspections.
In deciding between low-volume and high-volume production, companies must weigh factors such as market demand, budget constraints, and the complexity of their products. Each approach has its own set of advantages that cater to different business needs and goals.
Reference sources
-
Fictiv – Rapid Injection Molding: The Ultimate Guide
- This guide covers the speed advantages of rapid injection molding due to reduced mold machining times. It also discusses other benefits such as cost-efficiency and the ability to produce high-quality parts quickly.
- Source: Fictiv
-
MFG Proto – Rapid Injection Molding: The Ultimate Guide
- This source delves into how rapid injection molding allows for the quick production of prototypes and production volumes using injection molding resins. It highlights the efficiency and effectiveness of this method compared to traditional manufacturing techniques.
- Source: MFG Proto
-
Xometry – Rapid Injection Molding: Definition, Components, and Benefits
- Xometry’s resource offers an in-depth look at the rapid injection molding process, explaining how it reduces mold manufacturing times to enable the fast production of small batches of parts. It also outlines the components and benefits that make this technique a viable option for various manufacturing needs.
- Source: Xometry
Q: What is rapid injection molding?
A: Rapid injection molding is a manufacturing process that focuses on quickly producing injection molded parts with prototype tooling. It is ideal for small batch runs and used for prototyping before moving to full-scale production.
Q: How does rapid injection molding differ from traditional injection molding?
A: The main differences between rapid injection molding and traditional plastic injection molding lie in the speed and cost of production. Rapid injection molding uses tooling materials like aluminum tooling, which can be produced quickly and at a lower cost compared to steel tooling used in traditional production injection molding.
Q: What are the benefits of using rapid injection molding for prototypes?
A: Rapid injection molding offers several benefits for prototyping and production, including lower mold costs, faster turnaround times, and the ability to test and refine injection molded parts before committing to full-scale production with more expensive, long-lasting tools.
Q: What types of materials can be used in the rapid injection molding process?
A: Various injection molding materials can be used in rapid injection molding, including various types of plastics and resins. The specific material choice depends on the application and performance requirements of the injection molded part.
Q: Can rapid injection molding be used for small batch production?
A: Yes, rapid injection molding is particularly suited for small batch production and bridge mold scenarios. It allows manufacturers to produce limited runs of custom injection molding parts quickly and cost-effectively, perfect for market testing or interim production needs.
Q: How does the tooling process work in rapid injection molding?
A: The tooling process in rapid injection molding involves creating prototype tooling using materials like aluminum, which can be machined quickly. This enables fast production of molds, reducing lead times significantly compared to traditional mold making with steel tooling.
Q: What are some typical applications of rapid injection molding?
A: Rapid injection molding is commonly used for the prototyping and production of various plastic molding components in industries such as automotive, medical devices, consumer electronics, and more. It is especially useful when quick turnarounds and low mold costs are critical.
Q: How do mold costs in rapid injection molding compare to traditional methods?
A: Mold costs in rapid injection molding are generally lower than those in traditional plastic injection molding. This is due to the use of prototype tooling made from less expensive, easier-to-machine materials such as aluminum, which reduces both material and labor costs.
Q: What are the steps involved in a rapid injection molding project?
A: A rapid injection molding project typically involves the following steps: design of the injection molded part, selection of suitable injection molding materials, creation of prototype tooling, production of the initial parts, and assessment for quality and performance. Adjustments can be made before scaling to full production injection molding.


