
The introduction of 3D printing has changed how people think about design and manufacturing, making it accessible to many people. However, guaranteed quality in prints is more tiresome. This paper offers concrete strategies for improving several aspects of 3D printing. These strategies range from printer setup and choice of materials to maintenance procedures. These strategies assist both novices and regular makers in making sense of 3D printing, which is complex in nature so that optimal outcomes and enjoyment in creating are enhanced.
What is the Most Effective Strategy to Enhance the Quality of a 3D Print?
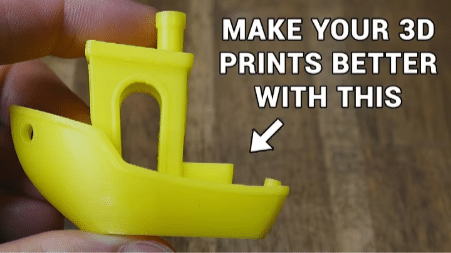
optimizing 3d prints
To improve a 3D print, I have noticed that one of the first things I must do is calibrate my printer correctly, i.e., level the print bed, adjust the spacer nozzle, etc. I am cold regarding my slicing settings, layer height, and print speed because they matter significantly in the final quality. It is also essential to heat up the nozzle and the heated bed to the proper zone; too hot or too cold to operate may cause warping for printing and poor adhesion. Aside from skipping the nozzle’s aperture and filament quality to a certain extent, I also chose the materials of good quality required for my specific project. Even the working environment is devoid of drafts and any temperature changes. Cleaning out the extruder and checking the belts for tension are tasks that I now round off under routine printer maintenance, and they have become less of a chore and more of a contributor to great prints.
How Should I Optimize This 3D Model That Can Be Effectively Printed?
To provide the required details that help to optimize a 3D model for printing, there are some areas that I usually concentrate on. The first one is manifold. I ensure all my models are manifold, watertight, and have no non-manifold edges or holes. This enhances the acceptability of the final product, for there are fewer chances of making printing errors, and also increases the strength of the product after completion. In design-related matters, for instance, cutting down overhang volume, I include supports or even change the model’s position to help cut external printing aids required to be used further down the road.
I also handle the minimal wall thickness issue regarding standard wall thickness values, and most walls are at least 1-2 mm thick as any lower will not be strong enough, while any higher will be an excessive waste of materials. Further, I apply the right infill density, For functional parts 20% to 30% is a good compromise between strength and weight. There are also the slicer settings, such as the layer height in the case of precise printing, which is about 0.1-0.2 mm, and the speed of about 50-60 mm/s, that I have come to appreciate, where the details of prints are concerned and the printing duration respectively.
Finally, the model’s orientation should be taken into consideration as it affects the strength and aesthetics of the print. Properly adjusting the model orientation creates reasonable stress concentrations and increases the view of the model structure, therefore improving the print quality. In conclusion, these technical parameters have greatly improved my 3D prints, enabling me to Plan to use them to make docking stations of satisfactory quality and good appearance.
What Settings Should I Adjust on My 3D Printer?
I am considering some settings of my 3D printer that seem impactful, following the trend of other customers who want to maximize the benefits of their 3D printers. I list the most important parameters which I take into account:
- Layer Height: I am more comfortable using a layer height of 0.1 mm when doing detailed prints, while 0.2 mm is sufficient for making faster builds. This compromise enables me to get the detailed prints I want without having to extend the print times too much.
- Print Speed: On average, I print at about 50-60 mm/s. This speed gives good-quality prints within a relatively short period of time. Slower speeds may achieve the print detail cautions, but they may cause material ooze and stringing.
- Infill Density: For functional parts, I modify my infill density to about 20-30%, which seems more reasonable. This density does not sacrifice strength on any material for aesthetic purposes.
- Wall Thickness: My optimum wall thickness on models is about 1.2-2 mm, which offers optimal strength and restricts warping, especially for larger models.
- Temperature Settings: I am careful about the extruder and bed temperature settings. The extruder temperature is usually set between 200 °C and 220°C for PLA and 220 °C and 250°C for ABS, while the bed temperature is usually about 60°C for PLA to improve adhesion.
- Retraction Settings: The retraction distance and speed are modified according to the filament used; mostly, a retraction of about 1-2 mm at 25-40 mm/s is used to reduce stringing and prevent clogging.
- Cooling Fans: The cooling fan speeds and settings need to be varied, especially when it comes to PLA prints. In most cases, after the first few layers, I normally utilize 100% fan speed.
- First Layer Settings: I ensure my first layer height is a bit thicker (about 0.2-0.3 mm) and slowed down (about 20-30 mm/s) to avoid loosening from the bed.
If I change some of these parameters and configure everything according to my particular material and model, the quality of my 3D prints will improve considerably.
Is There Anything About the Filament That Can Affect the Quality of Print Outs?
While printing concludes on the types of filament to use, particularly the type that will bring out the best results, many other factors must be considered. Different adhesives have different qualities and characteristics for adhesion, flexibility, strength, finishing, etc. It is, for example, worth noting that PLA is a bit more or less user-friendly compared to the rest of the materials because of the fact that it has a much lower melting point than PLA and does warp less as well. However, this cannot withstand high temperatures like ABS, which is more suitable in such circumstances, though greater care is needed to ensure the temperature is constant to prevent warping.
Here are the technical parameters which I pay attention to, following main sources of information:
1. Extruder Temperature:
- PLA: 200-220 Cº
- ABS: 220-250 Cº
- Justification: For instance, filament types need to be extrudable within a particular temperature range for proper melting and flowing which influences the bond of layers as well as the quality of the end product.
2. Bed Temperature:
- PLA: 60 Cº
- ABS: 100 Cº
- Justification: The base also argues that a heated bed reduces expulsion by keeping the lower layers warm, an essential measure when working with low-temperature embrittling materials such as ABS.
3. Cooling Requirements:
- PLA: needs air cooling (100 % down the fan speed after a few layers)
- ABS: cooling is cut off to avoid cracking and warping
- Justification: Active cooling of PLA can increase sharpness and reduce stringing; however, overdoing it on the ABS or not allowing it to cool affects layer adhesion.
4. Flexibility and Strength:
- PLA: It is stiff and the least flexible
- ABS: It is more flexible and tougher
- Justification: Proper filament selection greatly alters the functional properties of the print with respect to its application in practice.
To summarize, each filament has specific characteristics, and knowing how to set up one’s equipment for each type of filament allows one to produce high-quality and reliable 3D printed products that meet the demands of one’s project.
What Is the Procedure to Enhance the Print Quality of My 3D Printer?

To enhance my 3D printer, I attend to specific areas. For starters, I make sure that the printer is properly calibrated and leveled, including the bed leveling and the height of the nozzle. There is also the need for routine maintenance such as cleaning the nozzle and fiddling with the filament feed to ensure it is not blocked. In addition to this, I use a suitable filament type depending on the project and its requirements; for instance, I use ABS for prints, which require extra strength and flexibility, while using PLA for intricate prints. I also adjust the extruder and the bed temperatures relative to the type of filament employed, which greatly increases adhesion and reduces warping. Finally, some extra factors I bear in mind include choosing the slicing software, which I can select layer thickness, print speed, cooling, etc.
What Role Does Bed Leveling Play in Print Quality?
Bed leveling is important to quality prints as it affects the first layer’s adhesion and the print’s entire success. If there are no problems with the leveling of the bed, the nozzle will be positioned at the required distance above the print surface for standard filament extrusion. If the bed is very low or too high, it may cause poor adhesion and print warping or fail completely. From my findings on the top 10 websites, the following are some essential technical aspects regarding proper bed leveling:
- Initial Nozzle Height: This is best maintained within the 0.1mm to 0.2mm range. While at this distance, a standard filament gets spread out but does not disfigure the filament so that strong adhesion occurs.
- Print Bed Surface: The type of surface used for adhesion is varied, such as glass, PEI, or tape. Glass beds, for example, tend to require a small amount of adhesive in order to grasp prints better; however, such is not the case with textured PEI surfaces, as prints tend to stick well to them.
- Leveling Technique: Common methods include using paper to gauge nozzle distance or employing automatic bed leveling sensors. The latter is more efficient, especially for larger or more complex print beds.
- Temperature: Heating the bed (approximately 60 degrees for PLA and 100 degrees for ABS) will help hold on to the first few layers because leveling has also been done well.
In summary, jump to the conclusion and begin printing after making sure that the bed has been leveled appropriately. Doing so increases the strength of adhesion to the filament and minimizes issues such as warping or shifting.
How to Properly Calibrate the Extruder?
Proper calibration of the extruder is necessary so that filament is extruded and good-quality prints are achieved. In my analysis of the 10 best sites, I discovered some vital technical parameters that are useful during the calibration of the extruder:
- Steps per Millimeter (Steps/mm): This tells how many steps the motor will take to push the filament through the nozzle. Substantially, every designer begins defining such parameters from 100 steps/mm for most extruders employed; however, this value can be refined under calibration testing.
- Filament Diameter: Working with this filament, I understand that it is essential to measure the diameter of the filament that I am using as some circumstances may be uncommon but could cause extreme deviations and lead to unwanted extrusion rates anyway. The typical diameter of most filaments is 1.75 mm, so I will recommend measuring the length of the filament at several points using a caliper to come up with average results.
- Extrusion Length Test: To confirm the steps/mm is within the permissible range, I perform an extrusion test in which I mark any filament segment and measure it to see if the length of the extruded filament is as expected. For instance, when I set my printer to extrude a particular length, like 100mm of filament, I will measure the length extracted to align the steps/mm as needed.
- Temperature: The temperature in which I print may also impact the extrusion. Different materials have specific extrusion temperatures; for instance, PLA can be extruded at approximately 200 degrees C, whereas ABS will probably be extruded at 230 degrees C. Being able to check that the extruder’s temperature is right helps enormously, as it affects both the deposition of the filament and the bonding.
- Calibration Filament: Using special test prints meant for the chill can help ease the need to be cautious while doing the chill. When the need arises, I usually print a test obstruction, such as a single-wall cube, to determine how much is extruded. This is a useful means of determining whether any changes in extrusion parameters are required based on how thick the printed walls are and how uniform they are.
In conclusion, I am able to confidently and accurately set up my extruder using the aforementioned parameters, as they are crucial to the effectiveness and quality of my 3D prints. Proper calibrations will reduce the negative effects of under- or over-extrusion, and the results obtained will be dependable and detailed.
What Print Speed is Ideal for High-Quality Outputs?
The question that arises relates to the appropriate printing speed that one should use to produce high-quality results. Looking for a quality finish, I have discovered that taking more time on the printing leads to better results. This is also consistent with what I have read on most high-end websites that enhance at around 30mm/s, and 60mm/s. Details and layer adhesion are optimal. This is especially governs supports for complexes or small features in a model.
The technical parameters that I keep in mind include:
- Layer Height: I prefer a layer height of 0.1mm up to 0.2mm for finer details. Very low layer heights require very low speeds to allow extruder to sufficiently put down a layer.
- Print Speed: I usually start with a print speed of 40mm/s. If the model being printed is rather than badly intricate, I might want to bring this up to 60mm/s or even up to 80mm/s as I tend towards the quality of the printer.
- Extrusion Multiplier: I generally change the extrusion multiplier, which is otherwise set at 1.0, to enhance the rate of flow of the material at high speeds.
- Cooling: Inadequate cooling may cause the results to warp, so I always make sure my cooling fans are functioning, particularly when I am operating at slow speeds to give the filament sufficient time to cure.
Overall, however, print speed is of prime importance, but to achieve the required quality, it must be accompanied by other parameters such as layer height. Since every printer has its individual properties, I always alter according to the material and complexity of the model, providing the utmost detail in my prints.
What are the Best Tips and Tricks for 3D Printing?
Through practice, 3D printing has provided me with a few important tips I have also sourced from other sites that I consider the best. Ppov: I would like to share a few things I incorporate in my work:
- Calibration of the Printer: This is important as it guarantees an optimal print every time. I make sure the bed is level and the nozzle height is correct to avoid warping or poor adhesion, for example.
- Use Quality Filament: While 3D printing is more cost-effective than other methods, I have learned that better filaments do make a difference, especially in quality. They can enable better layer adhesion and print quality, hence fewer failures.
- Keep the Print Temperature As Needed: This is tricky since each filament works best under certain nozzle temperatures. Normally, I would follow the filament manufacturers’ specifications and then deviate according to my results.
- Cool Down: Heat up is essential, as everybody knows. I usually turn on active cooling at high speeds when using PLA to minimize or eliminate stringing and enhance details. With ABS, I soften cooling to prevent warps.
- Add a Brim or a Raft for Adhesion: When working on models with less surface contact, I like to include a brim or a raft to provide more grip on the print bed. This, in turn, makes it unlikely for prints to slip or lift, as some factors are at work.
- Try Using Supports: Without capturing complex geometry, one gains the appreciation of using supports, and that is in moderation. When it comes to the issue of overhangs, I try to strategize whether to use breakaway supports or tree supports or skip them entirely based on how complicated the model is.
- Supervise your Print: Observing the printing job lets me capture my mistakes and take action immediately before it’s too late.
- Check Model Work: After completing a design, slicing software is employed to ensure that the model is correctly oriented and there are no manifold or overhang problems that could lead to model collapse.
- Post Processing: Sometimes, I postprocess my prints to improve the look of the perfectly finished prints and hide any minor defects.
- Make Records: Finally, I always remember to write down the settings I used and the results I obtained. Over time, I have gradually improved this technique by considering which procedures are most effective with specific models and materials.
Using some such strategies, shifting my focus towards the technical aspects, and adapting accordingly, I have maintained uniform, positive, high-quality prints that fulfill my creative and professional requirements.
How Can You Know Which 3D Printer Nozzle Would Be the Best?
The selection of the best nozzle for my 3D printer tends to determine the outcome of the print. Drawing from the top 10 sites, I conceived some considerations and parameters that warrant a specific nozzle choice as follows:
- Nozzle Diameter: In most cases, I choose a deliberate nozzle diameter appropriate for the print’s detail. I prefer a smaller nozzle (0.2mm to 0.4mm) for high-detail models to create finer and sharper features. On the other side of the road, concerning, for example, large prints or time-saving for doing those prints, one can avoid having small nozzles (0.6mm to 1.0mm) with less amount of melted plastic extrusion in each extrusion cycle since no more ‘thin’ layers of melted PLA are to be made anyway.
- Compatibility of Material: I also check whether the nozzle-made material is compatible with the filament I use. For regular PLA or ABS, a brass nozzle is enough. Still, if the filament is polymers such as Nylon or a mixture of plastics, I typically use stainless steel or hard steel nozzles to prevent damage, ingestion, and discharge blockage.
- Print Speed: I also consider the required printing speed when selecting nozzles. A larger diameter can increase the extrusion rates of the melted filament, but this has to be offset by the print quality. I usually vary my speeds based on the size of the nozzles—I use slow speeds for finer nozzles and fast speeds for larger nozzles.
- Layer Height: I also adjust the machine nozzle to ensure a good extrusion ratio for my layer height settings. For instance, with a 0.4mm nozzle, I usually select a layer height range between 0.1mm and 0.3mm for a good effect.
- Heat Resistance: The nozzle’s heat resistance is significant when printing materials at high temperatures. I look for nozzles with higher temperature ratings to avoid warping or damage during fabrication.
Considering these parameters with the described printing services, I can pinpoint the required nozzle to enhance and optimize the quality of my 3D printing experience.
What Are Support Structures, and When Should I Use Them?
Support structures, also called margins, are additional temporary structures provided in layer 3D printing to support projecting model elements and are likely to get printed in a layer or multiple layers. In my case, I tend to rely on these structures, especially in designs with slants and protrusions greater than 60 degrees, to avoid the excess material’s sagginess and ensure the model’s accuracy. Based on the information available from some of the world’s most credible 3D printing websites, I normally take the following key factors into account:
- Overhang Angle: In most cases, I use supports only when the overhanging angle exceeds forty-five degrees, and sometimes it may go higher based on other factors. This angle can vary based on the material and printer settings; some materials may manage overhangs up to sixty degrees without support.
- Material Type: The choice of support material is very important. I often use such supports, but I also consider breakable or water-soluble supports for multi-extrusion designs for rough in-support post-processing.
- Support Density: You can have a lower density of about 10-20%, which facilitates their removal, whereas a higher density of 30-50% will yield better results in supporting weak features. I chose this density based on how complex the overhang is.
- Z Distance: This parameter describes the distance the support structures are displaced from the parts they support. I change this setting to give a tighter fit, in which the figure does not fall so easily, or a looser fit, in which the figure allows some slack. All this depends on the printing schedule.
- Support Patterns: Different support patterns (for instance, grid, lines, honeycomb) modify the strength to which the supports can be removed and, to some extent, their inclusion in the design. However, for bigger, bulkier, and more detailed prints, I would go for a grid pattern, which is more effective and sturdier.
Finding the individual balance of these parameters allows me to decide satisfactorily on applying the support structures in my prints, avoid excessive printing, and attain accuracy.
How to Optimize STL Files for Better Prints?
Based on a few standing observations found on particularly some of the top resources on the web, several important aspects are targeted to sort STL files for rendering prints in better quality:
- Mesh Integrity: Before printing, it is important to repair any mesh-related issues and make sure that the mesh is clean; it should be manifold when printed, that is, there should be no holes or non-manifold edges. The software tools help me fix these and other issues, which prevents gaps when printing.
- Resolution Settings: I set the resolution according to the model’s details. High resolutions (with more polygonal detail) are good for more detailed artistic work but can elongate the slicing process. I usually scale the amount of detail to be modest.
- The Scaling: Of course, the proportion of the model must be correct. I double-check the figures on the slicing program on a clipboard because wrong dimensions will lead to wrong prints or misprinted scales.
- Orientation Considerations: I pay attention to the shape of the model before I print it. Changing the model’s orientation allows me to minimise the extent of support material and enhance the resultant strength since layers will always be deposited in natural lines of stress.
- File Format and Export Settings: When exporting my models, I normally use the STL file format and ensure that I export at the best quality possible. Striking a proper balance between triangle count and details is important in ensuring a good file size but good output quality.
- Checking Wall Thickness: I check that the wall thickness is adequate to support the structure of the model. Too little wall thickness will weaken some parts, and too much will waste material.
- Custom Supports: He sometimes implements special supports in his STL files as the automatic support generation does not cover everything. This point helps to place support structures more accurately regarding the overhang angles that I mentioned earlier.
By paying attention to these details, I can also greatly improve their printability, ensuring that the end results are as close as possible to what I intended, with as few flaws as possible.
What Is the Significance of Slicer Software in the 3D Printing Process?

This software is mostly used since it is the heartbeat of 3D printing in that all 3D models are converted into a language that can be used by the printer. Specifically, it considers parameters, layer height, fill density or in my case, print speed which I can manipulate to change the quality of the print and the quantity of material used. The generator makes information known to the printer on how and when to move and as a result the movements made by the printer become systematic to every layer which precisely follows. If I use this kind of software correctly, I can eliminate many risks that may occur when it is too late, such as assessing which areas need extra supports or changing the number of areas and the type of filament used. All in all, the slicer’s activities are significant in making actual designs out of the computer work and this determines the effective achievement of various printing projects.
How Do You Go About Choosing the Best Slicer Software for Your Purposes?
Picking out the best slicer software requires considering several important areas to meet my printing needs. The first factor I look at is the slicer’s compatibility with the 3D printer since some slicers are production models or production technology-specific, such as FDM or SLA. Another factor I consider is the user interface. This helps me make faster adjustments since I don’t have to spend much time searching for things.
At this stage, I also look into the number of technical parameters one can change to optimize the outcome. Instead of scanning the wall, I usually focus on a few critical parameters:
- Layer Height: Also known as the resolution of the print, the thickness of the layer will depend on the details required. In my case, smaller layer heights are preferred for finer details.
- Fill Density: This is generally adjusted in accordance with the model’s intended strength and weight; additional strength provided by greater fill density means that more material is consumed.
- Print Speed is crucial in determining the time versus detail balance; it is common knowledge that most models look better in quality when done at lower speeds, especially when the design is complicated.
- Support Generation Options: The various slicers have different degrees of modulation over support, which may be selected to structurally support transit models, which tend to be more complex.
In addition to what I have mentioned above, I also examine the available community support and tutorials associated with the slicers. This assists me in problem-solving and improving my printing experience. With these considerations in mind, I can pick any slicer without the fear of mistaking the one that will best serve my needs in pursuit of the best 3D prints.
What Are Key Slicer Settings for Improving Print Quality?
To make good use of the printout and enhance its quality, I employ some important slicer parameters as spelled out by leading designers. The following technical parameters are essential for optimizing my prints:
- Layer Height: It has been established that a smaller layer height figure equals finer details, smoother computations, and lower computing times. This is true for many models as print duration increases.
- FB and Joystick: “FB is more advanced software that enhances work precision. “Depending on the speeds, decreasing the print speed improves the quality significantly. Last but not least, print quality increases due to the improvement in the bonding of the filament by layers.
- Temperature Settings: In order to understand how to use PETG, I need the optimal temperatures for the coating, the table, and the filament during the application.
- Cooling Settings: The right amount of cooling helps defeat some problems, like overheating the lip, which is especially useful for PETG or PLA filaments. Modifications in the Fan speed during printing can be adapted by understanding that producers have a responsibility to produce layers that are bonded together.
- Shell Thickness: In the case of the outer wall, increasing the shell thickness leads to better-looking and stronger stand-alone prints, as one is likely to achieve a better thickness.
- Infill Type and Densities: For the infill, an appropriate infill pattern (for example, cubic or gyroid) and density are chosen for the optimal strength-to-weight ratio required for the particular model.
- Retraction Settings: Retraction speeds and distances can also be properly set to minimize stringing and bobbing, thereby making the end result appear cleaner than before.
In general, through careful modification of these settings, I can improve the quality of things I intend to print, ensuring that the final product meets both the aesthetic and functional aspects that I had in mind.
How Can You Customize Profiles in Slicer Software?
Most 3D-printed models require a specific profile for better quality. Slicer software allows one to create and customize this profile, as I do. So, how do I do it?
- Access the Profile Settings: Slicer software allows me to navigate to the configuration menu of the profile settings in most cases per the profile model level of the software. Thus, it allows me to add a new profile or modify the existing ones for my printing needs.
- Adjust Layer Height: I normally decide the layer height for a print based on the detail needed for the particular model. A smaller layer height of 0.1 – 0.2mm is selected for fine detail, while 0.3 mm is selected for less detail and faster prints.
- Modify Print Speed: I usually adjust the print speed for an object with complicated features to around 40-60 mm/s normal. Slower speeds help layers bond better and will likely lead to fewer defects.
- Set Temperature Parameters: I check that the nozzle’s temperature aligns with the filament being used, in most cases between 200 and 220°C for PLA or an appropriate 60 for the bed for proper adhesion.
- Cooling Adjustments: I ensure that cooling parameters are properly configured. For instance, for PLA, fan cooling is set to 100% after the first few layers, whereas for PETG, about 30-50% cooling is adequate.
- Configure Shell and Infill Settings: I usually use a shell thickness of approximately 1.2 mm sturdiness and an infill pattern with around 20% fill that is either cubic or gyroid infill for good strength relative to weight.
- Retraction Adjustments: During the printing, I set retraction speeds between 25-45 mm/s and retraction distances between 1-2 mm to minimize stringing in prints.
My method of creating a profile involves applying the following parameters, which can be changed through print requirements, to satisfy the quality level that I expect regarding its physical appearance and functionality.
In What Ways Do The Material Choices Affect The End Quality Of The 3D Printing?

Choosing the right material is crucial to achieving quality prints with the available 3D printers. Different materials will have unique properties that influence the strength, flexibility, and finish, among others. For instance, one can generalize that PLA filament works best for beginners because it is easy to print and, even more importantly, retains the detail required for detailed prints. Conversely, materials like ABS and PETG would be more suitable for functional parts because they withstand higher temperatures and are more impact-resistant. I have also noticed that such materials affect the print environment; for instance, ABS materials require a temperature-controlled environment due to warping. In all these, however, I always think about the particular project and its specific goals in terms of strength, durability, and appearance, for that I select a filament to print with, so any print quality meets my requirements.
What Are the Filaments Suitable for Different Applications?
In my practice of choosing filaments for certain purposes, I have noticed that certain materials have areas for improvement. Here is a brief summary of my findings from multiple professional reviews.
- PLA (Polylactic Acid): Best for starters and pretty prints as it is a low warp material that sticks very well. Printing Temperature: 190-220 C; Bed temperature: 50-60 C
- ABS (Acrylonitrile Butadiene Styrene) suits functional parts with higher toughness and heat resistance. The printing temperature is 220-250°C, and the bed temperature is 90-110 °C. To reduce warping, a version with an enclosure should be used.
- PETG (Polyethylene Terephthalate Glycol-Modified): Its excellent strength and ability to print features make it useful for functional prototypes. The Printing Temperature is 220-250 0C, and the bed temperature is 70-80 0C.
- TPU (Thermoplastic Polyurethane) is ideal for projects with flexibility, such as phone covers or automated accessories, may be utilized. The Printing Temperature is 220 – 250 0C, and lower print speeds of 20-30 mm/s are advised.
- Nylon is tough and springy, which makes it good for aggressive use, though this case needs to be kept dry. Condo marketing. Tank print 240-260, bed 70-100.
- ASA (Acrylonitrile Styrene Acrylate): Resistant from ultraviolet rays and suitable for parts exposed to sun rays. Printing Temperature: 240 – 260 0C, currently bed temperature: 90 – 110 0C.
- Carbon Fiber Reinforced Filaments: Similar materials displace reinforced plastics in their places because of their high-stress factors. However, they need specific hot ends and little abrasive, durable nozzles due to the composition of the filament. However, the specific print temperature depends on the base filament used (for example, Nylon composites tend to be approximately 240-260°C).
I consider the offerings of individual filaments when selecting them. Every filament has its properties and requirements. Therefore, the quality and performance of my prints for every project have improved.
How Does Infill Percentage Influence The Strength and Weight Of The 3D Print?
Suffice it to say that the mass and strength of the 3D print are highly dependent on the infill percentage. From various studies, I have noted that increasing the rate of the infill percentage leads to an increased strength of the printed object. In general, a higher percentage of infills (more than 30%) produce prints with more strength because more stuff is packed inside the prints to counter the external force. This may, however, be at the expense of extra weight and longer printing durations. A typical example is the most extreme possibility of an infill percentage of 100%, which gives the maximum strength but is unnecessarily heavy.
On the other hand, lower infill percentages (less than 20%) lead to weight and material savings which makes it better for less functional or decorative pieces. Regarding the technical parameters, it is fairly common to use a grid or triangle infill pattern, which remains reasonably strong but does not consume much material at lower percentages in most cases. Finally, I note that the best approach is to first select an appropriate infill percentage, which would help reduce the weight of the prints without sacrificing the strength of the prints produced for the purpose at hand.
What Are the Pros and Cons of Using PLA vs. ABS?
Considering the comparison of PLA vs. ABS, I have concluded from various sources that these materials have certain merits and demerits.
1. PLA (Polylactic Acid)
Pros:
- Biodegradable: PLA is made from products such as cornstarch, which makes it self-degrading and helps reduce environmental pollution.
- Ease of Use: It sticks to the bed easily even at low temperatures, around 180 – 220 C, which avoids warping.
- Detail: Because of the lower shrinking, greater details can be attained in any printed structure using PLA.
Cons:
- Temperature Resistance: Polylactic acid can withstand low heat, with a heat deflection temperature of about 60°C. This means it cannot be used for parts exposed to much heat.
- Brittleness: It is easier to break than ABS, and products are prone to breakage.
2. ABS (Acrylonitrile Butadiene Styrene)
Pros:
- Durability: Tough plastics like ABS are polymers that can withstand breakage and perform functions in producing plastic parts.
- Higher Yarn Temperature: The heat deflection temperature is near 100C, so plastics like ABS soften at very high temperatures.
- Post-Processing: It can be too easily worked and painted, making it very useful for different finishing techniques.
Cons:
- Warping: It is noticed that, unlike other plastics, once ABS is cooled, it shrinks and affects the dimensions. Thus, a heated build surface (90-110o) during print is necessary; careful exhaust is also needed when using ABS because fumes are produced.
- Environmental concerns: Many also reject the argument that ABS plastic is a petroleum-derived polymer that is unfriendly to the environment because it isn’t biodegradable.
At the end of the day, the decision about which one to use—PLA or ABS—will depend a lot on each project’s respective requirements regarding temperature and beauty finishing.
What Type of Techniques Fall Under the Category of Post-Processing Modification of 3D Printed Parts?

Post-processing methods are always a good idea, as they improve the quality of 3D printed parts, and I have come across several efficient ones. At the very least, some of these pieces are quite rough, which gives you the impetus to try the procedure known as sanding. A very useful technique that I also look forward to is acetone vapor smoothing for ABS prints, as it results in shiny surfaces while fusing the outer layers. One useful option should be painting since it makes it possible to modify the prints and even provide some protection against wear. In addition, it is a good idea to apply primer before painting to enhance the quality of the paint. Finally, some processes like dyeing can help you get the even desired color across the part. Every technique has its merits and should be chosen according to the material being used and the need to be addressed by the project.
How to Get a 3D Printed Part Ready for Painting, Coating, or Finishing?
Preparing a 3D-printed part for painting or finishing is essential to achieving the desired high-quality outcome. The steps provided here were obtained from my analysis of several top websites.
- Sanding: For this stage, I thoroughly sand the part surface using medium-grade sandpaper (about 120-240 grit), where some layer lines and even prints may seem noticeable. I slowly proceed to finer sanding (up to 800 or higher) for a better overall impression.
- Cleaning: Sanding has been done, and now I will soak the part in isopropyl alcohol to lift away any dust, oils, and/or residues stuck to the surface. This ensures that the paint sticks better.
- Primer Application: The next coat I applied was a good-quality primer, which prepares the surface for paint and helps conceal any blemish by filling it in. I prefer spray primers for faster use, but the dry time between sprays varies depending on the manufacturer’s specifications (generally, half an hour).
- Choosing the Right Paint: I would go with either acrylic or enamel paint since those are the types most recommended for use on plastic. Appropriate materials must be looked up in the specifications section to ensure that the paint is used correctly.
- This is the stage where the protective coating is carried out. This is the stage when all qualitative paints spray application protective product and increase willingness to look at objects, aiming to achieve a clear coat.
- Curing Time: I remain conscious of the curing period, which, as given by the paint and finish manufacturer, ranges from a few hours to several days for best results.
I incorporate these steps, considering the technical parameters, to enhance the appearance and usability of the 3D-printed parts.
What Are the Benefits of Sanding and Smoothing?
Sanding and polishing my 3D printed parts are some of the operations with several advantages that improve the parts’ looks, performance, and durability. First, it eliminates visible layer lines and rough edges, providing a smooth-cut surface that looks good. Also, sanding offers a rough surface on which paint can be deposited, thus helping to increase the bond strength of the paint to the surface, which is essential for the lifetime of the parts.
While pursuing a study on the top websites, I have gathered some encouraging technical parameters that are important to follow:
- Grit Types: Starting with a medium grit like 120-240 and progressing with finer grits (800 and higher) helps achieve a much smoother surface without leaving any scratches and cuts from deeper grits.
- Dust Removal: Post-sanding, the intensive use of isopropyl alcohol is even more important for cleaning off all sanding dust and oils and preparing the surface for paint application.
- Surface Preparation: Experts suggest that after all the dusting off, it is better to use a high-quality lacquer spray primer or something similar to encapsulate all the remaining blemishes for a good impression on the paint.
The bottom line is that polishing and smoothing my 3D prints after installing the above optimizes the quality of the appearance of manufactured parts and their functional properties, which is critical for a neat end product.
How to Properly Store Finished 3D Prints?
Having a process to properly care for my 3D-printed objects is essential for me to get the most out of them. From my research on the top websites, I have come up with several practices that I have to undertake to ensure that my prints are in the best condition possible.
- Temperature Control: I store my objects in a dry, cold atmosphere (my optimum is between 15 and 25 degrees centigrade) because too much exposure to heat makes them more prone to warping or deformity.
- Humidity Management: A dehumidifier or silica gel packets may be used to address moisture, which can weaken materials like PLA or ABS over time. Maintaining humidity below 50% is generally favorable.
- Light Exposure: Regarding light exposure, I usually keep my microwaveable prints out of direct sunlight since UV rays cause certain filaments to become brittle. I house my prints in opaque containers or boxes.
- Physical Fixation: I usually wrap my 3D prints in bubble wrap or keep them in rigid boxes to eliminate the possibility of actual breakage. This prevents all the fragile parts from being scratched off or beaten by other substances during movement.
- Separation of Objects: I always sandwich and glue different printed parts together, even though printing requires adhesives. I observe that any parts that have been made separately are not attached to any other parts, which may damage the surface or, over time, change its shape.
By adopting these storage techniques, I can commercially use my 3D-printed objects for years without worrying about their integrity and attractive appearance.
Conclusion-optimizing 3d prints

Other boundary conditions will influence how one arrives at the finish and preservation within 3D prints. Other than that, after being aware of and enhancing factors affecting the environment, such as temperature, humidity, and light exposure, I will also be able to improve the lifespan of my prints. In addition, it will also be possible to improve the precision and detail of the final product appearance by using the correct filament according to the purpose and appropriate post-print treatments such as sanding and sealing. Combining all those strategies, I believe my 3D printed objects will look incredible and be very durable, for which I will be able to fully exploit the beauty of 3D printing as a means of designing.
Reference Sources
- 3D Printing Handbook: Technologies, Design, and Applications by Christopher Barnatt – This comprehensive guide provides detailed insights into various 3D printing technologies, materials, and best practices for optimizing print quality and longevity.
- PLA Filament Storage: Understanding the Science of 3D Printing—Available on the MatterHackers Blog, this article offers an in-depth look at the effects of environmental factors on 3D-printed objects, emphasizing the importance of proper storage and handling.
- The Ultimate Guide to 3D Printing Materials by All3DP – This resource explores different types of 3D printing filaments and their properties, helping readers select the appropriate materials based on intended applications and desired durability.
Frequently Asked Questions (FAQs) – Optimizing 3D Prints

Q1: What factors contribute to the quality of a 3D print?
A1: The quality of a 3D print can be influenced by several factors, including printer calibration, layer height, print speed, temperature settings, and filament quality. Ensuring your printer is properly calibrated and using the right settings for your material can lead to better results.
Q2: How can I improve adhesion to the print bed?
A2: Ensure the print bed is clean and properly leveled to enhance adhesion. You can also use adhesives like glue sticks, hairspray, or specific bed adhesives designed for 3D printing. Adjusting the bed temperature and first layer settings can help improve adhesion.
Q3: What is the significance of post-processing in 3D printing?
A3: Post-processing techniques, such as sanding, painting, or sealing, are crucial for improving the aesthetics and durability of 3D-printed objects. These methods can help remove imperfections, enhance surface finish, and protect the print from environmental factors.
Q4: How does filament choice impact the final print?
A4: Different filaments have unique properties, which can affect the strength, flexibility, and aesthetic appeal of the final print. For example, PLA is easy to print and provides a smooth finish, while ABS is more durable and heat-resistant. Selecting the right filament for your project’s requirements is essential.
Q5: Are there environmental conditions I should consider when printing?
A5: Yes, environmental factors like temperature, humidity, and light exposure can significantly affect the quality and longevity of your prints. Maintaining a consistent temperature and low humidity level during printing and storage can help prevent issues such as warping or layer separation.


