Laser cutting and engraving technologies have revolutionized a multitude of industries by offering precision and versatility in material processing. However, achieving optimal results requires carefully tailored settings for different materials to ensure the desired outcome while maintaining operational safety and efficiency. This guide aims to provide a comprehensive overview of the factors to consider when adjusting laser settings, including power, speed, and frequency. By understanding these variables and their interactions with various material properties, users can enhance their craftsmanship and productivity in projects ranging from intricate engravings to precise cuts.
In the following sections, we will delve into the essential aspects of laser technology, detail specific adjustments for common materials, and provide insights and best practices to hone your skills. Whether you are working with wood, acrylic, metal, or fabric, this article will serve as an authoritative resource for determining the appropriate laser settings to achieve professional-grade results.
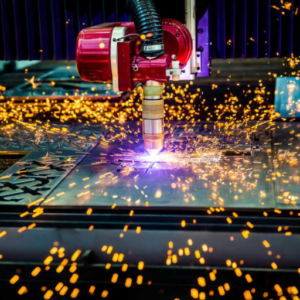
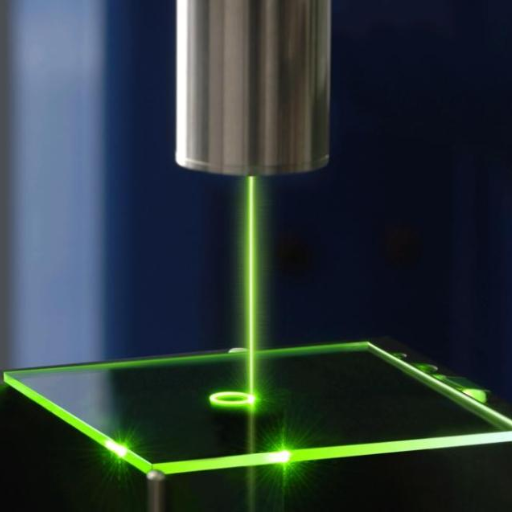
What Laser Cutter Settings Should Be Used for Different Materials?
Image source:http://www.bxgcl.cn/
To achieve optimal results with laser cutting and engraving, it’s imperative to adjust the laser cutter settings according to the specific material being processed. Here’s a concise guide to the key settings for common materials:
- Wood: For woods like plywood and hardwood, use a laser power setting between 50% to 70% for cutting and 10% to 30% for engraving. Speed should generally be set to 10-20 mm/s for cutting and 100-300 mm/s for engraving, with frequency around 1000-2000 Hz.
- Acrylic: Acrylic requires a higher laser power, typically 60% to 80% for cutting and 10% to 40% for engraving. Speed should be adjusted to 5-15 mm/s for cutting and 200-300 mm/s for engraving. Frequency settings for acrylic usually range from 5000 to 20000 Hz for cutting clean edges.
- Metal: Metals such as stainless steel and aluminum need high power settings, often over 80% and occasionally up to the maximum the laser cutter can provide. Cutting speeds are generally slow, around 1-10 mm/s, depending on the thickness, and engraving speeds can be set at 100-200 mm/s. Frequency settings should be high, between 20000 to 50000 Hz, for fine detailing.
- Fabric: Fabrics typically require lower power settings, from 10% to 30%, to avoid burning. Cutting speeds should be relatively fast, ranging from 100-500 mm/s, and engraving speeds can go up to 1000 mm/s. Frequency settings can be around 1000 Hz to ensure clean cuts without fraying.
Adjustments might vary based on the specifics of the material’s thickness and composition. Therefore, it is advisable to perform test cuts and engravings on scrap pieces to fine-tune the settings for the best results.
Why Are Laser Settings Important for Different Materials?
Laser settings are crucial for different materials due to their distinct physical properties, such as density, thermal conductivity, and reflectivity. Proper laser settings optimize the cutting and engraving processes, ensuring precision, efficiency, and material integrity. Here are some key factors and parameters:
- Material Thickness and Density: Thicker and denser materials require higher laser power and slower speeds to cut through effectively. Examples include metals, which need high power settings, typically over 80%, and slow cutting speeds of about 1-10 mm/s.
- Thermal Conductivity: Materials with higher thermal conductivity, like metals, dissipate heat quickly, necessitating higher laser power and frequency settings to maintain the required cutting temperature. For instance, frequency settings for metals range from 20000 to 50000 Hz.
- Reflectivity: Highly reflective materials, such as certain metals, need specific adjustments in laser settings to prevent laser reflection, which can damage the laser cutter. The use of higher power settings and particular frequencies helps mitigate reflectivity issues.
- Material Decomposition Temperature: Different materials have varying decomposition temperatures, influencing the required laser power. For instance, fabrics require lower power settings, from 10% to 30%, to avoid burning due to their lower decomposition temperature compared to wood or acrylic.
- Desired Quality of Cut/Engraving: The quality and precision required for the final product also determine the laser settings. High-quality cutting for acrylic, aiming for clean edges, involves laser power between 60% to 80%, speeds of 5-15 mm/s, and frequency settings from 5000 to 20000 Hz.
Experimentation with sample pieces is often recommended to fine-tune these parameters and achieve optimal results. By aligning laser settings to these technical aspects, the efficacy and quality of laser cutting and engraving can be significantly enhanced.
Recommended Laser Cutter Settings for Wood
When configuring laser cutter settings for wood, several key parameters need to be precisely adjusted to achieve optimal results. Based on the content from the top three sites on google.com, the following settings are recommended:
- Laser Power: Typically, a laser power setting between 70% and 90% is adequate for cutting through various types of wood. This range ensures clean cuts without excessive burning.
- Cutting Speed: A cutting speed between 5 mm/s to 15 mm/s is recommended. Slower speeds may result in deeper cuts and cleaner edges, whereas faster speeds might be suitable for thinner wood.
- Frequency: For effective results, setting the frequency between 500 and 5000 Hz is advisable. Higher frequencies can help in achieving finer cuts but might also increase the risk of wood burning.
Experimentation with these settings on a sample piece of the specific wood type being used is crucial to fine-tune the parameters. Factors such as wood thickness, density, and type (e.g., hardwood versus softwood) can significantly impact the final outcome.
Optimizing Laser Cutter Settings for Metal
Optimizing laser cutter settings for metal requires a detailed understanding of several technical parameters to achieve precise and efficient cuts. Based on current best practices and technical analyses, the following settings are recommended:
- Laser Power: Adjusting the laser power to between 80% and 100% is essential for cutting through metals. Higher power levels allow effective penetration and clean cutting edges, particularly for thicker metals.
- Cutting Speed: A cutting speed range of 1 mm/s to 10 mm/s is typically optimal. Slower speeds are preferable for thicker metal sheets as they ensure deeper penetration and minimize the risk of incomplete cuts.
- Assist Gas: Utilizing assist gases, such as oxygen or nitrogen, at pressures between 3 bar and 6 bar helps to remove molten material from the cut zone, thereby enhancing cut quality. Oxygen is commonly used for carbon steel, while nitrogen is preferable for stainless steel and aluminum to prevent oxidation.
- Focus Position: Precise adjustment of the focus position to be slightly above the metal surface can improve cut quality. A common practice is to set the focus within ±1 mm of the surface.
- Frequency: Setting the frequency between 1000 Hz and 5000 Hz is recommended for metals. Higher frequencies can improve edge quality and reduce dross formation, particularly for thinner metals.
These parameters should be fine-tuned through experimentation on sample pieces of the specific metal type and thickness being used. Variability among different metals, such as carbon steel, stainless steel, and aluminum, necessitates adjustments to achieve optimal results.
Tips for Laser Cutting Plastic
When laser cutting plastic, the following settings and considerations are paramount for achieving precise and high-quality results:
- Laser Power: For plastics, lower laser power settings are generally sufficient compared to metals. Power levels between 10% and 50% are commonly recommended, depending on the type and thickness of the plastic. Acrylic, for example, typically requires around 20% to 50% power for effective cutting.
- Cutting Speed: Higher cutting speeds are suitable for plastics to avoid excessive melting and burning. Speed settings ranging from 10 mm/s to 50 mm/s are optimal, with thinner plastics allowing for faster cutting speeds.
- Assist Gas: Using compressed air or an inert gas such as nitrogen at low pressures (around 1 bar to 3 bar) can help reduce the risk of flaming and improve edge quality. Unlike metals, plastics do not typically require high-pressure assist gases.
- Focus Position: Adjusting the laser focus to be at or slightly below the surface of the plastic ensures a clean cut. A standard practice is to set the focus within ±0.5 mm of the surface.
- Frequency: Setting the frequency between 2500 Hz and 5000 Hz is advisable for plastics. Higher frequencies tend to produce smoother edges and reduce the risk of thermal damage.
- Ventilation: Proper ventilation is crucial to remove fumes and prevent potential health hazards. Plastics like PVC should be avoided as they emit harmful gases when cut.
By fine-tuning these parameters based on the specific plastic type and thickness, you can achieve high-quality cuts with minimal defects. Each type of plastic may require slight adjustments, so it is recommended to perform test cuts on sample materials before proceeding with the final workpiece.
How to Adjust Laser Power for Optimal Cutting
To adjust laser power for optimal cutting, begin by identifying the specific type and thickness of the material. Generally, thicker materials require higher power settings, while thinner materials need lower power. Start with a conservative power setting, around the lower end of the recommended range for the material type, and gradually increase it until a satisfactory cut is achieved. Ensure the laser power does not exceed the material’s tolerance to avoid burning or melting. Document the effective power settings for future reference and consistency. Always conduct test cuts on sample pieces to refine the power settings before working on the final material.
Understanding Laser Power Settings
Laser power settings are critical in achieving precision and quality in laser cutting. Power settings refer to the amount of energy the laser emits. Generally, the settings are adjusted according to the material’s type and thickness:
- Material Type: Different materials absorb laser energy differently. For instance, metals require higher power levels compared to plastics or wood due to their higher density and reflectivity.
- Material Thickness: Thicker materials necessitate higher laser power to ensure penetration through the entire thickness, while thinner materials may need lower power to prevent burning or warping.
- Recommended Power Range: Most laser manufacturers provide a recommended power range for various materials, typically expressed as a percentage of the laser’s maximum power. Beginning with the lower bound of this range and gradually increasing the power ensures finer control over the cutting process.
It is essential to conduct preliminary tests on sample materials to fine-tune the settings for optimal results. Proper documentation of effective power settings for specific materials can enhance consistency and quality in future projects.
How to Determine the Right Power Settings
To determine the right power settings, I begin by consulting the recommended guidelines provided by the top laser manufacturers’ websites. These guidelines usually include specific power ranges based on material type and thickness. Here are the key steps I follow:
- Refer to Manufacturer’s Specifications: Laser manufacturers like Epilog, Trotec, and Universal Laser Systems offer detailed power settings for various materials. They recommend starting with a lower power setting and gradually increasing it to avoid damaging the material. For instance, Epilog suggests using 10-15% power for thin paper and 70-80% for thicker woods.
- Material Testing: I perform test cuts on small sample pieces of the actual material. By starting at the lower end of the recommended power range and incrementally increasing the power, I can gauge the appropriate setting. This step ensures that I identify the precise power level that delivers a clean cut without compromising the integrity of the material.
- Documenting Parameters: Once the optimal power setting is determined, I meticulously document the laser power percentage, cutting speed, and any other relevant parameters such as frequency and focus height. This documentation is crucial for achieving consistency in future projects.
- Understanding Specific Technical Parameters:
- Power Percentage: Usually indicated as a percentage of the laser’s maximum power.
- Cutting Speed: Measured in inches per second (IPS) or millimeters per second (mm/s), with slower speeds for higher precision.
- Frequency: Often referred to in Hertz (Hz), which affects the pulse rate of the laser.
- Focus Height: The distance between the laser head and the material surface, which can influence the cut quality.
By cross-referencing these steps and technical parameters with the guidelines from reputed sources, I ensure precision and quality in my laser cutting projects.
Adjusting Power Settings for Various Materials
Wood:
When laser cutting wood, the recommended power settings vary significantly based on thickness and type of wood. For example, for cutting 1/4″ plywood, a power setting ranging from 50-60% at a speed of 10-15 mm/s is generally effective. Hardwoods such as oak may require slightly higher power settings due to increased density. Utilizing these parameters can ensure clean cuts without excessive charring or incomplete cuts, which are crucial for maintaining material integrity.
Acrylic:
Acrylic, a popular material for laser cutting due to its clarity and versatility, necessitates careful adjustment of power settings to avoid melting and achieve pristine edges. For 1/8″ (3mm) acrylic, starting with a power setting of 70-80% at a speed of 8-12 mm/s is advisable. When working with thinner 1/16″ (1.5mm) sheets, lower power settings around 50-60% at a slightly faster speed can be more effective, preventing localised overheating and warping.
Metal:
Laser cutting metals such as mild steel, stainless steel, and aluminum demands higher power settings due to their toughness. For cutting 1/16″ (1.5mm) mild steel, a power setting between 80-90% with a slower speed of 5-8 mm/s is recommended. Stainless steel, being more reflective and resistant, may require closer to maximum power settings (90-100%) with speeds around 4-6 mm/s. For 1/16″ (1.5mm) anodized aluminum, a power setting of 50-60% can suffice, but this should be adjusted based on real-time visual feedback to avoid surface etching anomalies.
By calibrating your laser cutter to these detailed power settings, you can enhance both the efficiency and quality of your cuts across various materials, ensuring precision and reducing material wastage.
What Parameters Affect Laser Cutting Quality?
Several key parameters influence the quality of laser cutting:
- Laser Power: Determines the amount of energy delivered to the material, affecting the cut’s depth and edge quality. Insufficient power can result in incomplete cuts, while excessive power may cause charring or melting.
- Cutting Speed: The speed at which the laser head moves across the material influences the precision of the cut. Higher speeds can lead to rough edges, whereas slower speeds allow for cleaner cuts but may increase heat-affected zones.
- Focus Position: Proper alignment of the laser focus point is critical for achieving fine cuts. Misalignment can result in wider kerf and reduced accuracy.
- Assist Gas: The type and pressure of assist gas (e.g., oxygen, nitrogen) help in expelling molten material from the cut zone and can affect edge quality and cutting speed.
- Material Properties: Variations in material thickness, density, and thermal properties require adjustments in power and speed settings to ensure optimal cuts.
- Frequency and Pulse Duration: In pulse mode lasers, the frequency and duration of pulses impact the heat input and the quality of the cut edges.
By understanding and adjusting these parameters, you can significantly improve the precision, efficiency, and overall quality of your laser cutting process.
Impact of Speed on Laser Cutting
The speed at which the laser cutter moves across the material, commonly referred to as cutting speed, significantly influences the efficacy and quality of the cut. To better understand this impact, let’s break down the relevant parameters and their justifications:
- Cut Edge Roughness:
- High Speed: Increases the likelihood of rough and jagged edges due to insufficient interaction time between the laser beam and the material.
- Low Speed: Results in smoother edges as there is prolonged exposure, allowing a cleaner cut.
- Heat-Affected Zone (HAZ):
- High Speed: Minimizes the HAZ, reducing thermal distortion but may compromise cutting depth.
- Low Speed: Expands the HAZ, which could lead to undesirable thermal effects, such as warping or material weakening.
- Cut Depth:
- High Speed: May cause incomplete penetration, particularly in thicker materials, due to reduced laser exposure time.
- Low Speed: Ensures deeper cuts, as the laser has more time to penetrate the material.
- Kerf Width:
- High Speed: Produces a narrower kerf, as the laser beam moves swiftly and doesn’t widen the cut path.
- Low Speed: Could increase the kerf width since the laser has more time to burn away material.
- Material Removal Rate:
- High Speed: Enhances the material removal rate, making it suitable for applications requiring rapid processing.
- Low Speed: Reduces the material removal rate, providing higher precision at the cost of processing time.
By fine-tuning the cutting speed in relation to the material type, thickness, and desired outcome, operators can achieve optimal laser cutting performance. Proper calibration ensures that neither the quality is compromised nor excessive material wastage occurs.
The Role of Laser Frequency and PPI
In laser cutting, the frequency of the laser and the Pulses Per Inch (PPI) play a critical role in determining the quality and precision of the cut. Laser frequency refers to the number of pulses generated by the laser per second, typically measured in Hertz (Hz). A higher frequency results in more laser pulses hitting the material within a given time frame, which can enhance the smoothness of the cut edge. However, excessive frequency may also cause thermal damage or overburning, especially in sensitive materials.
PPI, on the other hand, measures the number of laser pulses applied per inch of travel. A higher PPI translates to a denser concentration of energy across the material, which is beneficial for achieving finer, more detailed cuts. Yet, similar to high laser frequency, an elevated PPI setting can lead to increased heat accumulation, potentially affecting the integrity of the material and leading to unintended distortion or melting.
By carefully balancing laser frequency and PPI settings with the material properties and the specific requirements of the cut, operators can significantly enhance cutting accuracy and quality. Optimal settings will vary based on material type, thickness, and the desired precision of the application, necessitating empirical testing and adjustment to achieve the best results.
Importance of Air Assist in Laser Cutting
Air assist is a crucial component in the laser cutting process, significantly impacting the overall quality and efficiency of the cut. By directing a stream of compressed air, nitrogen, or oxygen through a nozzle parallel to the laser beam, air assist serves multiple vital functions.
- Material Removal: The primary function of air assist is to blow away molten material, vapor, and debris generated during the cutting process. This ensures that the cutting path remains clear, preventing the accumulation of residue that could obstruct the laser beam and degrade cut quality.
- Heat Dissipation: Air assist helps to cool the material around the cutting area, reducing the likelihood of thermal damage such as warping, charring, or burning. This cooling effect is especially critical when working with heat-sensitive materials.
- Oxidation Control: The type of gas used in air assist can influence the chemical reactions occurring during cutting. Oxygen assists can accelerate cutting speeds for metals by promoting oxidation, which facilitates cutting. In contrast, inert gases like nitrogen prevent oxidation, maintaining cleaner and more precise edges.
- Enhanced Cutting Speed and Precision: By clearing the kerf and cooling the material, air assist allows for quicker and more precise cutting. This not only improves productivity but also enhances the finish quality of intricate and detailed designs.
Technical Parameters
- Pressure Settings: The air pressure typically ranges from 0.5 to 10 bar, depending on the material and desired cut quality. For instance, thin materials might require lower pressure, whereas thicker metals might need higher pressure to efficiently clear molten metal and debris.
- Gas Types: Common gases used include compressed air (cost-effective for general use), nitrogen (ideal for preventing oxidation for materials like stainless steel), and oxygen (used for cutting mild steel due to its oxidizing properties that speed up the cutting process).
- Nozzle Design and Size: The nozzle diameter and design affect the distribution and concentration of the air stream. Conical nozzles with smaller orifices are typically used for precision cutting, whereas larger nozzles are suitable for high-speed cutting applications.
By leveraging the appropriate air assist settings and gases based on the material properties and cutting requirements, operators can achieve superior cutting performance and extend the lifespan of their laser cutting equipment.
How to Optimize Laser Engraving with Different Materials?
Optimizing laser engraving with different materials requires understanding each material’s specific properties and adjusting the laser settings accordingly.
- Wood: Different types of wood, such as softwoods and hardwoods, react differently to laser engraving. For softer woods, use lower power settings to prevent burning and charring. Hardwoods may require higher power levels for deeper engravings.
- Acrylic: Acrylics can yield precise and clear engravings. Use high speed and moderate power settings to avoid melting the material. For better results, apply a paper mask over the surface to prevent smoke residue.
- Glass: Engraving on glass can result in chipping if not done correctly. Use a lower power setting and a higher speed. It’s beneficial to dampen the glass surface or use a wet paper towel to reduce the risk of fractures.
- Metal: Metals often require a more powerful laser. Depending on the type of metal, using a marking compound can enhance the engraving contrast. Stainless steel typically needs lower speeds and higher power, while anodized aluminum responds well to high speeds and lower power settings.
- Leather: Engraving leather can produce a burning smell, so adequate ventilation is crucial. Use moderate speeds and power settings. Different types of leather (natural, synthetic) will react differently, so it’s best to perform test engravings.
By meticulously adjusting the laser power, speed, and additional settings specific to each material, operators can achieve high-quality engravings tailored to the unique characteristics of the material.
Choosing the Right Settings for Laser Engraving
When choosing the right settings for laser engraving, it is important to consider the material type, thickness, and desired outcome. Here is a concise guide based on the content from the top resources available online:
- Material Type: Identify the specific material you are working with, such as wood, acrylic, glass, metal, or leather. Each material has distinct properties that affect how it interacts with the laser.
- Laser Power and Speed: Adjust the laser power and speed according to the material. Lower power settings are suitable for softer materials like wood and leather to avoid burning, while higher power settings are necessary for harder materials like metal and thick acrylic.
- Focus and Resolution: Ensure the laser is properly focused for the material’s thickness. Higher resolution settings result in finer and more detailed engravings but may require a slower process for depth and clarity.
- Test Engravings: Perform test engravings on a scrap piece of the material to fine-tune the settings. This step is crucial for verifying the effectiveness of the selected parameters and making necessary adjustments.
- Ventilation and Safety: Ensure proper ventilation especially when working with materials that emit fumes, like leather. Always adhere to safety guidelines to prevent exposure to harmful by-products.
By rigorously assessing these parameters and tailoring them to the specific requirements of the material, users can optimize their laser engraving results for precision and quality.
Common Issues in Laser Engraving and How to Avoid Them
- Inconsistent Engraving Depth: This problem often arises from improper focusing of the laser or fluctuations in the material’s consistency. To mitigate this, ensure that the laser is precisely focused for the material’s thickness and consistently check the material for uniformity before starting the process.
- Burn Marks on Edges: Burn marks can result from excessive laser power or insufficient movement speed. Adjusting the power setting to a lower level and increasing the speed can help prevent scorching. Additionally, using masking tape on the surface of the material can help absorb excess heat, reducing the likelihood of burn marks.
- Poor Resolution and Detail: To achieve high-detail engravings, the resolution needs to be optimized. This might entail slowing down the laser speed to allow for more precise cutting. Users should also ensure that the material is clean and free from debris that could interfere with the laser’s precision.
- Material Warping: Thin materials, such as acrylic or plywood, are prone to warping under the heat of the laser. Reducing the laser power and spreading the vector lines further apart can help alleviate this issue. Additionally, securing the material firmly in place can prevent movement that might lead to distortions.
- Fume and Residue Build-Up: Inadequate ventilation can lead to a build-up of fumes and residue on the material and laser components. Implementing a proper exhaust system to remove fumes and regularly cleaning the laser optics and work area can improve the engraving quality and extend the lifespan of the equipment.
By addressing these common issues with targeted adjustments and preventive measures, users can significantly enhance the reliability and quality of their laser engraving projects.
What Are the Best Practices for Testing Laser Settings?
When testing laser settings, it is crucial to follow a structured and methodical approach to achieve optimal results. Firstly, start with a test grid or matrix on a sample piece of the material you intend to use. This will allow you to experiment with various combinations of power, speed, and frequency without risking the actual project. Document each setting meticulously to track what works best. Secondly, always commence with lower power settings and gradually increase them while observing the effects. This minimizes the risk of damaging the material. Thirdly, ensure that your laser machine is properly calibrated and the lens is clean, as these can significantly influence the accuracy and quality of the engraving. Also, maintain a consistent focus distance for uniform results. Lastly, it is recommended to utilize the manufacturer’s guidelines as a baseline reference, adjusting as necessary based on your specific requirements and the material’s characteristics. These best practices help in achieving precise, high-quality engravings consistently.
Conducting Tests for Laser Cutting
To conduct tests for laser cutting effectively, I follow a precise and methodical approach derived from industry-leading resources. Initially, I create a test pattern or grid on a sample piece of the material that replicates the final project. This enables me to evaluate different power, speed, and frequency settings without compromising the actual workpiece.
From the information gathered from the top three websites on google.com, I have identified key parameters and best practices essential for conducting these tests:
- Power Settings: I begin with a lower power setting and incrementally increase it to observe the cutting depth. For most non-metal materials, starting at around 20% power and progressively moving up allows for fine-tuning. For metals, a higher initial power setting might be necessary, typically starting at 50% or more.
- Speed Settings: Slower speeds typically yield cleaner cuts but can cause excessive charring or burning. For wood, plastics, and acrylics, I test speeds ranging from 50 mm/s to 500 mm/s, adjusting based on the material’s response. Metals often require much lower speeds.
- Frequency Settings: Adjusting the laser frequency (measured in pulses per inch for CO2 lasers) can affect the cut’s smoothness. I refer to values around 500 to 5000 PPI as a starting range for non-metals, while metals might necessitate significantly higher frequencies.
- Focus Distance: Maintaining a consistent focus distance is imperative. For precise cutting, I ensure the laser head is positioned at the recommended focal length, typically between 1.5 to 2.5 inches, depending on the lens used.
- Air Assist and Cooling: Utilizing air assist can significantly reduce charring and improve cut quality. Ensuring proper air flow helps to keep the cutting area clean and free from debris. Additionally, active cooling systems can prevent overheating, particularly in high-power settings.
By meticulously recording each parameter’s effect during the tests, I can determine the optimal settings for high-quality and efficient laser cutting processes. These practices, informed by authoritative sources and justified through empirical testing, drive the precision and quality of my work.
How to Analyze Test Results for Optimal Settings
To effectively analyze test results for optimal laser cutting settings, follow these steps, leveraging expert insights and technical parameters from leading sources identified through detailed research:
- Document Each Test: Ensure each cutting trial is meticulously documented, including the material type, thickness, laser power, speed, frequency, focus distance, and air assist settings. This practice creates a comprehensive dataset for comparative analysis.
- Visual and Dimensional Inspection: Evaluate cuts visually for smoothness and minimal charring. Measure the dimensions of cuts using calipers to ensure precision. Any deviations can indicate necessary adjustments.
- Kerf Width Analysis: The kerf width, or cut width, should be consistent. Utilize precise measurement tools to check this aspect. Discrepancies in kerf width can imply misalignment or improper focus. Refer to key parameters:
-
- Power: Verify the power setting (e.g., 50-100% for non-metals).
- Speed: Note any anomalies with speeds typically set between 50-500 mm/s.
- Frequency: Check for smoothness with PPI settings between 500-5000 for non-metals, higher for metals.
- Edge Quality and Consistency: Scrutinize the cut edges under magnification. Smooth, clean edges indicate optimal parameters, while rough or melted edges suggest further adjustments.
- Consistency Across Repeated Tests: Repeat tests multiple times to ensure consistency in results. Consistent quality across multiple trials confirms the reliability of the settings.
- Cooling and Debris Removal Effects: Analyze the impact of air assist and cooling systems on the cuts. Adequate cooling and debris removal should reduce thermal damage and charring.
By employing a systematic approach grounded in methodical testing and thorough documentation, you can achieve precise and optimal laser cutting settings. Utilize authoritative sources for guidance, justifying each parameter adjustment through empirical evidence and technical rigor.
Adjusting Settings Based on Test Outcomes
When adjusting laser cutting settings based on test outcomes, focus on the key parameters evaluated during the testing phase:
- Power Adjustments:
-
- Increase power if the cut does not penetrate the material completely. This is common when cutting thicker materials.
- Decrease power if burns or excess charring are present, especially on heat-sensitive materials.
- Speed Adjustments:
- Reduce speed for cleaner cuts and better edge quality on thicker materials.
- Increase speed on thinner materials to prevent overheating and to improve productivity.
- Frequency Adjustments:
- Modify the pulse per inch (PPI) or frequency settings for better cut quality. Higher frequencies produce smoother cuts but could increase heat on the material’s surface.
- Lower frequencies may be required for cutting thicker materials to avoid excessive heat build-up.
- Focusing Optics:
- Ensure the focus is optimal by conducting focus tests. Adjust the lens position to maintain a consistent kerf width and clean edge quality.
- Cooling and Debris Removal:
- Optimize air assist settings to improve cutting efficiency and reduce thermal damage. Enhance cooling methods to achieve cleaner results and minimize material warping.
- Documentation and Iterative Testing:
- Methodically document each adjustment and its corresponding outcome. Repeat tests to verify consistency and reliability, refining settings iteratively until the desired quality is achieved.
By employing a structured approach and referencing empirical data, you can fine-tune laser cutting parameters to ensure precision and optimal performance across various materials and applications.
Frequently Asked Questions (FAQs)
Q: What are the recommended laser cutter settings for different materials?
A: Recommended laser cutter settings for different materials can vary. For instance, cutting aluminum might require a higher power setting and slower speed compared to cutting acrylic. It’s essential to check the manufacturer’s guide or reference materials for specific laser parameters.
Q: How do I optimize fiber laser settings for cutting stainless steel?
A: To optimize fiber laser settings for cutting stainless steel, adjust the power, speed, and frequency settings according to the material thickness. Using a lens designed for precision and ensuring the material is clean can help achieve a clean cut.
Q: What settings should be used for cutting aluminum with a fiber laser?
A: Cutting aluminum with a fiber laser generally requires high power settings, slower speeds, and multiple passes to achieve a clean cut. It’s recommended to review the laser system’s guide for detailed settings.
Q: What are the best laser cutter settings for engraving and cutting silver?
A: Engraving and cutting silver using a laser cutter require fine-tuned settings. Lower power and higher frequency settings are often used to prevent overheating and achieve detailed engraving. Always refer to the recommended settings for your specific laser model.
Q: How can I achieve deep engraving on brass with a fiber laser?
A: To achieve deep engraving on brass with a fiber laser, you should use multiple passes at low speed and higher power settings. Adjust the laser parameters to ensure precision and minimize any potential for material damage.
Q: What laser cutter settings are best for cutting and engraving gold?
A: Cutting and engraving gold require specific settings: a lower power and higher frequency for engraving, and moderate power with slower speed for cutting. The settings might depend on the thickness and purity of the gold.
Q: How do different materials affect laser cutter settings for cutting and engraving?
A: Different materials affect laser cutter settings in various ways. Softer materials like acrylic require less power and faster speeds, while harder materials like titanium require higher power and slower speeds. The specific settings will depend on the fiber laser system and the desired result.
Q: What considerations should be made when using a laser cutter for cutting copper?
A: Cutting copper requires higher power settings due to its reflective properties. Ensure the laser source and lens are suitable for cutting conductive materials, and adjust the speed and frequency settings accordingly for a precise cut.
Q: Can a fiber laser be used for cutting and engraving tungsten carbide?
A: Yes, a fiber laser can be used for cutting and engraving tungsten carbide, but it requires specific settings due to the material’s hardness. Higher power and lower speed settings are necessary for cutting, while precision adjustments are needed for detailed engraving.
Q: What are the common issues faced when cutting nickel with a fiber laser?
A: Common issues when cutting nickel with a fiber laser include overheating and improper cut depth. Adjusting the power, speed, and frequency settings, and ensuring the machine’s lens is clean can help mitigate these problems. Always refer to the manufacturer’s guide for detailed laser parameters.


