To make laser cut stencils, it is necessary to have both creativity and precision. Whether you are doing this as a DIY project or for industrial use like sign-making or designing intricate patterns into materials, having the right stencil makes all the difference. In this article, we will discuss some important steps that need to be followed in order to create perfect laser cut stencils; ranging from selecting appropriate materials up until mastering design and cutting techniques. With these tips at hand, one can always expect clean results every time they attempt making such tools.
What is a Laser Cut Stencil?
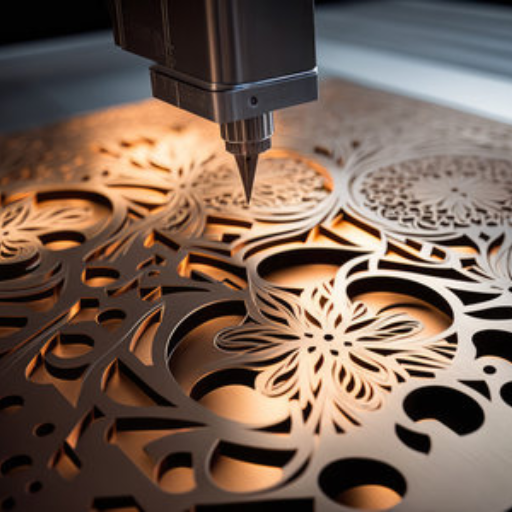
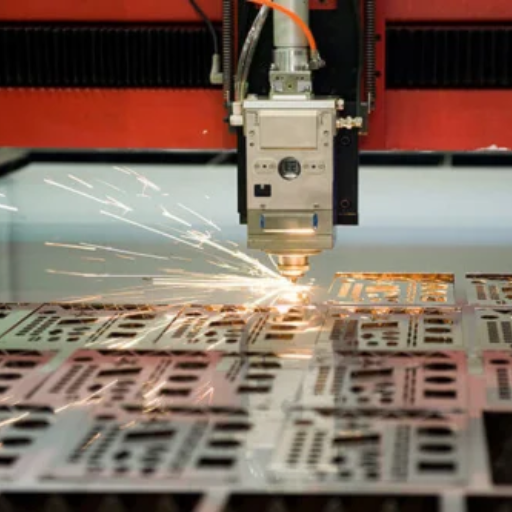
Image source: https://utlas.net/
A laser cut stencil refers to a template made out of plastic, metal or cardboard which is shaped by being precisely sliced with lasers thus forming specific shapes designs or patterns. Laser precision allows for very detailed and elaborate designs that would not have been easily made using other methods of cutting. These stencils can be used in various applications such as art projects, crafts making, industrial marking among many others where one needs a reliable tool that can consistently transfer designs onto different surfaces without getting worn out easily because they are reusable too.
Defining a Laser Cut Stencil
A precision instrument known as a laser cut stencil is created by using a strong laser to penetrate materials such as Mylar, stainless, or acrylic steel by cutting definite figures or patterns. These stencils are most suitable for use in many applications due to the sharp edges and intricate detail allowed through laser cutting technology; from fine art projects that require minute details to heavy duty industrial markings requiring high complexity levels. Painting becomes easier because there is uniformity provided which guarantees sameness with other items during decorating or etching since this tool offers exact replica on different surfaces every time it is used thereby increasing accuracy while saving time and effort.
Types of Laser Cut Stencils
There are various kinds of laser cut stencils that can be used for different applications, depending on the material and design complexity. The following are the most common types:
- Mylar Stencils: Mylar stencils are good choices for repeated use in arts and crafts since they are strong as well as flexible. They can be cleaned easily and they are resistant to solvents, making them suitable for painting and airbrushing projects.
- Metal Stencils: Metal stencils, usually made from brass or stainless steel provide precision and durability. Because of their toughness and resistance to heat, these stencils find wide application in industry for marking, etching or solder paste printing.
- Acrylic Stencils: As far as detailed designs are concerned, people prefer using acrylic stencils due to their rigidity and clarity. Signage, decorative arts, woodworking – you name it! Acrylics guarantee long life span; they do not lose integrity when finely cut through.
Each stencil type has its own set of benefits which ensures that there is always a suitable option available for any given need or use case.
Applications of Laser Cut Stencils
Laser cut stencils have many uses, both creative and industrial. In the arts and crafts industry, artists can use them for precise patterns that can be duplicated in painting or airbrushing. Stencils are also helpful in home decor where they assist with wall art, furniture design and custom signs.
In industries that need high precision, laser cut stencils are invaluable. For example, metal stencils are used in electronic manufacturing to ensure accurate placement of solder paste during circuit board design. They are also used for branding purposes by allowing companies to consistently mark products with their logos or text.
Another area that laser cut stencils find application is culinary arts especially baking and pastry making. Chefs dust powdered sugar or icing through these stencils onto desserts creating intricate designs which greatly enhances their aesthetic appeal.
All said versatility together with accuracy associated with laser cut stencils has made them become indispensable tools across different sectors thus driving efficiency while fostering innovation within such industries.
How to Make your Own Laser Cut Stencil?
To make your own laser-cut stencil, follow these steps for accuracy and quality.
- Design Your Stencil: Start by designing your stencil on a computer using a vector graphic program such as Adobe Illustrator or CorelDRAW. Make sure that the design is clean and simple with all parts connected so it stays strong structurally.
- Prepare the Material: You should choose a suitable material like acrylic sheet, mylar film or thin metal plate for making stencils. Each kind of stuff has its properties thus select one which suits best for your needs.
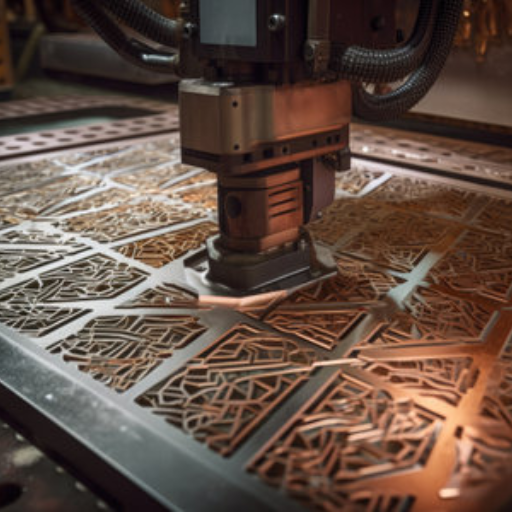
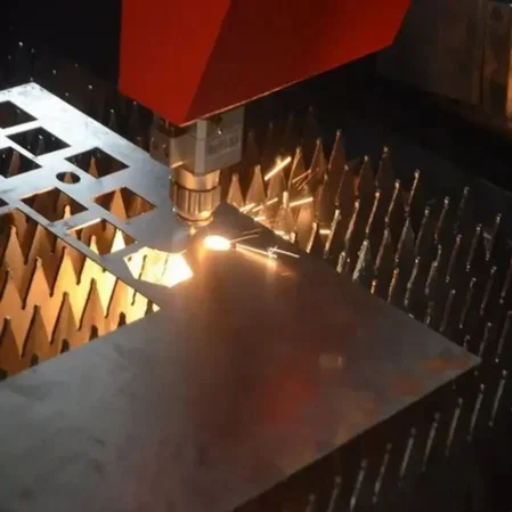
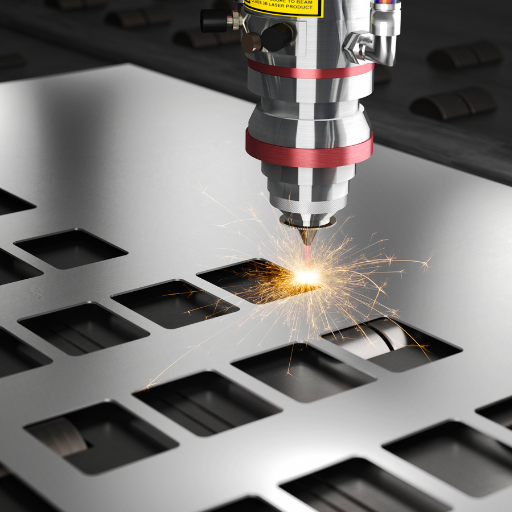
- Laser Cutting Setup: Set up the laser cutter by adjusting its parameters according to the type of material being used – power level, speed rate, frequency setting.
- Upload and Cut: Load your drawing into the machine’s software then position it on top of the base where you have placed your chosen material. Then start cutting and keep an eye on progress throughout this phase in order not to mess things up.
- Finishing Touches: Extracting completed stencils from machines require caution; therefore after cutting is done inspect edges carefully while doing necessary cleaning to rid off any remaining bits.
In conclusion, follow these directions for creating custom laser cut stencils that will fit your projects well leading into professional outcomes having attained accuracy levels too.
Choosing the Right Stencil Material
Choosing the correct stencil material is important if you want your laser cutting projects to turn out well. Below are a few options that are commonly used.
- Mylar: Mylar is a popular choice when it comes to stencils because it is flexible and durable. It will not tear easily and can be reused over and over again. Additionally, these kinds of stencils are easy to clean which makes them great for more intricate designs.
- Acrylic: Acrylic stencils offer precision with their rigid structure. They work best for permanent applications that require stability. However, they may break more easily than other materials like Mylar which can bend without snapping.
- Metal: Metal sheets – usually stainless steel or aluminum – are thin enough to be used as stenciling material but still very tough. They can take heavy use without wearing out quickly at all so would suit an industrial setting where long life span alongside accuracy are necessary features particularly for engraving or etching projects.
Each material listed above has its own benefits therefore what suits one project might not work as effectively on another depending on such factors like how intricate the design is complexity desired strength required etcetera.
Designing Your Stencil Template
Creating a stencil involves several main steps to guarantee accuracy and simplicity of utilization. First, draw your design; this can be done digitally using software such as Adobe Illustrator or by hand using pen and paper. Make sure that all the parts of your design are joined together so that no small isolated pieces fall off when cut out. It is good to use vector graphic software because it allows easy scaling modifications and accurate cutting out. Remember always maintaining uniform thicknesses for borders across the entire design so that it stays durable and legible. Lastly, check measurements twice along with alignments lest there be any mistake during laser cutting process.
Using a Laser Cutter Effectively
Follow these tips to use a laser cutter effectively:
- Select the right material: There are different types of laser cutters for different materials, such as wood, acrylic and metal. Ensure that your material is compatible with the particular machine you are using.
- Prepare your design file: Make sure that your design file is in a format that can be read by the laser cutter, such as SVG or PDF. Use software with vector graphics capabilities so that you can create designs which are precise and scalable; also check for issues like lines overlapping or elements being unconnected.
- Adjust settings: To get the best results out of your laser cutting machine, it is important to fine tune its settings. This includes modifying laser power, speed and focus depending on the material being cut through as well as desired cutting depth among other factors; Most cutters come with recommended setting for each type of material they can handle
- Conduct test cuts: Before doing an actual cut on your main material, consider making some test cuts on scraps instead. This way, you will confirm if indeed all parameters are set right without having to waste much of the primary substrate.
- Safety precautions: Always prioritize safety while using any tool including lasers; wear protective glasses if necessary but not always alone – It’s important also to ensure proper ventilation within working space. Maintenance should be done regularly when need be according to its condition too
- Post-processing: Depending on what kind of material has been worked upon through this process there may be need for post processing activities like edge sanding or even cleaning off residues left behind from cutting process by use of a chemical solvent cleaner etc., thus giving more professionalism touch over finished work piece.
If you follow these steps you will have maximum efficiency from your laser cutter and produce clean cuts for stencil projects
What Materials can be Used for Laser Cut Stencils?
Creativity is only limited by the materials available when it comes to making laser cut stencils. These are some of the most common options:
- Acrylic Sheets: Among other things, acrylic sheets are durable and can be found in various thicknesses which make them ideal for reusable stencils.
- Cardstock: Cardstock is a good choice for temporary stencils because it’s cheap and easy to cut.
- Mylar: Mylar is popular because this plastic material is flexible yet strong enough to be reused many times; this makes mylar great not only for detailed designs but also those needing durability.
- Wood Veneer: Wood veneers give off an authentic natural appearance while still being robust so they can withstand multiple uses as well.
- Paper: Paper works perfectly fine as either single use or practice stencil due its low costliness as well as being easy to cut through with precision if necessary.
The best material depends on what you’re using the stencil for, how long you want it to last and how intricate your design is. Each type has its own benefits that will work well in different situations so there are lots of options when choosing materials for laser cutting stencils.
Benefits of Mylar for Stencils
Because of its excellent durability and versatility, Mylar has become the best material for creating stencils. One good thing about Mylar is that it can bounce back; this means that it can be used severally without wearing out thus making it perfect for reusable stenciling. It is flexible enough to adhere on different surfaces hence ensuring even application even on bumpy grounds. Furthermore, this product does not stretch or warp while being used with solvents or paints so the cuts will remain accurate over long periods of time. Also, cleaning is easy since paints and residues can be wiped off quickly without damaging the stencil itself thereby saving more on maintenance costs too. In general strength combined with flexibility plus reliability sums up what Mylar represents which makes it an invaluable resource in any hobbyist’s or professional’s arsenal when working with stencils.
Exploring Different Stencil Materials
To effectively look into various stencil materials, one should consider their unique benefits as well as appropriate uses. Cardstock is cheap and easy to cut which makes it suitable for short-term projects or those done once in a while; this could also apply if you are new at using them so want something simple before moving onto harder ones like mylars etcetera… Another material that can be used several times over many surfaces without losing shape would be adhesive backed vinyl sheets; these come pre-cut with designs therefore all one needs do peel off backing stick onto desired area – very good especially where there is need for intricate detail work such as logos badges names dates among others.
Reusable Stencil Options
With regard to reusable stencil options, three of the best recommendations, according to leading websites are:
- Mylar Stencils: Mylar stencils are always put on top for durability and flexibility; they can be used over and over again without losing its shape or accuracy. They are also resistant to solvents as well as paints which makes them ideal for detailed projects that need repetitive use.
- Polyester Film Stencils: Like Mylar, polyester film stencils too have long life; besides being tear proof, it can take heavy usage and is easy to clean thus suitable both for simple or complex designs.
- Silkscreen Stencils: Silk screen combines durability with intricate detail handling ability thereby becoming highly reusable as well as giving professional precision. They come in handy especially where fine points are required frequently over an extended period.
All these materials have unique advantages which suit different types of stencil projects ensuring dependable outcomes whenever utilized.
How to Use Laser Cut Stencils?
To achieve detailed and accurate designs using laser cut stencils, do the following:
- Surface Preparation: The first step is to clean up and dry the surface where you want to stick your stencil. This ensures good adhesion between paint and substrate.
- Stencil Placement: Make sure that you secure your stencil with adhesive spray or painter’s tape. It should be tightly fixed so that no paint seeps through undesired areas.
- Paint Application: Spray paint, brush or roller can be used for this step. Paint over the stencil gently by applying multiple thin coats – it helps prevent bleeding of excess paint beneath edges of a stencil.
- Stencil Removal: Remove the stencil carefully while paint is still wet; otherwise, you might smear it!
-
Cleaning Stencils: Clean immediately after use using solvent appropriate for given type; if not available, then warm water with some soap should do just fine. This will ensure future accuracy in other projects too!
Adhering to these instructions can enable you get clean high quality designs by means of laser cut stencils
Preparing Your Stencil for Use
In order to achieve the best results in a project, proper stencil preparation is necessary. Below are steps on how to ready your stencil for use:
- Choose the Appropriate Material: Opt for a good material for your stencil depending on the project you are undertaking; this could be mylar sheets, vinyl or silkscreen.
- Cut Out The Stencil: If making your own design, make use of a laser cutter as it gives clean and precise cuts. Ensure that you transfer the design correctly and cut it out well.
- Smooth Down Jagged Edges: Examine if there are any rough edges on the stencils after cutting them and smooth them away so that paint does not seep under these areas causing smudging.
- Attach Stencil Firmly: Stick adhesive spray at the backside or painter’s tape across its entire surface area which will hold firmly onto where it was placed while working with other paints around it.
- Try It Out First: Before applying to final work piece, try using sample designs on scrap materials before perfecting technique adjustment or even altering templates themselves incase things don’t seem right.
What this does is set up an environment where success can happen with regard to stenciling professionally.
Using Spray Paint with Stencils
You can make clean and bright designs with only a little work by using spray paint along with stencils. Here are some steps you should take in order to get the best results.
- Choose the Right Spray Paint: Pick out a spray paint that will work well on your surface material. Make sure it is appropriate for what you’re doing (indoor/outdoor) and has the finish you want (matte, glossy, etc.).
- Prepare Your Workspace: Cover your work area with something to catch any overspray that might happen. If there’s not enough airflow in the room wear a mask or do it outside where there is ventilation.
- Secure the Stencil: Place your stencil onto the surface carefully so it doesn’t move around while being sprayed on, then use adhesive spray or painter’s tape to hold it down tight against its target area; this prevents smudging caused by sliding during application.
- Apply the Spray Paint: Hold the can about 6-12 inches away from stencil at a 90 degree angle; apply light even strokes back and forth always moving can side-to-side; don’t hover too long over one spot as this may cause pooling – several thin coats are better than one thick coat.
- Remove the Stencil Carefully: While paint is still wet lift straight up off surface so as not to smear anything; let dry completely before touching or adding more layers.
If followed accordingly, these instructions should result in clean lively design outcomes using spray paint and stencils.
Cleaning and Storing Reusable Stencils
To keep them in good condition for later use, you should properly clean and store your reusable stencils. Maintain them with these steps:
- Rinse Immediately After Use: Once you have finished stenciling, rinse the stencil gently using warm water to remove excess paint. If the stencil has many small areas that could be damaged by rubbing against it with a sponge or brush, use a soft sponge or brush.
- Use Gentle Detergents: If all the paints used are not cleaned away by rinsing alone, mild soap can be applied or a stencil cleaner bought. Chemicals which are strong should be avoided as they may eat up the stencil.
- Dry Completely: Put the stencil flat between paper towels after washing it and lightly press to take away any remaining water. To prevent mold or mildew from growing on it while in storage, make sure that no moisture is left on the stencil when you put it away.
- Store Flat or Hang: Stencils should always be stored flat in a drawer or portfolio but if space is limited then hanging them on hooks will do. Folding or rolling them should not be done because this could cause creases in the paper which would ruin their future usefulness as well as appearance.
By cleaning your stencils correctly and storing them appropriately, you will increase their lifespan and ensure they deliver crisp, clean designs every time they are used.
Where to Find Custom Laser Cut Stencils?
Different places you can get custom laser cut stencils from include:
- Websites: Websites like Amazon, Etsy and specialized stencil shops have many options available for custom made laser cut stencils.
- Local craft stores: Many of these stores offer services to create or direct you to someone who can make a custom stencil for you.
- Printing and Vinyl Cutting Services: Companies that specialize in printing or cutting vinyl usually provide this service as well.
- From the manufacturers themselves: Some companies allow customers to design and order their own personalized stencil directly from their website such as StencilEase or Mylar Shop .
-
Online Communities/Forums: Craft forums and local community groups on social media could give information about suggestions as well as where one may get them customized.
Online Resources for Stencil Templates
If you’re searching for online stencil templates, here are a few of the best websites:
- Stencil Revolution: Stencil Revolution is an internet site that has many different types of stencils in its catalog. The patterns vary from very detailed and complex to simple designs with clean lines. All stencils are made from high-quality, durable Mylar, which means they will work well on walls or canvas, and also for other DIY crafts too. If you can’t find what you’re looking for, Stencil Revolution also takes requests for custom-made stencils designed specifically to fit your needs.
- Stencil Planet: There are so many different types of art out there! That’s why Stencil Planet offers a wide range of styles in their inventory so that every artist can find what they need. With all those choices, whether it be something intricate like lace or just plain circles – this website has got them all covered! Don’t forget about customization options either; if none of these suit your fancy then make up one yourself.
- CraftCuts: Want a personalized stencil? Craft Cuts can help! They offer customizable text and image stencils with various font styles and sizes through their easy-to-use design tool. For those who are short on time or just not feeling creative right now, don’t worry–pre-designed templates are also available.
These resources each have a large number of stencil templates to choose from as well as offering custom services which makes them great places to start when looking for what you need for any project.
Local Shops and Custom Services
To obtain bespoke and premium stencil patterns one can go to local stores. Stores that focus on arts and crafts have a wide range of stencils for different projects. Some examples are Michaels or Joann Fabrics. They usually have everything from simple shapes to intricate patterns and even custom options as well. Also, print shops nearby may offer services where they use more advanced machines capable of cutting out detailed and durable designs for you in the form of a stencil.
Using Cutting Machines like Cricut for Custom Stencils
Efficiently make custom stencils for any project using cutting machines like Cricut which also provide precision while working with them. With these gadgets, it is possible to design various materials such as vinyl cardstock mylar etc., into stencils through specialized software called Cricut Design Space. By uploading or creating within this program oneself can easily adjust dimensions complicatednesses cut settings until achieving perfection thus in terms of size details . The versatility; accuracy make them perfect not only for home decor but also crafting professional uses where quality is vital every time produced. There are many online resources including tutorials tips projects ideas on how best one can use their cricut machine especially when dealing with personalizing items , this could be done by visiting official website such as Cricut.com or other crafting blogs.
Frequently Asked Questions (FAQs)
Q: What materials can be used to create perfect laser cut stencils?
A: Popular materials for laser cut stencils include mylar sheets, card stock, and polyethylene. Mylar sheets, especially 10mil, are favored for their durability, flexibility, and reusability.
Q: How do I choose the right stencil design for my project?
A: Selecting the right stencil design involves considering the purpose of the stencil, the intricacy of the design, and the surface you’ll be applying it to. For example, a large stencil with a mandala pattern works well for wall decor, while simpler designs may be better for scrapbooking or card making.
Q: Can I make my own stencils at home?
A: Yes, you can make your own stencils at home with a laser cutter like Glowforge or Full Spectrum Laser. For DIY stencil creation, you’ll need a vector file of your design and suitable materials like mylar sheet or card stock.
Q: What is the best way to ensure my stencil is reusable?
A: To create reusable stencils, choose durable materials like 10mil mylar. Ensure proper care by cleaning the stencil after each use and storing it flat or rolled to prevent distortion.
Q: How do I use a stencil to paint intricate designs?
A: Secure the stencil to your surface using painter’s tape, and use a stencil brush or spray paint for application. Apply paint in thin layers to avoid bleeding under the stencil and achieve crisp lines.
Q: Where can I find ready-made stencils online?
A: You can find a wide variety of ready-made stencils online from specialized retailers. Check out our custom collections for options ranging from home decor stencils to intricate mandala designs.
Q: What file formats are needed for laser cut stencil designs?
A: For laser cutting stencils, vector file formats like SVG, DXF, or AI are essential. These formats ensure precision cutting. If you only have a PNG, you may need to convert it to a vector format before laser cutting.
Q: How thick should mylar sheets be for stencil making?
A: The standard thickness for reusable mylar stencils is 10mil. This thickness provides a good balance between flexibility and durability, allowing for precise cuts and repeated use.
Q: Can laser-cut stencils be used for wall tile designs?
A: Yes, laser-cut stencils are perfect for creating intricate designs on wall tiles. You can use these stencils with paint or engraving techniques to customize your tiles.
Q: How do I prevent paint from bleeding under the stencil?
A: To prevent bleeding, secure the stencil firmly to the surface, use minimal paint on the brush or sponge, and apply paint in light, even coats. Using a spray adhesive on the underside of the stencil can also help keep edges tight against the surface.