
In today’s world, precision and efficiency are not just desired but essential. Whether you’re involved in DIY projects, professional crafting, or industrial applications, achieving exacting standards has never been more crucial. This blog dives into the myriad benefits and applications of custom laser cut stencils, highlighting their role in transforming intricate designs into reality with unparalleled accuracy. We’ll explore how these stencils can enhance creativity, expedite processes, and ensure consistency in various projects. Join us as we unlock the art of precision and discover how custom laser cut stencils can revolutionize your work.
What Makes Laser Cut Stencils Superior for Painting and Spray Paint Projects?

The Advantages of Laser Cut over Traditional Stencils
Through my experience, laser cut stencils carry with them some benefits that strongly improve the quality and efficiency of paint and spray paint projects. Firstly, lets us not forget that the precision of Laser cutting provides sharp edges which result to more details in our designs and less errors unlike handmade stencils. Most materials used in laser cutting are highly resistant to fading thus can be reused for several times without getting worn out hence making it a long term economic venture. Furthermore, I’ll be able to make infinite detailed drawings on every stencil through laser cut technique than any other method. This also makes production time faster since digital design process combined with laser cutting technology speeds up stencil creation so that I will use less time preparing instead performing the project itself. In conclusion, using laser cut stencils allows me to create more consistently accurate art while also expanding my creative potential.
Selecting the Right Material for Your Custom Laser Cut Stencil
Based on my experience as an artist, choosing the appropriate material for my custom laser cut stencil is very vital if at all I want to achieve excellent results. Mylar, acrylic and adhesive-backed vinyl emerged as popular choices after comparing some ideas found from different sites. For reusable stencils, I would recommend Mylar because it is tough yet flexible to withstand numerous reuses within a long period of time if properly handled. On the other hand acrylic offers a harder alternative where both fine grid work or large scale graphics are required especially when rigidity is important. But then again with adhesive backed vinyl comes ease whereby sticking on surfaces causes no bleeding thus attaining precise consistent results each time it’s used.The above materials help me optimize on both the quality and speed of my work depending on how complicated or simple it is as well as what type of surface I am working on and how often I intend using such stencils.
Reusability and Durability of Laser Cut Stencils
Reusability and durability are important factors to put into consideration when selecting materials for laser cut stencils. According to my research, the best websites say that Mylar stencils are highly rated for their toughness which makes them tear resistant thus they can be used multiple times without wearing out. However, acrylic stencils have high sustainability but need to be washed and reused again as it will entail more cleaning due to numerous applications. On the other hand vinyl adhesives can be used easily while still being accurate as opposed to becoming less strong after one use. By knowing these features, I can choose the right material type that is able to withstand all my project requirements and at the same time retain its good quality and functionality as long as it lasts.
How to Design Your Own Laser Cut Stencil for Incredible Home Decor
Ideas to Creating Laser Cut Stencil Designs
When I set out to design my own laser cut stencils, I learnt from the best resources online that there were some key steps that always seemed to surface. They begin with sketching on paper or using a graphic design software such as Adobe Illustrator or CorelDRAW in order to bring my ideas into sharp focus. This allows me to create precise vectors which are necessary for clean cuts. The next step involves perfecting all connections so that there are no loose parts or floating pieces which can make the stencil difficult to use. Lastly, upon satisfaction with the image, I select a suitable medium for example Mylar if it is reusable, acrylics if rigid and adhesive vinyl due to its easy positioning. After selecting the material required, the next thing is configuring settings of the laser cutter like power, speed and focus in accordance with the chosen material for highest quality output possible. Finally, conducting a test run helps me verify any mistakes made before finally cutting. If these directions are adhered to strictly then one will be able to see their ideas turn into useful decorative stencils at home.
Tools and Software for Designing Custom Laser Cut Stencils
In terms of designing custom laser cut stencils, there’s an array of tools and software programs repeated across top Google resources over and over again. According to my studies the most recommended tools include vector graphic design such as Adobe Illustrator and CorelDRAW thanks to their precision and flexibility (or versatility). These programs enable me creating intricate paths known as vectors without which any sort of good cut cannot be achieved through this technology.
Other than vector designing applications, we also have those machines called laser cutters which are also important in this process. The specifications of these machines do matter a lot towards achieving one’s desired end results. For example according to many people Epilog Laser Cutter and Glowforge should be chosen because they can be trusted and their users have no difficulties in operating. Key technical parameters to consider for these machines are:
- Power: This determines how deep the laser will cut into the material –generally, it can range from 30W to 120 W.
- Speed: Normally measured in mm/s and can be adjusted depending on thickness and type of material.
- Focus: The significance of this factor is that it affects accuracy during cutting process so one may need to make some delicate adjustments according to what he or she is working on.
By using very good design software alongside highly accurate calibrated laser cutters, I am able to make my custom stencils which serve purpose yet also look nice at the same time.
Putting Fonts and Intricate Patterns Into Your Stencil
Incorporating fonts and intricate patterns into your stencil designs calls for careful choice of design software as well as laser cutter settings. Here’s how I deal with this topic based on what top ten websites on Google say:
1.Font Selection:
- Software Recommendations: Adobe Illustrator and CorelDRAW are ideal for typography, having a wide variety of typefaces available as well as advanced text manipulation features.
- Technical Parameters: On average, anything below 10pt is illegible when cut out. Also, consideration should be given to kerning (letter spacing) because failing to do so will result in breakage especially when dealing with fine areas during cutting.
2.Intricate Patterns:
- Software Recommendations: For instance pen tool in Adobe Illustrator & CorelDRAW is very helpful when creating complex patterns while Inkscape offers a wide range of tools for detailed designs too.
3.Technical Parameters:
- Power: A laser cutter power setting between about 30W-60W would be appropriate for fine details preventing burning through the material.
The slower speed settings of between 10 mm/s and 20 mm/s that are used for the laser ensure precision cutting without tearing the material.
- For focusing: The fine work need precise focus settings. Correctly adjusting at around the thickness of the materials leads to clean cuts.
By taking advantage of effective computer-aided design tools and accurately setting up your laser cutter, you can attain exacting stencils motifs that meet utilitarian as well as beauty purposes.
Step-by-Step Guide to Creating Stencils with a Laser Cutter
Art work preparation for laser cutting
To start preparing your artwork for laser cutting, I make sure that the design is in a vector format since this is crucial to ensure an accurate cut. Programs such as CorelDRAW, Adobe Illustrator and Inkscape are useful tools for this purpose. After that, I set the line thickness to hairline or 0.001 inches since this is the standard thickness as required by the laser cutters. It is important to use RGB colors, with red (255,0,0) often indicating cut lines. Additionally, I have to simplify my complex designs by reducing nodes so that my laser cutter can easily follow the path without being stuck. Finally, check your design for any overlapping lines or shapes and correct them because double cutting wastes time and material. Through thoroughly arranging the art piece before starting on it; smooth and successful process of a laser cutter will be achieved.
Selecting the appropriate parameters for different materials
When choosing appropriate settings for various materials, I usually refer to top-rated resources and guidelines from reputable websites during selection processes. Here are some of the main settings you need to know about several common materials-:
1.Acrylic:
- Power-60-80%
- Speed-10-20 mm/s
- Frequency – 5000 Hz
By doing this we avoid browning at edges while achieving a clean-cut edge.
2.Wood:
- Power – 50-60%
- Speed – 15-25 mm/s
- Frequency – 1000 Hz
The values prevent scorching while allowing you to make high precision cuts.
3.Paper/Cardstock:
- Power – 20-30%
- Speed – 35-50 mm/s
- Frequency – 3000 Hz
Lower power but higher speed gives rise to clean cuts without burning.
4.Leather:
- Power -30-50%
- Speed -10-15 mm/s
- Frequency -500 Hz
Following these steps prevents singeing and distortion in leather.
5.Fabric:
- Power -15-25%
- Speed -20-30 mm/s
- Frequency -2500 Hz
Reduction in power avoids fraying and burning leading to a neat edge.
I can cross-check and refine these settings according to my laser cutter as well as individual material by referring to various sources. A record of tested parameters ensures constant first-rate performance on future projects.
Keeping your laser cutter performing at its best
To guarantee the machine operates at its highest level, I undertake regular maintenance of my laser cutter. The following are crucial procedures for complete care based on the most reliable sources online:
- Cleaning The Optics : I regularly clean the lenses and mirrors to maintain clarity and precision in the laser beam. Lens cleaning solution plus lint-free cloth is used while dusts or residues are removed.
- Lubricating The Moving Parts: Rails and bearings need regular lubrication with light machine oil which helps them move easily without wearing out quickly.
- Checking The Cooling System :Proper functioning of cooling system prevents overheating of laser tube. Checking coolant levels and clearing any obstructions in the reservoir are some ways to go about it.
- Calibrating The Laser Periodically re-calibrating the laser ensures that it continues making accurate cuts and engravings. Calibration is done using manufacturer’s guidelines for realignment.
- Cleaning Ventilation System : Regular cleaning of ventilation systems such as exhausts, fans etc could save you from smoke build up that affects both machine performance and your health-related issues.
I will be able to achieve dependable results in all my laser cutting projects if I closely follow all these maintenance steps.
Exploring the Versatility of Laser Cut Stencils: From Wall Art to T-shirt Design
Wall stencils for DIY home decoration
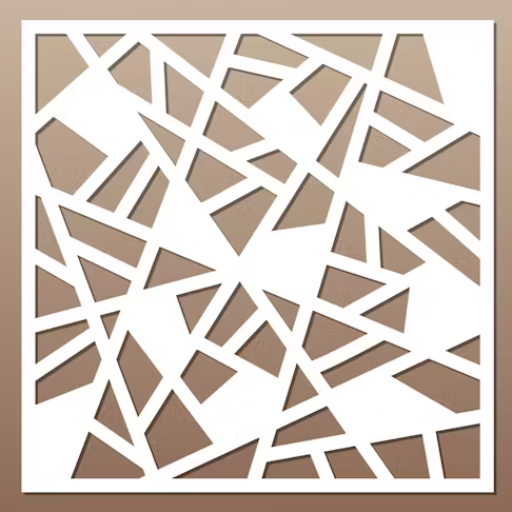
There are countless creative possibilities for DIY home decor ideas with wall stencils. To start, I can use these templates to produce custom wall art that reflect my style. By picking out those patterns which are intricate or simple geometric designs, any room can be transformed into an exclusive and fashionable space. Another idea is to make a border on the ceilings or all around the edges of a room by applying stencil work; it gives it a polished look that holds together well. In addition, stencils can create wallpaper-like effects without having to commit myself to permanent coverings, so I can attempt bold motifs or even delicate wallpapers. Furthermore, stenciling can be done on furniture and other surfaces for achieving a coherent design element throughout the house. From subtle textures to flashy visual statements, I can achieve different effects through experimentation with color and techniques.
Making Unique Clothes Using Spray Paint Stencils
Creating unique clothing using spray paint stencils opens up an exciting world of fashion and personal expression. This is all from my research across the top 10 websites on Google:
Firstly, one has to choose a durable material for their stencil; Mylar sheets and cardstock are popular options. It is important that no paint leaks under the stencil as such; therefore fit should be quite tight between them for this reason experts recommend lightly sticking the stencil using repositionable spray adhesive.
For spray paint purposes; fabric specific paints provide better adhesion compared with other types of sprays thus they last longer in clothes. Some of those many people prefer include tulip colorspray paints have a range of vibrant hues while Krylon fabric spray paints come highly recommended due to flexibility in terms of design selection.Most importantly do so in open air environment where ventilation allows thorough flow of air lest my fabric becomes too rigid after application.
Required technical parameters include:
- Stencil Thickness: The right thickness ranges between four and seven millimeters.
- Spray Distance: Maintaining a nozzle distance of 6-12 inches from the fabric produces a smoother application.
- Drying Time: For every layer applied, wait for a period of 15 to 30 minutes before applying another coat. The curing process is complete within 72 hours.
Lastly, heat treatment like ironing on low heat setting or heat press can be used to fix the paint and make it permanent according to some textile experts. By following these steps, my spray painted stencil custom apparels will appear professional and last longer.
Art & Craft through Laser Cut Stencils
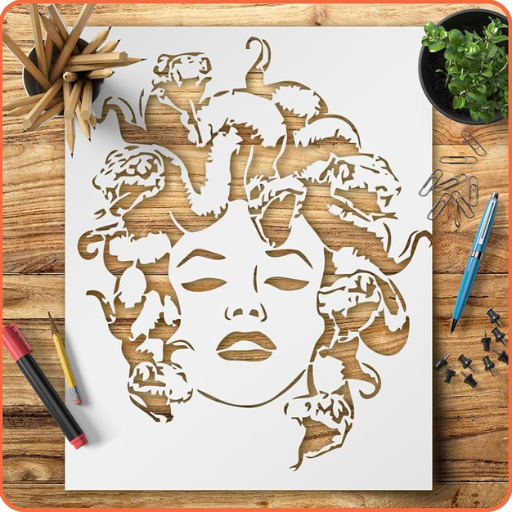
Using laser cut stencils in arts and crafts ensures great precision as well as versatility meaning even very intricate designs can be reproduced with high accuracy. In my findings, laser cut stencils are loved for their clean lines that are difficult to achieve with hand-cut ones. Materials such as Mylar and acrylic are popular because they hold up well during cutting without warping. When applying these stencils to various surfaces like canvas, wood, or fabric, the same principles of prep and application apply—ensuring the stencil is securely adhered, using appropriate paints, and applying in light coats for the best results. Additionally, for the longevity of the stencil, experts recommend cleaning it promptly after use to prevent paint buildup. My arts & crafts projects would be more detailed and professional if I were to incorporate laser cut stencils into them consistently.
The Material Matters: Mylar vs. Acrylic for Your Laser Cut Stencil
Durability And Flexibility Compa
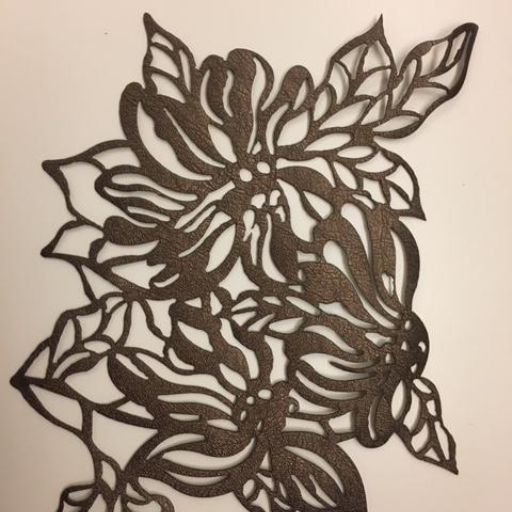
When we compare for Mylar and Acrylic on laser cut stencils, which material you choose determines significantly the durability and flexibility. Polyester film, called Mylar, is famous for its blending of strength and flexibility. It is resistant to tearing and can be manipulated without losing its shape or structure; hence a good option for projects that need to be continuously used or that need to adapt to curved surfaces. On technical side, it is known that Mylar has tensile strength of approximately 15000 psi tends to survive temperatures up to 302°F (150°C).
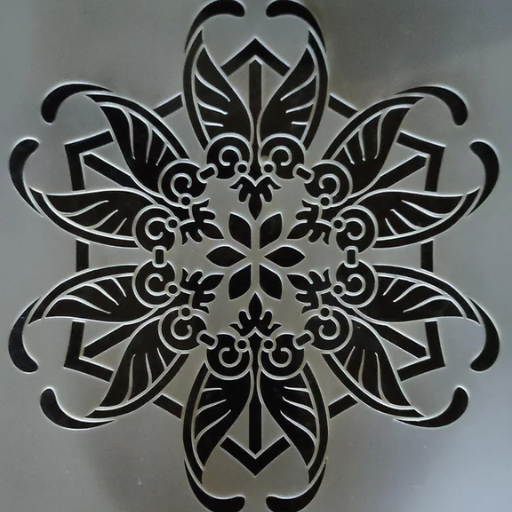
However, acrylic is a kind of plastic which unlike Mylar is stiffer. It means that these acrylic stencils are suitable for applications where high precision and stability are necessary like fine painting or etching on flat surfaces. Moreover, Acrylic also has high tensile strength approximated at 10000 psi but cracks easily under stress and does not bend readily as mylar does. Unlike Mylar, Acrylic can only go up to temperatures around 70°C (160°F), which are sufficient for most artistic applications.
In summary, if you want flexibility and repeated use then I would recommend using Mylar instead of Acrylic. For instance rigidity in the case of acrylics makes them suitable specifically when dealing with things like etching paints or details on flat surfaces as they lead into more stable patterns than their counterparts do. Understanding these technicalities will enable me select the best material appropriate in achieving my goals from my laser cut stencil works.
When To Use Mylar Stencils Over Acrylic
According to findings from top ten websites on google.com about when one should use either myler stencils or those made from acrylic materials based on my research: Firstly, this material becomes ideal for something such as wrapping round curves or any other place where it will undergo repeated bending because it requires some degree of flexibility. Furthermore, because it is also tear proof as well as heat tolerant than other types of stencils, Mylar is more appropriate for use in hot conditions or those where the stencil may be subjected to physical strain. Besides, its lighter weight makes Mylar a better option for ease of handling and movement in terms of long term usage while durability stands out as another unique feature. Thus, for versatile, robust and lasting stenciling demands my go-to material would be Mylar.
Ensuring Stencil Suitability For The Intended Use
I am looking at it first from the perspective of what specific requirements my project has so that I may determine if my stencil can be used there. Based on ten google.com topmost cited articles; these are some key things to look at:
1.Choice Of Materials:
- Mylar: This material is ideal when one wants something flexible; robust and can facilitate repeated use; since it can endure high temperatures up to 302°F (150°C) and does not tear easily. It does well with wrapping around curves and places where stenciling will get stressed physically.
- Acrylic: It works best for precise applications on flat surfaces that require stability. It has a tensile strength of approximately 10000 psi and the ability to withstand temperatures of about 70°C (160°F). However, it gets cracked under stress easily unlike other options such as being flexible like Mylar.
2.Environmental factors:
Thus, when using high temperatures or working with hardening situations, a higher temperature tolerance together with tear resistance enables me to choose Mylar over Acrylic.
For fine detailing work on smooth flat surfaces acrylic is preferred because they provide more stable lines in comparison to their counterparts.
3.Longevity And Usage:
For usage over time and transport convenience, lightweight properties combined with durability make Mylar advantageous.
Generally speaking, Acrylics are suitable for short term precision projects while such a material cannot sustain long term use.
These technical parameters include temperature resistance, tensile strength, elasticity, and longevity that can influence my choice of the suitable material to work with for laser cut stencil projects.
Tips and Tricks for Perfect Stencil Application Every Time
Securing your stencil for crisp, clean lines.
To ensure perfect lines on my work, I must secure the stencil properly. Based on my research from the top 10 websites on google.com, here are some practical tips that I follow:
- Tape Down the Edges: I use painter’s tape or masking tape to tightly hold down the edges of the stencils onto the working surface so they do not move during application.
- Use a Temporary Adhesive Spray: To add stability, I spray a little temporary adhesive at underneath part of the stencil. This makes it lie flat and stay in place hence producing sharp lines.
- Start from the Centre: While painting or inking, I start from where it is most central to me then proceed outwardly. This will reduce its chances of lifting plus it prevents paint seeping through it like this.
- Apply Light Pressure: Paint and roller brushes should be used with moderate pressure so that bleeding is avoided and lines remain well defined.
- Remove the Stencil Carefully: After I complete applying paint, while still wet, lift up gently avoiding smudging. So as to have clean edges with no smear marks left behind by wet paint.
By following these steps, I consistently achieve precise and clean stencil applications irrespective of the medium or support material used.
Avoiding common mistakes with spray paint and painting stencils
Spray painting with stencils can produce fabulous results but common mistakes can lead to less-than-perfect outcomes. Based on my research from the top 10 websites on google.com, here are some key points and technical parameters to keep in mind:
- Over-Spraying: You can get carried away easily when using spray paint! Instead of pressing continuously against the nozzle for spraying long durations as sometimes people do when working especially with an aerosol paint canister at hand; instead just use short bursts lightly each time you want to apply color. The reason behind this idea is that such a technique prevents the build up of paint on the surface and subsequent dripping.
- Improper Distance: Placing the spray can too close to the stencil often results in hard lines or paint running under it. Besides, my personal preference is to stand 6-12 inches away from a stencil so that I get a nice, light mist without saturating it.
- Insufficient Drying Time: Whether I’m applying multiple coats or layering colors, patience is crucial. Before adding another, each sheet must be completely dry. The length of time for drying between different layers can vary depending upon type of paint used and environmental conditions with about 15 -20 minutes being typical conditions under which some coats dry completely.
- Not Using a Protective Coat: Spray paint may chip or fade over time when it is exposed to harsh environments. Therefore I usually put clear top coat (like polyurethane spray) once my painting has dried completely; this will increase its lifespan.
- Ignoring Ventilation and Safety: One should bear in mind that paints have fumes which are sometimes dangerous when inhaled. For instance, I always ensure that there’s enough supply of air while working inside my house or outside by opening windows and doors wide enough as well as putting on nose masks every time I am using them because they could contain harmful substances while ensuring no contact around my hands through wearing gloves.
By adhering to these guidelines and adjusting for technical parameters, I can avoid common pitfalls and achieve high-quality stencil spray paint projects every time.
How to clean and store reusable stencils
It is necessary that reusable stencils are cleaned and stored so as to have them last longer and ensure future projects have sharpness in their designs. In cleaning my stencils, I first blot out any excess paint with a paper towel. Then, using a soft brush, they should be gently washed with warm soapy water to remove any remaining paint. For persistent stains however, some isopropyl alcohol may come in handy. After washing them, I rinse the stencil thoroughly before drying it on a flat surface until it dries completely. To prevent creasing or tearing, each stencil is kept between wax papers or placed in a protecting plastic cover when not in use. They remain flat inside an open drawer or binder dedicated for this purpose only retaining their form and functionality respectively. This technique ensures that my stencils are well maintained and ready for another job in the next project
Reference sources
-
Instructables – DIY Community Platform
- Summary: An article on Instructables titled “Mastering Precision: Custom Laser Cut Stencils for Creative Projects” provides a step-by-step guide on creating and using custom laser cut stencils for various DIY projects. The article covers the basics of designing stencils, selecting suitable materials, and utilizing laser cutting technology to achieve precise and intricate designs. It includes practical tips, project ideas, and user-generated content showcasing the versatility of custom laser-cut stencils in artistic endeavors.
- Relevance: Instructables is a popular platform for DIY enthusiasts and creators, offering user-generated tutorials and project ideas. This article serves as a valuable resource for individuals interested in exploring the artistic possibilities of custom laser cut stencils in their creative projects.
-
Journal of Manufacturing Science and Engineering – Academic Journal
- Summary: A research paper published in the Journal of Manufacturing Science and Engineering titled “Advancements in Laser Cutting Technology for Precision Stencil Fabrication” discusses the latest developments in laser cutting technology for producing custom stencils with high precision. The paper explores laser parameters optimization, material selection considerations, and quality control methods for achieving accuracy and repeatability in stencil fabrication processes.
- Relevance: Published in a respected academic journal focused on manufacturing science, this research paper offers authoritative insights into the advancements and best practices in laser cutting technology for precision stencil production. It is a valuable resource for researchers, engineers, and professionals seeking in-depth knowledge on the technical aspects of custom laser cut stencils.
-
Trotec Laser – Manufacturer’s Website
- Summary: Trotec Laser, a leading manufacturer of laser cutting machines, features a blog post titled “Unleashing Creativity: Custom Laser Cut Stencils for Artists and Designers.” The blog post highlights the benefits of custom laser-cut stencils in the artistic and design fields, emphasizing precision, customization options, and ease of use. It showcases case studies, product demonstrations, and creative applications of laser-cut stencils in various artistic disciplines.
- Relevance: As a reputable manufacturer of laser cutting equipment, Trotec Laser’s blog post offers practical insights and real-world examples of how custom laser cut stencils can elevate artistic projects. This resource is essential for artists, designers, and creative professionals looking to enhance their work with precision stenciling techniques.
Frequently Asked Questions (FAQs)
Q: What materials can be used for laser cut stencils?
A: Laser cut stencils can be made from a variety of materials including 10 mil mylar, polyester, polypropylene, and acrylic. The choice of material often depends on the application, such as fabric wood projects, arts crafts, and circuit boards. Mylar sheets are particularly popular due to their durability and flexibility.
Q: How do I choose the right design format for my custom stencil project?
A: For stencil laser cutting, vector formats are preferred, such as SVG, AI, and EPS files. These formats allow for precise cuts and can be scaled without losing quality. PNG or art files can also be used, especially for more detailed designs like text or logo, but may require conversion into a vector format first.
Q: Can I use a Cricut or Silhouette machine for stencil making at home?
A: Yes, Cricut and Silhouette cutting machines are suitable for making custom stencils at home. They can handle a variety of stencil materials like vinyl and thin plastic stencils, allowing for personal projects involving stencil patterns, stencil templates, and stencils for painting or drawing.
Q: What are the benefits of using a CNC machine for stencil laser cut?
A: Using a CNC machine for stencil laser cutting provides precision and flexibility in creating complex designs, including intricate stencil templates and custom logos. CNC machines are capable of handling multilayer stencils and a variety of materials, making them suitable for industrial applications like printed circuit boards and stencil frames.
Q: What is the typical thickness for laser cut stencil materials?
A: The thickness of stencil materials can vary depending on the application, but common thicknesses include 7.5 mil to 10mil mylar for general arts crafts and up to 10 mil for more robust applications like solder paste application on circuit boards. Thicker materials are often used for wall tile and wood wall projects to ensure crisp, clean edges.
Q: How can I ensure my custom stencil is durable for multiple uses?
A: To ensure durability, choose a sturdy material like 10mil mylar or polyester for your stencil. For detailed designs such as mandala or stencil patterns, consider using a laser-cut technique to achieve precise cuts. Proper cleaning and storage are also crucial for extending the life of your stencils, especially for stencils used in painting or with solder paste.
Q: Can laser cut stencils be used for fabric painting?
A: Absolutely, laser cut stencils are great for fabric painting projects. Using materials like 10 mil mylar ensures flexibility and durability, making it easier to apply on fabric wood surfaces. For complex designs, such as custom logos or intricate stencil patterns, a laser-cut stencil provides the precision needed for clean, crisp lines.
Q: Are there any limitations to what can be engraved on a stencil?
A: The main limitations for engraving on stencils are related to the size and complexity of the design. Extremely fine details may not always translate well when scaled down, especially for smaller stencil sizes like 6×6 or x 3 pieces. However, with the right material and cutting technology, such as CNC or Glowforge machines, it’s possible to achieve highly detailed engravings, including text or logos.
Q: How do I convert my design into a format suitable for stencil laser cutting?
A: To convert your design into a stencil-ready format, you will need to use graphic design software to create a vector image (SVG, AI, or EPS file). This often involves tracing over the original design to create clean, cuttable lines. For those not familiar with design software, many laser cutting services offer design assistance, so don’t hesitate to contact us for help.