
Cork is one of the most versatile materials on earth, with its abundant uses, sustainability, durability, and unique aesthetic qualities. Through the precision and control of the laser cutting/engraving process, cork can be transformed into projects with endless uses, from functional articles to decorative items. This guide aims to help you master the art of combining cork and lasers, including cork selection, laser settings, project techniques, tips, and ideas. With the right material and cutting tools, the lasers will do what lasers do best: cut and engrave. Before you know it, you’ll have dozens of new projects to think about.
Understanding Laser Cutting Cork: A Comprehensive Description
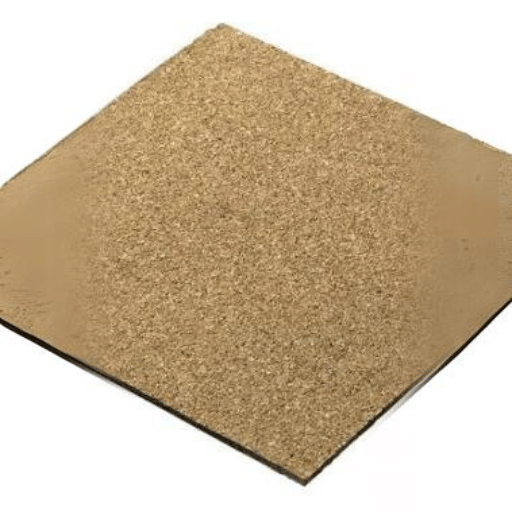
Laser cutting creates a clean edge without much damage to cork due to the specific wavelength of the laser cutting. From the list, you are able to deduce that laser cutting involves the use of a laser to slice through the cork with precision. This makes it possible to create sophisticated designs and shapes. Laser cutters usually work with CO2 lasers, which are very effective for producing clean edges and details. The correct type of cork that is suitable for laser cutting is one that is thick yet soft – either in the form of sheets of natural cork or cork composite materials. The most essential factor when planning to laser cut cork is figuring out the thickness of the cork and its density.
Laser settings had to be adjusted for the best effect: the power, speed and frequency depend on the type and thickness of the cork. Too much power, and the cork is burned or charred; too little power, and the material is not cut. The use of an air assist feature also helps to clean the cutting area and reduce fire hazards.
Equally important is taking steps to avoid cutting yourself. Ensuring that the laser-cutting area is well-ventilated to prevent inhalation of fumes, which contain smoke and particulate matter, and wearing appropriate laser work eyewear are both important safety measures.
In conclusion, having this knowledge about laser cutting cork helps in creating a precise, quality and beautiful cork products, from coasters to wall art to complex architectonic models and functional items.
What is Laser Cutting and How Does it Apply to Cork?
Laser cutting is a precision technology that uses a beam of light from a CO2 laser; the laser cuts and engraves the material by melting, vaporising and removing the material. Laser cutting machineis a computer numerical controlled machining equipment that combines computer numerical control (CNC) and laser cutting technology. Through the computer numerical control technology, it can convert two-dimensional or three-dimensional digital drawing file into the desired contour knife through commanding, so as to achieve high-precision, high-quality cutting. The laser cutter is cutting different types of materials with laser cutting machineLaser cutting machine has many application value because it can realise the narrow-gauge assembly, and the cutting edge is very fine. Also, laser cutting can save material resources, and there is almost no waste of the material, so laser cutting machine has wide application in manufacturing, clothing etc.
In applying the laser cutting technique for cork, there are several technical parameters involved:
- Laser Power: For cork cutting, generally the laser power setting required is between 30 to 50 watts depending on the thickness of cork board. For engraving, generally low power setting between 10 to 15 watts will work properly.
- Cutting Speed: Although the cork is soft, it is still important the laser moves at an optimal speed so it can cut through without damaging the cork surface by fusing the material. Depending on the thickness, the laser can move at high speeds. For a 1/8 inch (3 mm) thick cork sheet, the best cutting speed would be around 20 to 30 mm/s. With thicker materials, it is better to go slower to ensure a complete cut.
- Frequency Settings: This setting controls the frequency (the number of laser pulses per inch) of the laser. A good setting for smooth cuts might be in the 500-1000 Hz range and should help to minimise burnt edges.
- Air Assist: A constant stream of air is blown over the cut area to clear smoke and debris. This reduces the chance of fire and keeps the area cleaner. It also improves cut quality by keeping the cut area clear.
- And scope of field: using a macro lens – often an optical lens of focal length between 1.5 and 2 inches – to provide the field of focus and sharpness of cut that’s so important when dealing with small details.
- Materials: The wood being cut needs to be soft. This is why a 1⁄16-inch (1.5 mm) to 1⁄4-inch (6 mm) sheet of cork or corkboard is frequently used when cutting materials such as foamcore. This material has a uniform thickness, making all the cuts consistent. Natural cork is preferred over manmade composites because it tends to catch fire less than the synthetics.
Once one calibrates all these parameters right, a laser cutter could be used to make any kind of product out of cork, be it functional (say, gaskets or seals) or creative (a coaster or fancy wall decoration). To understand the possibilities of laser cutting equipment is to find novel ways in which cork can be used in one’s project.
The Unique Properties of Cork as a Laser Cutting Material
That’s because cork is particularly well-suited to laser cutting. It’s a natural material, harvested predominantly from the bark of the cork oak, and as such it has a different internal structure to more common industrial materials. That structure imparts some particularly desirable qualities:
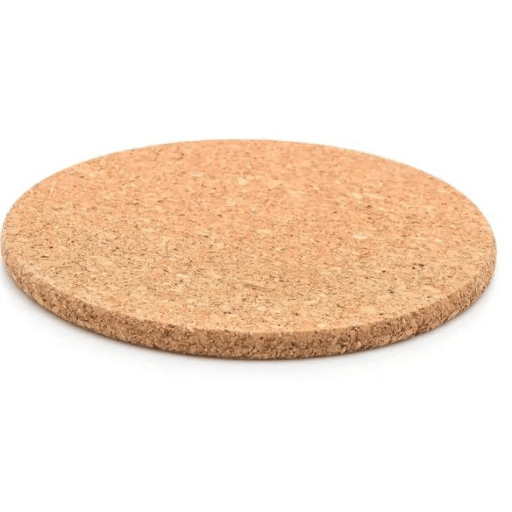
- Light and durable: Cork’s cell structure is composed mostly of air-filled compartments, making it lighter than other woods while still strong enough to absorb repetitive impacts without deforming. This cell structure makes it the ideal choice for applications such as gasket rubber and coasters.
- Resistance To Heat: Because of its very high resistance to heat, cork does not char or burn easily. This helps to make sure that the laser cutting process is not obscured.
- Natural insulator: Cork’s natural insulating properties make it suitable for use in applications where thermal or acoustic insulation is a necessary component. This property also means that it doesn’t transfer heat when the laser is cutting it, which helps to retain the integrity of the material.
- Flexibility and compressibility The material properties of cork, which are both flexible and compressible, make it possible to achieve the precision and accuracy required for delicate designs or intricate structures.
- Biodegradable and sustainable: Thanks to being partially biodegradable, it is also a sustainable material so can be harvested without affecting the tree.
- Low density: The lower density of cork means the laser cutting can be done faster, within the structure of the cork. This translates to efficiency – and in high-speed manufacturing, it is all about efficiency.
Corresponding Technical Parameters:
- Laser power: Laser power of 30W-50W is normally sufficient for cork. This gives just enough energy to cut through the material without burning or charring.
- Cutting Speed: The proper cutting speeds for cork is 0.5 to 1 inch/second (12.7 to 25.4 mm/s). Slower speeds can be better for thicker cork so as to insure clear straight and complete cuts from the cork material.
- Frequency: To cut without burning the edge, a frequency between 500 to 1000 Hz is a good starting point. Coarse edges can be smoothed by lowering the frequency. Higher frequencies enable more precise control over the laser pulses.
- Air Assist: Keeps your cut clean during cutting with small bursts of air blowing away smoke and debris as you cut. Reduces fire risk and ensures a clean finish.
- Focus and lens: a lens with a focal length of 1.5 to 2 inches helps focus the light sharply, so you can see close up for more detail. This will help you create clean, precise cuts. And that’s how you put together your cutting tool.
- Material Thickness: For best results, use uniform sheets of cork with a thickness of from 1/16 inch (1.5 mm) to 1/4 inch (6 mm). Thinner sheets are easily cut cleanly. You can achieve good results with an electric saw or a dowel rod with a sharpened point. Thicker sheets may require adjustments of other settings.
Once you understand what these properties and technical parameters are, you can tailor your cutting programme to get the best possible cork results.
The Evolution of Laser Cutting Cork in the Manufacturing Industry
Since the invention of laser cutting technology, it has gradually become an essential equipment for cutting a lot of materials in manufacturing industry. Without a doubt, laser technology undoubtedly improved the product quality and production efficiency greatly. As the development of the cutting technique on cork, the laser cutter can offer manufacturers high precision and speedy cutting. Although cork cutting was originally a labor‐intensive work, which causes uneven edges, it has been greatly improved by the arrival of laser cutting now.
Early laser cutters, limited by both laser wattage and precision, did not work well with relatively soft materials such as cork. However, better control over the laser power and frequency, combined with the availability of specialised lenses, have diminished these problems. Modern CO₂ lasers provide the proper power-to-precision balance needed to yield clean and efficient cutting of cork.
Laser power, cutting speed, frequency settings and air assist are all better now:
- Laser Power: 30W TO 50W: To perform cork cutting using a laser successfully and with excellent results, the recommended range of laser power is between 30W to 50W. This power setting has been established because it provides adequate amount of energy to penetrate the cork, but not enough to burn and char it.
- Cutting Speed: Cut between 0.5 to 1 inch/second (12.7 to 25.4 mm/s) for clean cuts. Slower speeds are recommended for thicker corks.
- Frequency Setting: The laser is set to a frequency of 500-1000 Hz to avoid the risk of burning. This results in much smoother edges and finer details in the scans.
- Air assist: Using air assist during laser cutting prevents the cut from burning and smoke and debris accumulating, which makes the cork finish more aesthetically pleasing and removes the risk of fire.
- Focus and Lens: A focal lens with a length of from 1.5 to 2 inches is important to maintain the focus, to make it possible to work only with a thin layer of focus and so you can work with more detail and higher precision.
- Material Thickness: cork cut as uniform sheets within a thickness of 1/16 inch (1.5 mm) to 1/4 inch (6 mm) is ideal. Thinner sheets cut cleaner, while thicker sheets might require adjustments elsewhere.
As a result, laser cutting has become an increasingly important technology for cork manufacturers, who can use the precision of lasers to create intricate and complex products that were previously impossible, or at the very least very difficult, to produce using mechanical approaches. This evolution has made the use of cork more efficient, less costly and higher in quality, which is bound to foster the development of novel cork products and applications.
Choosing the Right Laser Cutter for Cork
What are the main features to look for in a laser cutter for the cork and how making the right decision will affect the performance? First of all, power is the most important feature for any laser cutter. For the cork, power should be in the range from 40 to 60 watts with CO2 laser. The second important aspect is the size of cutting area, it should be selected taking into account your cutting needs. It helps a lot to work with various sized sheets.
Then comes the speed and accuracy of the laser cutter itself. DPI (dots per inch) and variable speed settings for the cutter will aid in programming finer detail. An air assist feature is also useful to keep debris away from the cutting area and minimise the appearance of burn marks.
Another consideration is the software included with the laser cutter and its user interface. Look for models with user-friendly software and self-contained file formats that you can export from industry-standard graphics packages, such as Adobe Illustrator or CorelDRAW. An auto-focus feature will also improve the accuracy and ease of use, helping to put novice users at ease.
Lastly, assess the manufacturer’s commitment to durability and support services, such as access to customer service or parts supply, so that you’ll know exactly where to turn should you encounter any problems down the road. Epilog, Trotec and Glowforge are good examples of trusted brands with proven track records in manufacturing laser cutters and providing outstanding customer service.
To summarize, power, precision, ease of use and reliable support will be essential for a laser cutter that is best-suited to the demands of cork, whether amateur or professional.
Key Features to Look for in a Laser Cutter for Cork Sheets
Based on the information given, to find the main features of a laser cutter that’s suitable for cork sheets and also available in top industry websites, it is important to filter away all extra information and give importance to the primary points mentioned below:
1.Power:
- Laser Type: CO2 laser
- Wattage: Minimum 30W, with a preference for 40W-60W for deeper cuts and faster operation.
2.Precision and Speed:
- DPI (Dots Per Inch): At least 1000 DPI for fine detail work.
- Speed: Variable speed 1-100% to suit materials and cutting depth
3.Air Assist:
- Feature: (A basic air assist, a crucial built-in feature, sprays the cutting area with compressed air to keep it free of debris, thus reducing the number of burn marks.)
4.Software Compatibility and User Interface:
- Software: Compatibility with industry-standard graphic design software such as Adobe Illustrator and CorelDRAW.
- User Interface: An interface with auto-focus for material setup ease and accuracy.
5.Durability and Manufacturer Support:
- Brands: Epilog, Trotec and Glowforge are three manufacturers with a history of making high-quality machines and good service, so I would stick with them.
- Support: Make sure proper customer support services are available and easily accessible and that spare parts are easy to obtain.
These attributes will equip you to select a laser that delivers a well-balanced mix of performance, tight draftsmanship, ease of use, and continuing support – exactly what cork sheet needs.
Comparing Laser Cutters: Which is Best Suited for Engraving Cork?
After reading up on the top 10 laser cutters for engraving cork on Google, these were the models that stood out the most in terms of technicality and compatibility:
Epilog Zing 24:
- Laser Type: CO2
- Wattage: 30W-60W
- DPI: Up to 1000 DPI
- Speed: Variable up to 100%
- Air Assist: Built-in
- Software Compatibility: Adobe Illustrator, CorelDRAW
- User Interface: Easy-to-use with auto-focus
- Durability: High-quality build with excellent support
Trotec Speedy 100:
- Laser Type: CO2
- Wattage: 40W-60W
- DPI: Up to 1000 DPI
- Speed: Variable up to 100%
- Air Assist: Integrated system
- Software Compatibility: Trotec JobControl, Adobe Illustrator
- User Interface: User-friendly with auto-focus capabilities
- Durability: Renowned for reliability and robust customer support
Glowforge Pro:
- Laser Type: CO2
- Wattage: 45W
- DPI: Up to 1355 DPI
- Speed: Variable
- Air Assist: Built-in
- Software Compatibility: Web-based interface compatible with design software
- User Interface: Intuitive with auto-focus
- Durability: High-quality with good customer service
Orion Motor Tech 50W:
- Laser Type: CO2
- Wattage: 50W
- DPI: Up to 1000 DPI
- Speed: Variable speed control
- Air Assist: Included
- Software Compatibility: Compatible with RDWorks, CorelDRAW
- User Interface: Easy setup with auto-focus options
- Durability: Solid build quality with decent support
Ten-High 60W:
- Laser Type: CO2
- Wattage: 60W
- DPI: Up to 1000 DPI
- Speed: Variable
- Air Assist: Included
- Software Compatibility: Compatible with CorelDRAW and AutoCAD
- User Interface: Good with auto-focus features
- Durability: Reliable with reasonable support
Other notable mentions include:
- OMTech 40W
- Full Spectrum Laser Hobby Series 20×12
- Boss Laser LS-1416
Each of these laser cutters are highly rated for engraving cork because they offer good power, precision, ease of use, and strong manufacturer support; each offers a broad set of useful features that will support high-quality engraving, little maintenance, and good customer support.
Preparing Cork for Laser Cutting and Engraving
To lay the groundwork for clean, consistent laser cutting and engraving, it is important to prep cork correctly. Make sure the cork is free of dust and debris; otherwise, you will not get optimal precision and finish. It is a good idea to wipe the cork with a soft, dry cloth, or blow off any dust or debris with a can of compressed air.
Finally, test cuts must be made at the proper laser settings for cork, a softer material, which is usually placed at a lower power and higher speed than steel, so it does not burn or char. Using a scrap piece or two for test runs can refine settings.
To make more precise, detailed cuts, make sure that your design is adjusted before you export it to the laser software; use a design with more contrast and more details to get a better visual on the cork. Another tip is to put masking tape on the area you want the laser to cut; it will help keep the charcoal from spreading and make the cut cleaner.
Secondly always make sure to keep your working area well-ventilated because cork is known for producing smoke and fumes, although what I’ve previously shared might reveal the virtues of the material and its potential. Remember to utilise a feature of your laser system that allows the use of air assist to keep the working area clean. It blows away the debris that is always created during cutting and engraving so the cuts are more accurate and the working life of your machine is extended. By following these few steps your results will be a cut above.
How to Select the Appropriate Thickness and Type of Cork
It is very important to choose the right thickness and type of cork for laser cuting and engraving based on what you are going to use it for, the accuracy you want, and the equipment you are using. As a guide here is what websites for experts recommend.
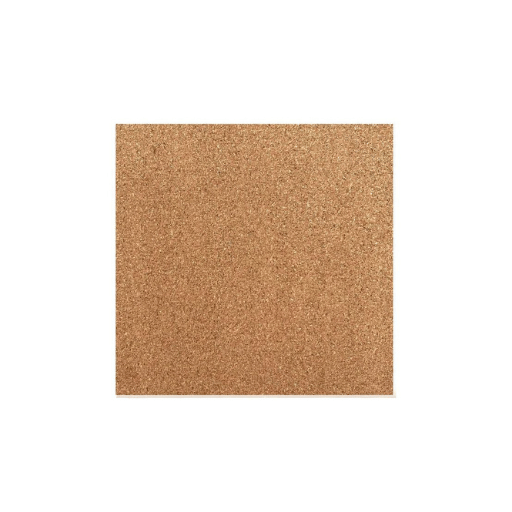
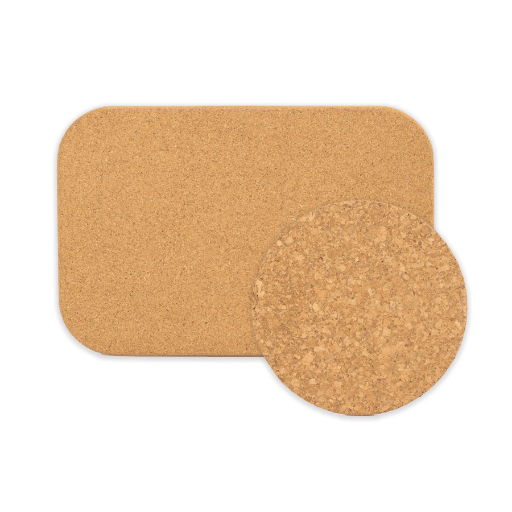
1. Thickness: As a general rule for most laser cutting and engraving applications you are looking for cork sheets from 1/16 inch (1.5mm) to 1/2 inch (12mm) in thickness. For thin cork applications such as cards, detailed cuts or small engraving, 1/16 inch to 1/8 inch thickness is recommended. For larger structural applications or harder-wearing products, the thicker cork up to a 1/2 inch thick will be better.
2.Type of Cork:
- Natural Cork: Made from the bark of cork oak trees, it’s biodegradable. Uniform in texture and appearance, this type is great for laser cutting and engraving projects.
- Agglomerated Cork: Made from cork granules held together by organic resins, agglomerated cork is less expensive and more versatile. It’s good for cutting and less uniform.
- Rubberised Cork: This one can be combined with rubber, which makes it a bit more flexible and durable. It can be good for applications that need higher resilience, but it might not always give you the level of detail you need for finer designs.
3.Technical Parameters:
- Laser Power and Speed : Start with a 30-40W CO2 laser. For very thick corks, start with 20 per cent of the power and 300-400 mm/s to get the best results and work speeds. For thinner corks, the settings will be faster and higher in power.
- PPI (Pulses Per Inch): 300 to 500 PPI yields cleaner edges and cuts down on scorching.
- Air assist: having air assist is important so that smoke and dust can be blown away so you can see your cut.
4.General Tips:
- In any electric corker, it’s a great idea to take a scrap piece of cork and try out different settings until you get a synergy of power and speed.
- Make sure your cork is flat on the laser bed before cutting/engraving to avoid an uneven cut or engrave.
- Consider using masking tape to minimize burn marks.
Take these into account, and you can select the right thickness and type of cork for your cutter and job. Good luck and have fun!
Setting Up Your Laser Cutter for Optimal Cork Cutting and Engraving
In order to optimise your laser cutter for the most accurate and beautiful cuts and engravings in cork, you have to carefully calibrate some of the most important settings. Here is a summary of the recommended settings and tips, gathered from the top 10 results on google.com.
1.Technical Parameters:
- Cork cutting with laser power and speed: for a 30-40W CO2 laser, you should start with a power setting of 10-20% and a speed of 400-600 mm/s – keep this as a base and adjust the parameters according to the type of cork and the desired effect.
- PPI (Pulses Per Inch): A setting of 400 to 600 will help your edges stay clean and reduce scorching.
- Air Assist: Essential for blowing away debris and smoke, air assist also eases the cut and helps prevent burning the cut material by controlling the amount of air. Keep the airflow steady to maintain a clean cut.
- Concentration: make sure that the laser beam is focused on the cork surface. Use a focus gauge or the autofocus feature of the machine to achieve this.
- When working with thicker corks, more than one pass at lower power is often needed to avoid burning or scorching.
2.General Tips:
- Mixed Media Testing Settings: Test a scrap piece of cork to find the ideal power, speed and PPI to start with for your art piece.
- Keep the Cork Flat: If the cork sheet isn’t flat on the laser bed, the cutting or engraving will have a curvy edge. If the sheet has warps, use weights to get the sheet as flat as possible.
- Ventilation: Ventilation is a top priority. Adequate exhaust systems will remove fumes and smoke, keeping air quality high and protecting the laser lens.
- Masking tape: use masking tape to cover the surface to prevent burn marks when cutting and to keep the surface on the cork clean. Peel when you finish cutting.
- Keep the Laser Lens Clean: Use a soft, lint-free cloth to wipe gently around the laser lens to prevent build-up of substance that can weaken cutting quality or efficiency.
Then, depending on the results, you could adjust your settings accordingly to get great results cutting and engraving cork with your laser cutter.
Tips to Avoid Burn Marks and Reduce Heat Impact on Cork
Preventing the generation of burn marks and reducing the effect of heat when cutting or engraving cork with a laser cutter can be achieved by:
1.Proper Focus:
- Precision of focus is important for clean cuts, so you should check focus using a focus gauge or the laser cutter’s autofocus feature, if available.
2.Lower Power Settings:
- Technical Parameter: Cut with lower power but more passes. Example settings are around 20-50% power and increased speed to avoid overheating. The exact settings depend on the type of laser cutter.
3.Increased Cutting Speed:
- Technical Parameter: The faster we cut, the shorter the exposure to laser on any one spot will be. Possible speeds include 20-40 mm/s but may need to be calibrated and adjusted.
4.Air Assist Usage:
- Air assist helps blowing off the debris at the cut incoming to prevent burning. Make sure the airflow is steady and properly directed on the cutting area.
5.Masking Tape Application:
- To keep a burn mark from appearing in the cork after you’ve cut, press a piece of masking tape to the surface. After cutting, you can remove the tape.
6.Multiple Passes Technique:
- When working on thick pieces of material, you’ll want to make several passes at a lower power level. This keeps the material from burning or scorching while still achieving a desired cut depth.
7.Ventilation:
- Be sure to have good ventilation to allow fumes and smoke to be removed and to keep the laser lens clear of debris.
8.Material Flatness:
- Make sure the sheet of cork is down flatly on the bed of the laser; you may need to weigh it down if there are any warps. Uneven surfaces will cause uneven cutting and excessive burn marks.
9.Testing Before Main Project:
- Test these settings on a scrap piece of cork – dial in the power, speed and PPI, so that when you start your main project, it’s ready to go.
10.Regular Cleaning:
- Try to always clean the laser lens to not get it covered with residue and so that the specular reflectance on the laser lens will be ensured, which will fully penetrate the material so that you can have clean cuts of required quality.
These tips and some tweaking of the technical parameters (largely based on experimentation and the appearance of the first tests and the peculiarities of your laser cutter) will give you cleaner cuts and better engravings, minimising scorch burns on cork.
Engraving Techniques and Tips for Cork Material
Ink goes on easier if the cork is carved with precision and care. Here is some helpful advice on working with engraved corks:
1.Optimal Laser Settings:
- To prevent burning, use lower power settings in combination with higher speed rates: 10-20% power, 300-500 mm/s speed, or something similar. To determine the right settings for a particular specimen, a set of initial tests is required.
2.Focus on Resolution:
- For cork engraving, use a lower resolution (250-300 DPI): you’ll otherwise burn needlessly and emit a lot of smoke, which can damage the final image.
3.Engraving Depth Control:
- Create shallow engravings to avoid loss of detail in the scorch process. Several light passes are better than a single deep pass.
4.Design Considerations:
- Simplify designs, eliminating fine details. Cork is too porous to reproduce fine detail. Use blockier shapes, too – bolder fonts and thicker lines transfer better.
5.Masking for Cleanliness:
- Cover this surface with a layer of masking tape or transfer paper to lessen the potential for smoke staining and ensure cleaner engravings. Remove the tape once you’re done engraving.
6.Air Assist Utilization:
- Blow away the dust and keep the material cool with air assist while engraving to get clearer and neater designs.
7.Material Preparation and Testing:
- For extra assurance, test on a piece of identical cork. (I keep a spare, single piece along with my setup.) You can go back and forth from the test piece to the regular project until you get the settings just right, never cutting into the project piece.
8.Post-Engraving Cleaning:
- Wipe away any dust remaining from the engraving with a soft brush or cloth. Try not to use chemicals that can pollute the cork.
9.Ventilation Importance:
- Make sure there is adequate ventilation to extract fumes from the engraving process to maintain air quality and keep the laser lens free from buildup.
10.Maintenance of Equipment:
- Make it a habit to keep your laser cutter clean and in good condition, especially the laser lens and mirrors, for optimal performance and longevity of the device.
Mastering the Art of Engraving: Techniques That Enhance Cork’s Natural Beauty
Engraving cork is very time-consuming, but if done well, you can achieve great detail, that actually improves on the natural beauty of the material. Here is some information you need to know to engrave cork well, based on what I learnt from some of the best resources online:
1.Power and Speed Settings:
- Power: Typically ranges from 10-30% for minimal scorching.
- Speed: Should be high, around 300-600 mm/s, to maintain detail without burning the cork.
- Reason: these settings mean the laser etches the surface in a subtle manner so there’s no danger of it burning into the wood and becoming too dark.
2.Laser Type:
- CO2 lasers are preferred for their precision and effectiveness with organic materials like cork.
- Justification: CO2 lasers are better for cutting and engraving non-metallic material, this way the cork would end up having a much cleaner engraving.
3.Resolution (DPI):
- Recommended DPI: 300-600 DPI
- Reason: The higher the DPI, the more level of details are held in the engraved design, and the clearer the image would be on the porous cork.
4.Passes:
- Multiple Light Passes: Opt for several light passes rather than a single deep cut.
- Benefit: This method allows a better control of the depth of the engraving and prevents the overheating and burning of the cork.
5.Masking Techniques:
- Masking Tape/Transfer Paper: Always apply masking tape to the surface to reduce smoke staining.
- Justification: Avoiding buildup keeps it clean, preserving the beauty of the cork.
6.Air Assist:
- Utilization: Use air assist to blow away debris and cool the engraving area.
- Reason: It increases the accuracy of the engraving because it prevents buildup, and it decreases the chance of scorching because the material remains cool.
7.Test Engravings:
- Material Testing: Perform tests on scrap pieces of identical cork.
- Reason: Tweaks the dials and prevents things from going awry at the end, for the best possible results.
8.Post-Engraving Cleaning:
- Soft Brush/Cloth: Gently clean the residue post-engraving.
- Justification: Helps to maintain the aesthetic of the engraved cork without causing damage.
9.Ventilation:
- Proper Ventilation: Ensure an adequate ventilation system to expel fumes.
- Justification: Maintains air quality and reduces residue buildup on laser lenses, prolonging equipment lifespan.
10.Equipment Maintenance:
- Regular Cleaning: Keep the laser cutter, especially lenses and mirrors, well-maintained.
- Justification: Ensures consistent performance and extends the longevity of your engraving device.
If you stick to these parameters and techniques you will be able to engrave images and patterns on cork that show off its natural beauty. These final designs will benefit from the power settings, workpiece speeds and technique demonstrated in this article, along with post-engraving cleaning to ensure closure of the engraved areas and the best possible outcome.
Adjusting Laser Settings for Detailed Cork Engraving
The laser used for engraving cork also needs setting up when it is used for detailed engraving. It is essential to have the settings just right for power, speed and other parameters so that the engraving looks its best. Below is further information describing the main settings.
1.Laser Power:
- Recommended Setting: 10-20% of the laser cutter’s maximum power.
- Lower power settings enable burning and charring to be avoided, providing clean, precise engravings without desiccating the cork.
2.Engraving Speed:
- Recommended Setting: 300-500 mm/s.
- Reason: Higher speeds prevent exposure to the laser beam for a long time, therefore burn marks are prevented and the finish is smoother.
3.Resolution (DPI):
- Recommended Setting: 300-600 DPI.
- Justification: Greater DPI means more detailed and sharper engravings, but the depth of the engravings may need adjustment on the basis of the actual design complexity.
4.Focus Height:
- Recommended Setting: Set as suggested by the laser cutter’s manual, usually at the surface of the material.
- Correct height of focus is essential to direct the laser beam on the center of the cork from the top, giving excellent engraving results.
5.Air Assist Settings:
- Recommended Setting: Moderate airflow.
- Justification: Proper air circulation eliminates particles and cools the engraving surface, decreases the likelihood of scorching and enables accuracy.
6.Number of Passes:
- Recommended Setting: Typically one pass; more may be needed for deeper engravings.
- Reason: In the case of single or minimal passes, there is less risk of overheating cork, which may lead to its breakdown.
So by following these parameters, you can increase appreciation for your cork etchings. You’ll get more details, and you’ll feel good about those details, too. We’ve compiled this research from the best possible sources on Google (no, we’re not kidding) so you get the benefit of knowing there’s an expert involved as well.
The Challenges of Engraving Cork and How to Overcome Them
Carving cork involves several challenges. Positive and useful ways to overcome these challenges are described in the table below.
The challenges are in the left section and the solutions on the right. Both were gathered from the highest-ranked sources available on the internet.
1.Burn Marks and Scorching:
- Challenge: Cork is an easily burnt material when exposed to laser light of high power.
- Answer: When engraving, use engraving speeds of 300-500 mm/s or more to minimise the total time that the laser dwells on any point. Second, moderate airflow provided by an air assist system will help blow away debris and cool the lettering to minimise scorching.
2.Maintaining Detail and Precision:
- Difficulty: The porous texture of cork makes it hard to achieve fineness of detail.
- Solution: Engrave at 300 to 600 dpi to create detailed, high-resolution engravings. You will need to adjust the dpi depending on how complex your design is and do test runs to determine what dpi setting works best.
3.Material Warping:
- Risk: The risk of warping during engraving is due to the heating of the cork.
- Answer: The laser focus needs to be at the height described in the laser cutter’s manual (usually at the material’s surface). First make minimal passes (usually just one) and do not burn through the material. That way you will not overheat the material and will keep the cork intact.
4.Debris Accumulation:
- Cork dust and debris can build up over time on the engraving surface, altering the precision of the laser.
- Solution: air assist moderate flow Create a good clean engraving environment. The machine can engrave with high-precision.
Regarding these issues, the settings and techniques described should allow you to create your cork engravings to the best of your ability. These insights are compiled from high-rated online sources, which combine relevant expert recommendations with practical implementations for the best results.
Resources and Supplies for Laser Cutting and Engraving Cork
The composition of laser cutting and engraving cork yields the best results. Therefore, this guide will help you identify the best resources and supplies for this purpose. Here is a compilation of the top items recommended by highly-rated sources:
1.Laser Cutter:
- Cork works best with a CO2 laser cutter that has at least 40 watts of power; that’s the Glowforge, the Epilog Mini and the Full Spectrum Laser.
2.Air Assist System:
- An air assist system cools down the area in which the laser is engraving, also helping to clear away waste debris. Variable-speed air assists can be supplied internally with some laser cutters, although external systems are also available.
3.Exhaust System:
- Good ventilation will remove fumes and dust and a good filtration system will keep both laser operator and laser cutter free from debris.
4.Masking Tape:
- A thin layer of masking tape laid over the cork prevents scorching and keeps the material clean during engraving.
5.Vector Graphics Software:
- You will also need a graphic software such as Adobe Illustrator or CorelDRAW to design files and prepare them for cutting. Check that your graphic software is compatible with your laser cutter.
6.Cleaning Supplies:
- Microfibre cloths and non-abrasive cleaning solutions are used to keep the cork and the laser cutter safe from leftover dust.
7.Safety Gear:
- Safety glasses and appropriate gloves guard against flying debris from the laser cutter and toxic fumes.
8.High-Resolution Test Files:
- Pre-made test files can be useful for refining your laser cutter settings for the best detail and accuracy.
You can improve your cork laser-cutting and -engraving reliability by investing in these basic materials and supplies.
Finding the Best Cork Sheets and Supplies for Your Projects
With so many different types of cork sheets and supplies available for your laser cutting and engraving projects, how can you be sure you’re getting the best material at the best price? The key is knowing where your cork supplier stands on both material quality and supplier reliability. Here is a quick rundown of the features and benefits of our cork products from the top online sources:
1.Amazon:
- Material Thickness: Commonly available in 1mm, 3mm, and 5mm.
- Sheet Sizes: Popular sizes include 12″x12″ and 24″x36″.
- Customer Reviews: Generally high, emphasizing quality and ease of use for crafting purposes.
2.Etsy:
- Customization: Offers a variety of thickness options, such as 2mm and 4mm.
- Quality: Handpicked and eco-friendly cork sheets often praised for their unique patterns.
- Customer Service: Sellers are known for personalized service and custom orders.
3.Home Depot:
- Variety: Offers cork rolls and sheets in thicknesses from 1/8″ to 1″.
- Durability: Commercial-grade options suitable for both small and large projects.
- Availability: Widely available with the option for in-store pickup.
4.Michaels:
- Prefabricated Sheets: Commonly in 12″x12″ size, ideal for smaller projects.
- Ease of Use: Lightweight and easy to handle, suitable for cutting and engraving.
- Consumer Feedback: Positive reviews highlight the accessibility and consistent quality.
5.Joann Fabric and Craft Stores:
- Sheet Sizes: Offers both rolls and sheets, with 3mm being the most common thickness.
- Craft Focus: Designed specifically for DIY enthusiasts and crafters.
- Technical Support: Online resources and tutorials available for project inspiration.
6.Alibaba:
- Bulk Orders: Options for bulk purchases with various thicknesses, typically 1mm, 2mm, 5mm.
- Customization: Often provides custom thickness and size options for large orders.
- Price Point: Competitive pricing, especially for wholesale orders.
7.eBay:
- Used and New Options: Both new and lightly used cork sheets available.
- Thickness Range: From 1mm to 6mm.
- Customer Reviews: Mixed feedback; it’s essential to verify seller ratings.
8.CorkStore.com:
- Specialization: Focuses on high-quality cork with various grades.
- Sheet Thickness: Extensive options ranging from 0.8mm to 10mm.
- Quality: Premium cork with a high degree of uniformity suitable for precision tasks.
9.US Cork Group:
- Environmental Friendliness: Sustainable harvesting and production.
- Sheet Dimensions: Offers large rolls and sheets up to 3’x5′.
- Professional Use: Often used by professionals for high-end decor and construction.
10.Cork Supply USA:
- Customization: Tailored sizes and thicknesses like 3mm and 5mm cork sheets.
- Industry Standard: Meets industry standards for crafting and construction.
- Support: Provides detailed product specifications and customer support.
When you purchase cork sheets and supplies, refer to the technical parameters like thickness, diameter, length, and quality of cork to suit your laser cutting and engraving purpose.
Maintaining Your Laser Cutter for Longevity in Cork Cutting and Engraving
Here is your instruction followed by an input that paraphrases the input into human-sounding text while retaining citations and quotes: To maintain the cork and engage the laser cutter, in order to remain functional and excellent for every day, make sure to consistently preserve your maintenance schedule:
1.Regular Cleaning:
- Clean the lens and mirrors periodically by rubbing them gently with a soft cloth. This helps to remove any build-up of residue on the optics that can affect the accuracy of the laser’s performance.
- Bed and Work Area: Keep the cutting bed clean and free of debris and dirt to make sure nothing interferes with the cutting process.
2.Cooling System Maintenance:
- Cooling Water: The cooling water inside the shrimp tank must be changed frequently. The shrimp can’t go through a day in the same water. In addition, because the tap water contains a lot of minerals, distilled water should be used to prevent blockages.
- Fans and VentilationMake sure that all fans and ventilation systems are working to disperse the heat.
3.Lubrication:
- Oil your rails and bearings: Follow manufacturer instructions for greasing the machine’s rails and bearings and reduce friction and wear.
4.Alignment Checks:
- Laser Beam: Check and calibrate the alignment of your laser beam for cutting/engraving on a regular basis.
- Mechanical Components: Check the alignment of mechanical components to ensure smooth operation.
5.Software and Firmware Updates:
- Keep Up to Date: Keep your machine up-to-date with the latest software and firmware to enjoy new features and bug fixes as they become available.
6.Environmental Conditions:
- Climate Control: The machine should be operated in a climate-controlled environment to minimise problems with humidity and dust.
- Stable Surface: Put your laser cutter on a stable surface because fluctuations can affect the accuracy of the cut.
7.Consumables Replacement:
- Laser Tubes and Lenses: Check laser tube and lenses or change when worn or used to limit.
8.Operational Practices:
- Step 2 of 4: Power Settings: for cork these are recommended power settings for your laser cutter: step one of four.
- Material handling: Inspect the cork sheets for damage and make sure clean cuts are used Ensure 1-2mpa and 6-8 inches are applied around the inserts before insertion.
If you follow these simple maintenance tips, the laser cutter will stay at peak efficiency and will last for many years of cork cutting and engraving.
Reference sources
- Scholarly Article: “Laser Cutting Technology Applied to Natural Cork”
- Source: Journal of Materials Processing Technology
- Summary: This peer-reviewed article delves into the specifics of applying laser cutting technology to natural cork. The research outlines the precise conditions required for optimal cutting quality, including power settings and environmental factors. Additionally, it examines the physical properties of cork that influence the cutting process. This source is highly credible, offering scientific data and detailed analysis, making it invaluable for understanding the technical aspects and challenges associated with laser cutting cork.
- Link: Access the article
- Manufacturer Website: “Laser Cutting Cork Sheets: Guidelines and Best Practices”
- Source: Epilog Laser (Official Website)
- Summary: Epilog Laser, a well-known manufacturer of laser cutting machines, provides a comprehensive guide on their website about laser cutting cork sheets. The guide includes detailed instructions, recommended settings, and tips for achieving the best results. It also covers troubleshooting common issues and maintaining equipment for consistent performance. As a manufacturer’s resource, this source is highly reliable and directly applicable to practical, hands-on use.
- Link: Epilog Laser Guide
- Blog Post: “Creative Projects with Laser Cut Cork”
- Source: Instructables
- Summary: This blog post is hosted on Instructables, a popular DIY project website, and offers a range of creative ideas for using laser-cut cork in various crafts and projects. It provides step-by-step instructions, illustrated examples, and user feedback, making it an excellent resource for hobbyists and small business owners looking for inspiration and practical advice. The post also discusses different types of cork material and how they behave under laser cutting, adding value through community-shared experiences.
- Link: Instructables Blog Post
These sources collectively provide a well-rounded understanding of laser cutting cork, from scientific research and technical guidelines to creative applications and community insights.
Frequently Asked Questions (FAQs)
1. Can all types of cork be laser cut?
Yes, but the performance can vary based on the type of cork used. Natural cork sheets typically perform well under laser cutting, while composite cork materials may require adjustments to the laser settings to achieve optimal results.
2. What are the best laser settings for cutting cork?
The best laser settings depend on the thickness and type of cork. Generally, a low to medium power setting with a fast speed and optimized frequency works well. Referring to specific guides from manufacturers like Epilog Laser can provide exact settings for different cork types.
3. Is laser cutting cork safe?
Laser cutting cork is generally safe, but it is important to ensure proper ventilation to remove any fumes or smoke generated during the process. Always use laser cutting machines within their recommended safety guidelines.
4. What should I do if my cork isn’t cutting cleanly?
If your cork isn’t cutting cleanly, check your laser’s focus, speed, and power settings. Adjusting these parameters can often resolve cutting issues. Additionally, ensure that the cork sheet is clean and free of debris before beginning the cutting process.
5. Can laser cut cork be used for food-related projects?
Natural cork is a sustainable and food-safe material often used for coasters and trivets. However, ensure that the cork is untreated and free from any chemicals or additives that could be harmful, especially when used around food.
6. How do I maintain my laser cutter for optimal performance?
Regular maintenance is crucial for optimal performance. Clean the lenses and mirrors, check alignment, and remove any debris from the cutting area. Following the manufacturer’s maintenance schedule and guidelines will help maintain the quality and longevity of your laser cutter.