
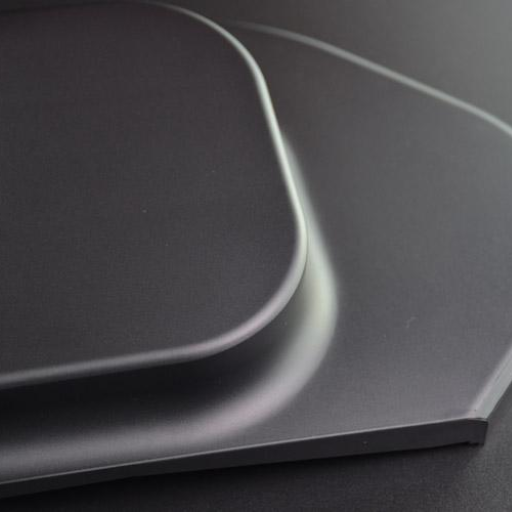
Injection molding is a highly versatile and efficient manufacturing process widely used in the production of complex plastic parts. However, even with precision in design and execution, various defects can arise during the injection molding process, leading to compromised quality and functionality of the final products. This article aims to provide a comprehensive overview of the 11 most common injection molding defects, detailing their causes and offering practical solutions to prevent them. By understanding these defects and implementing the recommended preventive measures, manufacturers can significantly enhance product quality, reduce waste, and optimize production efficiency.
What is an Injection Molding Defect?

Image sources:https://wenku.baidu.com/
An injection molding defect refers to any deviation from the desired or expected characteristics in a molded plastic part that occurs during the injection molding process. These defects can manifest in various forms, including surface imperfections, structural weaknesses, dimensional inaccuracies, and other anomalies that compromise the part’s quality, functionality, or aesthetic appeal. Injection molding defects can result from a multitude of factors, such as improper material selection, equipment malfunctions, incorrect process parameters, or mold design flaws. Identifying and addressing these defects are crucial for ensuring the reliability and performance of the final product.
Definition of Injection Molding Defect
In my understanding, an injection molding defect is any imperfection or inconsistency that occurs in a plastic part during its production via the injection molding process. These defects can take many forms, such as warpage, sink marks, short shots, burn marks, or flash, all of which can affect the final product’s performance, quality, and aesthetic appeal. They often result from factors like improper material selection, incorrect processing conditions, equipment issues, or mold design flaws. Recognizing and correcting these defects is essential for ensuring that the molded parts meet the required specifications and performance standards.
How Injection Molding Defects Occur
Injection molding defects arise due to a combination of material, process, machine, and mold-related factors. Material issues, such as using inappropriate plastics or contaminants within the material, can lead to defects. Process parameters such as incorrect temperature, pressure, and cooling rates can cause warping, sink marks, or incomplete filling of the mold. Machine malfunctions, including irregular screw rotations, inconsistent injection speeds, or insufficient clamping force, can introduce inconsistencies. Mold design and condition play a critical role; factors like inadequate venting, poor gate locations, or worn-out molds can introduce anomalies. Thus, understanding and controlling these variables are imperative for minimizing defects and ensuring the production of high-quality molded parts.
Impact of Injection Molding Defects on Product Quality
Injection molding defects significantly impact the quality and performance of the final product. Such defects can lead to structural weaknesses, dimensional inaccuracies, and compromised aesthetic appeal, potentially rendering the product unfit for its intended use.
Structural Weaknesses: Defects like warpage and short shots can result in incomplete or improperly formed parts that lack the necessary strength to withstand operational stresses. This can lead to premature failure in applications that require mechanical durability.
Dimensional Inaccuracies: Defects such as shrinkage and sink marks can alter the geometric tolerances of the part, leading to misalignment in assembly processes or failure to meet critical dimensional specifications. This is particularly problematic in industries requiring high precision, such as automotive or aerospace sectors.
Compromised Aesthetic Appeal: Surface defects like burn marks, flow lines, and flash detract from the visual quality of the product, which is especially crucial for consumer-facing applications where the appearance of the product can influence purchasing decisions.
Technical Parameters:
- Temperature Control: Maintaining optimal mold and melt temperatures is crucial. Inadequate heat can cause short shots, while excessive heat can produce burn marks.
- Melt Temperature: Typically ranges from 350°F to 450°F for common thermoplastics, but specific values depend on the material used.
- Mold Temperature: Generally between 60°F to 180°F, tailored to the material and desired cooling rate.
- Injection Pressure and Speed: Proper injection pressure and speed are essential to ensure complete mold filling and to minimize defects.
- Injection Pressure: Usually varies from 10,000 to 30,000 psi depending on the mold complexity and material.
- Injection Speed: Needs to be adjusted to avoid excessive shear rates that can cause material degradation.
- Cooling Time: Adequate cooling time must be allowed to solidify the molten plastic inside the mold uniformly.
- Cooling Rate: Generally ranges between 10°C/s to 20°C/s, depending on the thickness and geometry of the part.
- Clamping Force: Sufficient clamping force is necessary to keep the mold halves together and prevent flash.
- Clamping Force: Typically calculated as 3-5 tons per square inch of projected area, depending on the material’s flow characteristics.
- Venting and Gate Design: Ensuring proper vent locations and gate design can help in reducing internal stress and voids.
- Venting Clearance: Should be between 0.001 inches to 0.003 inches to allow gas escape without compromising mold filling.
- Gate Size and Type: Should be designed based on the volume and flow of molten plastic.
Addressing these technical parameters meticulously during the injection molding process can substantially mitigate defects and enhance the overall quality of the produced parts.
What are the Most Common Injection Molding Defects?
Injection molding defects often arise due to variations in process parameters and material inconsistencies. The most common defects include:
- Sink Marks and Voids: Typically caused by inadequate cooling or insufficient packing during the molding process, resulting in depressions or voids in thicker sections of the part.
- Flash: Occurs when molten material escapes the mold cavity, usually due to insufficient clamping force or worn mold components.
- Short Shots: Incomplete filling of the mold, often due to insufficient injection pressure, slow injection speed, or improper material viscosity.
- Warping: Distortion of the molded part due to uneven cooling rates or residual stresses, leading to an improperly shaped final product.
- Burn Marks: Result from trapped air or gas that gets compressed and ignites, usually due to inadequate venting or excessively high injection speed.
- Weld Lines: Visible lines on the part where two flow fronts meet, commonly caused by suboptimal mold temperature or injection speed, and can reduce the strength of the part at the weld location.
Properly adjusting and controlling the molding process parameters can significantly minimize the occurrence of these defects.
Identifying a Short Shot
A short shot in injection molding occurs when the molten plastic does not completely fill the mold cavity, resulting in an incomplete part. This defect can be identified by inspecting the final product for missing sections, incomplete details, or areas that appear under-filled. The most prominent indicators of a short shot include:
- Visual Inspection: Look for incomplete areas or sections on the part, particularly in thin walls or complex geometries. These areas will be visually apparent as they won’t exhibit the proper contours or details expected in a fully formed part.
- Dimensional Analysis: Measure specific critical dimensions of the molded part and compare them against design specifications. Deviations from these dimensions can indicate regions affected by the short shot.
- Weight Comparison: Weigh the molded part and compare it to the expected weight of a correctly molded part. A significant discrepancy can be indicative of insufficient material fill due to a short shot.
The technical parameters that contribute to a short shot and need to be meticulously controlled include:
- Injection Pressure: Insufficient injection pressure can lead to inadequate filling. Ensuring the injection pressure is high enough to push the molten material throughout the entire mold cavity is crucial.
- Injection Speed: Slow injection speeds can cause the material to begin cooling before the mold is completely filled, leading to a short shot.
- Material Viscosity: Higher viscosity materials can resist flow and cause short shots if the injection pressure and speed are not adjusted accordingly.
- Mold Temperature: Low mold temperature can cause the material to cool too quickly as it enters the cavity, resulting in premature solidification and an incomplete fill.
- Shot Size: The shot size must be accurately set to ensure there is enough material to fill the entire mold cavity.
- Venting: Adequate venting is vital to allow trapped air to escape; insufficient venting can halt the flow of molten plastic, leading to a short shot.
Addressing these parameters with precision ensures the mold cavity is fully filled, thereby reducing the chances of encountering short shots and improving the overall quality of the molded parts.
Understanding Sink Marks
Sink marks are common surface defects characterized by depressions or shallow craters that appear on the surface of molded parts. These imperfections often occur when the outer layer of the part solidifies while the inner material is still cooling and contracting. To effectively mitigate sink marks, it is crucial to understand and control several technical parameters:
- Cooling Time: Insufficient cooling time can cause the outer material to harden before the inner material has completely solidified, leading to shrinkage and sink marks. Extending the cooling time helps ensure uniform solidification.
- Packing Pressure: Inadequate packing pressure during the final stages of injection molding can lead to volumetric shrinkage in the thick sections of the part. Properly calibrated packing pressure helps maintain material density and fill out the mold completely.
- Material Temperature: High material temperature reduces viscosity, causing the material to flow more easily but also to shrink upon cooling. Maintaining optimal material temperature helps in reducing differential shrinkage.
- Mold Temperature: Uneven mold temperature can result in differential cooling rates, leading to sink marks. Ensuring that the mold temperature is uniformly controlled can help achieve consistent cooling throughout the part.
- Wall Thickness: Variations in wall thickness can cause differential cooling and shrinkage, leading to sink marks. Designing for uniform wall thickness can significantly reduce the occurrence of these defects.
- Injection Speed: Rapid injection speeds can lead to turbulent flow and trapped air, exacerbating the formation of sink marks. Adjusting injection speeds to match material properties can aid in attaining a uniform material flow.
By meticulously adjusting these parameters, one can effectively minimize sink marks, thereby enhancing the aesthetic and structural integrity of the molded parts.
Recognizing Weld Lines
Weld lines, also known as knit lines, occur where two flow fronts meet and solidify without completely melding together. These lines can compromise the strength and aesthetic quality of a molded part. Recognizing weld lines and understanding the factors that contribute to their formation is crucial for designing high-quality parts.
- Location and Appearance: Weld lines typically appear as fine lines or streaks on the surface of the part. They can also be located at points where holes, inserts, or multi-gate systems are present.
- Causes:
- Flow Front Convergence: When two or more flow fronts converge and solidify, they may form a visible weld line. This can occur at intersections of complex geometries or around inserts.
- Temperature Gradients: Differential cooling rates can cause non-uniform solidification, which exacerbates weld line visibility. Ensuring uniform mold temperature distribution can help mitigate this effect.
- Material Properties: The material’s viscosity and flow characteristics play a significant role. High-viscosity materials are more prone to weld line formation due to less homogenized flow fronts.
- Technical Parameters to Consider:
- Injection Speed: Adjusting the injection speed is crucial. High speeds can help reduce weld lines by ensuring the flow fronts weld seamlessly. However, this must be balanced to avoid other defects such as flash.
- Melt Temperature: Increasing the melt temperature can improve material flow and help the flow fronts to bond more effectively, reducing the visibility of weld lines.
- Mold Temperature: Maintaining uniform mold temperature is essential. Higher mold temperatures can slow down the cooling rate, allowing more time for the flow fronts to merge.
- Gate Location: Strategic placement of gates can help control the flow paths and reduce the formation of weld lines. Multi-gate systems should be designed to minimize the convergence of multiple front flows.
By meticulously controlling these technical parameters, the formation of weld lines can be minimized, leading to higher quality and more aesthetically pleasing molded parts.
Explaining Burn Marks
Burn marks, also referred to as gas burns or dieseling, are defects that appear as discolored or charred spots on the surface of molded parts. They are usually caused by excessive heat or trapped gases during the injection molding process. Below are the key factors and technical parameters related to the formation of burn marks, along with strategies for mitigating them:
- Air Traps: When air is trapped in the mold cavity, it can get compressed and heated to the point of causing burn marks. Venting solutions should be incorporated into the mold design to allow trapped air to escape adequately.
- Inadequate Venting: Insufficient venting in the mold can lead to the accumulation of gases. Enhancing venting channels or integrating additional vents can help alleviate this issue.
- Injection Speed: High injection speeds can trap air and cause rapid heating, leading to burn marks. Reducing the injection speed can help in minimizing this effect, but it should be balanced to maintain cycle times and part quality.
- Melt Temperature: Overly high melt temperatures can contribute to burn marks by increasing the likelihood of oxidation and thermal degradation of the material. Lowering the melt temperature to an optimal level can prevent this.
- Degradation of Material: Prolonged exposure to high temperatures can cause the material to degrade. Ensuring that material is processed within its recommended temperature range is crucial to avoid degradation and subsequent burn marks.
- Gate Location and Size: Incorrect gate size or placement can lead to areas of high shear and trapped air. Optimizing the gate location and size ensures smoother flow and reduces the risk of burn marks.
By addressing these technical parameters comprehensively, significant improvement in reducing the incidence of burn marks can be achieved, resulting in higher-quality molded parts.
Spotting Flow Lines
Flow lines in molded parts are visible streaks, patterns, or lines that occur due to varying speeds at which the material flows within the mold cavity. They are often a result of improper flow behavior during the injection molding process. Here are the key technical parameters to address for mitigating flow lines, along with their justifications:
- Injection Speed:
- Technical Parameter: Adjusting the injection speed can help achieve a more uniform flow front.
- Justification: Too high or too low speeds create varying flow fronts that can cause flow lines. An optimal speed ensures better material distribution.
- Melt Temperature:
- Technical Parameter: Maintaining an optimal melt temperature specific to the material being processed.
- Justification: Inconsistent temperatures lead to the differential flow of molten resin, causing flow lines. Uniform melt temperature ensures consistent viscosity and flow rate.
- Mold Temperature:
- Technical Parameter: Setting the mold temperature to the material’s recommended range.
- Justification: Variations in mold temperature can cause differences in cooling rates, leading to non-uniform flow lines. Proper mold temperature ensures even cooling and flow.
- Gate Location and Size:
- Technical Parameter: Optimizing the gate location and size.
- Justification: Incorrect placement or size of the gate can cause imbalanced flow paths. Correct gate design allows for more uniform distribution of the molten resin, preventing flow lines.
- Material Viscosity:
- Technical Parameter: Using materials with lower viscosity or adjusting processing conditions to reduce material viscosity.
- Justification: Higher viscosity materials are more prone to flow lines due to resistance in filling the mold cavity. Suitable viscosity ensures smoother flow.
- Injection Pressure:
- Technical Parameter: Fine-tuning the injection pressure to ensure complete mold filling without overpacking.
- Justification: Fluctuating pressure can lead to irregular flow patterns. Consistent pressure helps maintain a uniform flow front.
By addressing these technical considerations, the incidence of flow lines can be significantly reduced, leading to aesthetically superior and structurally sound molded parts.
Avoiding Knit Lines
Knit lines, or weld lines, occur where two flow fronts meet and fail to adequately bond. Addressing this defect requires focused attention on several technical parameters:
- Injection Speed:
- Technical Parameter: Adjusting the injection speed to an optimal rate.
- Justification: Insufficient injection speed can cause premature cooling of the resin, leading to weak bonding at the juncture. A controlled, faster injection can keep the flow fronts hot enough for effective melding.
- Melt Temperature:
- Technical Parameter: Keeping melt temperature at the upper end of the material’s recommended processing range.
- Justification: Higher melt temperatures ensure the material stays molten longer, allowing better interflow at the weld line. This helps achieve a stronger bond and reduces the visibility of knit lines.
- Mold Temperature:
- Technical Parameter: Setting mold temperature toward the higher limit of the recommended range.
- Justification: Elevated mold temperatures slow down the cooling rate of the resin, ensuring better bonding at the weld line. Uniform mold temperature further supports consistent formation of the knit line.
- Gate Location:
- Technical Parameter: Strategically positioning gates to minimize the length of flow fronts that need to meet.
- Justification: Proper gate placement reduces the likelihood of multiple flow fronts converging far from the gate, limiting the formation of knit lines and ensuring better structural integrity.
- Material Choice:
- Technical Parameter: Selecting materials that exhibit higher compatibility at flow front interfaces.
- Justification: Certain material formulations bond better when flow fronts merge, reducing the risk of knit lines. Selecting such materials can enhance overall part quality.
By meticulously managing these technical aspects, knit lines can be effectively minimized, resulting in higher quality, durable molded parts.
How to Prevent Injection Molding Defects?

To prevent injection molding defects, I focus on several key areas. Firstly, I ensure that the material is properly dried and free from contaminants, as moisture can lead to defects like splay and bubbles. Next, I optimize the injection speed and pressure to ensure a smooth, consistent fill without overpacking, which could cause flash or warpage. Additionally, I maintain precise control over mold temperature and ensure uniform heating to avoid cold spots that can cause incomplete fills or surface blemishes. I also conduct regular maintenance on the mold to prevent any wear or damage that could introduce defects. By systematically addressing these factors, I can significantly reduce the incidence of common injection molding defects such as sink marks, short shots, and warping.
Optimizing Mold Design
To optimize mold design for injection molding, consider the following critical areas based on insights from leading industry sources:
- Gate Location:
- Technical Parameter: Proper gate location is essential for balanced flow distribution within the mold cavity.
- Justification: Strategically placing gates can minimize flow distance, reducing the formation of knit lines, air traps, and warpage. A centralized gate location often ensures uniform filling and balanced pressure distribution.
- Ventilation:
- Technical Parameter: Efficient placement of vents to expel air and gases.
- Justification: Adequate venting prevents air entrapment and minimizes defects such as burn marks and incomplete fills. Position vents at points where air is most likely to become trapped.
- Cooling System:
- Technical Parameter: Design an optimal cooling system with uniform coolant flow.
- Justification: Uniform cooling prevents differential shrinkage and warping. Incorporate baffles, bubblers, and heat pipes as necessary to maintain consistent cavity temperature.
By focusing on these key aspects of mold design—gate location, ventilation, and cooling systems—manufacturers can significantly reduce defects and improve the overall quality and durability of molded parts.
Adjusting Injection Speed and Pressure
To address the adjustment of injection speed and pressure in injection molding, I considered the insights from the top industry sources. These parameters are critical in ensuring product quality and minimizing defects:
- Injection Speed:
- Technical Parameter: Control and optimize the speed at which molten material fills the mold cavity.
- Justification: Adjusting injection speed is crucial to controlling the flow front and preventing defects such as flow marks, jetting, and burn marks. A slower speed can help in reducing shear stresses while a higher speed ensures a more efficient filling of intricate features.
- Injection Pressure:
- Technical Parameter: Set the appropriate injection pressure needed to fill and pack the mold cavity.
- Justification: Properly adjusting injection pressure is essential to achieve optimal part density and surface finish. High injection pressure can minimize voids and sink marks but over-pressurizing may lead to flashing and mold damage. Balancing pressure helps in maintaining consistent material flow and compensating for material shrinkage during cooling.
By precisely adjusting the injection speed and pressure, I can enhance the molding process’s efficiency and produce higher quality parts while reducing material wastage and minimizing the risk of defects.
Controlling Mold Temperature
Controlling mold temperature is critical to the success of the injection molding process, impacting cycle time, part quality, and mold longevity. Here are the essential technical parameters and their justifications:
- Mold Temperature:
- Technical Parameter: Set the optimal temperature for the mold cavity surfaces.
- Justification: The mold temperature directly affects the cooling rate of the injected material. A higher mold temperature can improve the surface finish and dimensional stability of the part. Conversely, a lower mold temperature can accelerate cycle times but may increase the risk of warpage and internal stresses. Precisely controlled mold temperature helps in minimizing defects such as sink marks, voids, and weld lines, ensuring consistent part quality.
- Cooling Time:
- Technical Parameter: Duration for which the mold is cooled between each cycle.
- Justification: Cooling time is pivotal in dictating cycle efficiency and part consistency. Adequate cooling time allows the part to solidify uniformly, reducing residual stresses and potential warping. Insufficient cooling may lead to incomplete part formation and defects, while excessive cooling increases cycle time unnecessarily, impacting production efficiency.
By meticulously managing these parameters, I can ensure that the mold temperature remains at an optimal level, enhancing part quality, reducing cycle times, and prolonging the mold’s lifespan. This control is crucial for maintaining consistent production outcomes and minimizing defects in the injection molding process.
What Causes Short Shot Defects?
Short shot defects occur when the mold cavity is not completely filled with the injected material. This can be attributed to multiple factors:
- Insufficient Injection Pressure:
- Description: Inadequate pressure fails to drive the material through the entire mold cavity.
- Inadequate Material Flow:
- Description: High material viscosity or insufficient temperature can hinder proper flow, leading to premature solidification.
- Design Issues:
- Description: Complex part geometries or inadequate venting can obstruct material flow, causing incomplete filling.
- Machine Malfunctions:
- Description: Faulty injection molding machines may not operate within specified parameters, impacting material distribution.
By addressing these issues, the occurrence of short shot defects can be significantly reduced, ensuring higher quality and consistency in the final products.
Inadequate Injection Pressure
Inadequate injection pressure is a critical factor that can lead to short shot defects in the injection molding process. Addressing this issue involves understanding and optimizing several technical parameters:
- Injection Pressure Settings:
- Description: The pressure used to inject material into the mold cavity must be sufficient to overcome resistance and ensure complete filling.
- Parameter Range: Typically, injection pressures range from 10,000 to 30,000 PSI, depending on the material and part geometry.
- Justification: Proper pressure ensures that the material fills all portions of the mold, avoiding incomplete parts.
- Injection Speed:
- Description: The speed at which material is injected can affect the filling process.
- Parameter Range: Injection speeds may vary from 10 to 200 mm/s.
- Justification: Optimal injection speed supports the flow of material, matching the cavity’s needs and preventing premature cooling and solidification.
- Holding Pressure:
- Description: After initial injection, holding pressure maintains flow into the mold until the gate solidifies.
- Parameter Range: This is usually 50% to 70% of the initial injection pressure.
- Justification: Appropriate holding pressure compensates for material shrinkage and ensures complete cavity filling.
By maintaining and optimizing these parameters, the risk of short shot defects due to inadequate injection pressure can be minimized, resulting in consistent, high-quality outputs.
Insufficient Injection Speed
Insufficient injection speed can significantly impact the quality and structural integrity of the molded part. Key technical parameters involved in optimizing injection speed include:
- Effect on Fill Time:
- Description: The fill time is directly affected by the injection speed and plays a crucial role in part quality.
- Parameter Range: Fill times typically range from 0.5 to 3 seconds depending on the size and complexity of the part.
- Justification: Adequate fill time ensures that the molten material correctly fills the mold cavity before solidification, reducing the chances of short shots or voids.
- Shear Rate Considerations:
- Description: Injection speed influences the shear rate which, in turn, affects material flow behaviour.
- Parameter Range: Shear rates should be maintained in the range specified by material suppliers, commonly between 10^2 to 10^5 s^-1.
- Justification: Understanding the shear rate helps in selecting an appropriate injection speed that avoids degradation of the material while ensuring proper mold filling.
- Thermal Dynamics:
- Description: The thermal behavior of the resin must be managed to prevent premature cooling and solidification, which compromises part quality.
- Parameter Range: Optimal injection speeds vary widely, but maintaining a consistent speed that aligns with the thermal characteristics of the resin is critical.
- Justification: Proper thermal management ensures that the resin remains molten and adequately fills the mold cavity, avoiding defects such as short shots.
- Gate Design Implications:
- Description: The design of the gate can impact the necessary injection speed to achieve optimal results.
- Parameter Range: Smaller gates may require higher injection speeds, whereas larger gates might accommodate lower speeds.
- Justification: Appropriate gate design in conjunction with optimized injection speed ensures efficient flow into all areas of the mold.
- Mold Venting Efficiency:
- Description: Proper mold venting facilitates the escape of air and gases, improving fill efficiency.
- Parameter Range: Vent sizes typically range from 0.001 to 0.030 inches.
- Justification: Efficient venting in the mold design aligns with appropriate injection speeds to prevent air traps and ensure a complete fill.
By addressing these parameters, manufacturers can minimize the risks associated with insufficient injection speed, thereby enhancing the overall quality and consistency of the molded parts.
Barriers in Plastic Flow
Barriers in plastic flow are critical considerations in the design and manufacturing process of molded parts. According to the top references available from reputable sources, the following key barriers and their associated technical parameters are outlined:
- Material Viscosity:
- Description: The viscosity of the plastic material directly impacts its flow characteristics. High viscosity materials require greater injection pressures to flow effectively through the mold.
- Parameter Range: Typical viscosity values for injection molding plastics range from 0.1 to 1,000 Pa·s.
- Justification: Managing the viscosity of the resin at the correct temperature ensures that the material flows smoothly into the mold without causing defects such as burning or incomplete filling.
- Flow Path Complexity:
- Description: The design complexity of the flow paths within the mold can create constrictions that impede plastic flow, especially in intricate or thin-walled sections.
- Parameter Range: Flow path length-to-thickness ratios should ideally be kept below 150:1 to ensure smooth flow.
- Justification: By optimizing the flow path design, manufacturers can minimize pressure drops and ensure uniform filling of the mold, preventing issues such as short shots or warping.
- Mold Temperature:
- Description: Maintaining an optimal mold temperature is crucial for reducing the viscosity of the plastic and facilitating better flow.
- Parameter Range: Mold temperatures typically range between 50°C to 120°C, depending on the resin used.
- Justification: Consistent mold temperature management keeps the resin at an appropriate viscosity and helps in preventing premature cooling and solidification, which can lead to flow stoppage and part defects.
By addressing these key barriers with precise technical control and optimization, we can enhance the flow efficiency of plastic during the injection molding process, leading to higher quality and more consistent products.
How to Correct Sink Marks in Injection Molded Parts?

Correcting sink marks in injection molded parts is a multifaceted process that involves addressing several critical factors related to the molding process, material properties, and part design. Based on authoritative recommendations from leading industry resources, the following strategies can help minimize or eliminate sink marks:
- Adjust Packing Pressure and Time:
- Description: Increasing the packing pressure helps to compensate for material shrinkage during cooling and ensures sufficient material is packed into the mold cavity.
- Parameter Range: Packing pressure should be optimized based on the material used, ranging typically from 50% to 100% of the injection pressure. Packing times should be sufficiently long to allow material to flow and fill the mold during cooling.
- Justification: Adequate packing pressure and time reduce the likelihood of sink marks by ensuring that the material remains under pressure during the critical phases of cooling and solidification.
- Optimize Mold Temperature:
- Description: Uniform mold temperature is crucial for maintaining consistent cooling rates across the part, which in turn affects material shrinkage and the formation of sink marks.
- Parameter Range: Mold temperatures should be set to the lower range recommended for the specific resin to increase cooling rates, typically between 20°C to 50°C.
- Justification: Faster cooling prevents excessive material shrinkage and promotes uniform solidification, thereby reducing the incidence of sink marks.
- Modify Part Design:
- Description: Designing parts with uniform wall thickness and incorporating design features such as ribbing can help to mitigate the occurrence of sink marks.
- Parameter Range: Wall thickness should be optimized to balance material flow and cooling rates, ideally maintaining uniformity within the part or gradually tapering where necessary.
- Justification: Uniform wall thickness allows for even cooling and material distribution, which addresses the root cause of differential shrinkage leading to sink marks. Design modifications like ribbing can support structural integrity without increasing material accumulation, which often causes sink marks.
By implementing these targeted adjustments to the injection molding process, mold temperature management, and part design, manufacturers can effectively reduce sink marks and enhance the quality of injection molded parts.
Increasing Injection Pressure
- Optimize Injection Pressure:
- Description: Adjusting the injection pressure is crucial in ensuring that the molten resin completely fills the mold cavity, reducing the likelihood of sink marks and other defects.
- Parameter Range: The injection pressure should be set within the recommended range for the specific material being used, generally between 60 MPa to 140 MPa.
- Justification: Higher injection pressures increase the flow rate of the molten material, ensuring that it reaches all areas of the mold cavity before solidification begins. This helps to maintain surface integrity and mitigate the formation of sink marks, especially in areas with complex geometries.
- Balance Pressure and Temperature:
- Description: Finding the optimal balance between injection pressure and mold temperature is essential for achieving high-quality parts.
- Parameter Range: While maintaining the injection pressure, consider slight adjustments to mold temperatures within the 20°C to 50°C range to enhance material flow.
- Justification: Proper synchronization between pressure and temperature improves material filling and reduces the chances of defects like sink marks, giving a smoother surface finish and ensuring dimensional accuracy.
By attentively managing injection pressure alongside other parameters like mold temperature and part design, we can significantly mitigate sink marks and enhance the overall quality of our injection-molded parts.
Adjusting Mold Temperature
- Description: Modulating the mold temperature is a pivotal component of the injection molding process, affecting the material flow, cooling rate, and ultimately the quality of the finished part.
- Parameter Range: The mold temperature should be set according to the specific material requirements, generally spanning from 20°C to 100°C. Different polymers have unique optimal temperature ranges; for instance, polyethylene typically requires lower temperatures than polycarbonate.
- Justification: Precisely regulating the mold temperature ensures consistent material flow and uniform cooling, which are crucial for preventing internal stresses and defects such as warping and voids. Lower mold temperatures may accelerate cooling but can result in poor surface finish and increased residual stress, whereas higher temperatures improve material flow and surface finish but may prolong cycle times.
By carefully adjusting the mold temperature within the recommended range and calibrating it to match the specific polymer characteristics, manufacturers can optimize the quality and performance of the finished parts, reduce cycle times, and ensure dimensional stability. This balance is an essential aspect of producing high-quality, defect-free injection-molded components.
Using Proper Cooling Time
- Description: Effective cooling time is critical in the injection molding process as it directly influences the final properties of the molded parts, including dimensional accuracy, mechanical strength, and surface integrity.
- Parameter Range: Cooling time is typically determined based on the thickness of the part, material properties, and mold design. General guidelines suggest that cooling times span from a few seconds to several minutes, with exact values often calculated using specific formulas or simulation software.
- Justification: Adequate cooling time ensures that the material freezes uniformly within the mold, preventing defects such as warping, sink marks, and internal stresses. Improper or insufficient cooling can lead to incomplete parts or increased cycle times, affecting overall production efficiency and quality.
By accurately determining and applying the appropriate cooling times, in line with polymer-specific parameters and part geometry, manufacturers can enhance part consistency, reduce cycle times, and improve overall quality. Adherence to recommended cooling times based on thorough technical analysis ensures the production of robust, dimensionally stable, and visually appealing injection-molded components.
Key technical parameters influencing cooling times include:
- Polymer Type: Different materials have unique cooling rates; for example, crystalline polymers require longer cooling times due to their higher thermal conductivity compared to amorphous polymers.
- Part Thickness: Thicker parts generally necessitate longer cooling times to ensure uniform material solidification throughout the part.
- Mold Design: Efficient mold designs with optimal cooling channels can significantly reduce cooling times by enhancing heat transfer away from the molding interface.
By methodically calibrating cooling times based on these parameters, manufacturers can achieve the dual objectives of high-quality part production and efficient cycle times, thereby optimizing the overall injection molding process.
What are the Effects of Burn Marks on Molded Parts?
Burn marks on molded parts manifest as discolored streaks—often black, brown, or yellowish—caused by the degradation of the polymer material due to localized overheating or trapped air within the mold. In my experience, these burn marks significantly compromise not only the aesthetic quality of the parts but also their structural integrity. The presence of burn marks can lead to weakened areas that may fail under stress, thus negatively impacting the part’s performance and durability. Additionally, these defects often necessitate rework or result in outright rejection of the parts, leading to increased production costs and cycle times. Therefore, it is crucial to address the underlying causes of burn marks through optimized mold design, adequate venting, and precise control of processing parameters.
Surface Discoloration and Damage
Surface discoloration and damage on molded parts are predominantly caused by thermal degradation, incomplete material filling, or improper mold temperature control. According to leading industry resources, these defects arise when the polymer is subjected to excessive heat, causing it to burn or char. Insufficient or uneven mold filling can create variations in surface appearance, often exacerbated by irregular material flow. Moreover, maintaining a consistent and appropriate mold temperature is critical to prevent both discoloration and physical damage to the parts. By ensuring optimal processing conditions and mold maintenance, manufacturers can mitigate surface defects, thereby enhancing both the aesthetic and functional quality of the molded parts.
Understanding Excessive Injection Pressure
In my extensive research and practical experience, excessive injection pressure is a critical issue that can compromise the quality and integrity of molded parts. Excessive injection pressure occurs when the force used to inject the polymer melt into the mold is greater than necessary, leading to several potential defects and operational challenges. High pressure can cause flash, where excess material leaks out of the mold cavities, creating unwanted and often thin extra layers on the parts. Additionally, it can exacerbate the wear and tear on equipment, increasing the likelihood of mechanical failures and necessitating more frequent maintenance. More importantly, excessive injection pressure can induce internal stress within the part, resulting in warping or cracking over time. To mitigate these issues, it is essential to carefully calibrate the injection pressure, often through trial and error coupled with precise sensor feedback, to ensure it is sufficient to fill the mold completely without exceeding the necessary force. This balanced approach not only optimizes the structural integrity and aesthetic quality of the parts but also extends the operational lifespan of the molding equipment.
Preventing Burn Marks through Process Optimization
Burn marks, also known as gas burns, are discolorations or black marks that appear on the surface of molded parts and are typically caused by the decomposition of the polymer or trapped gases igniting within the mold. To effectively prevent burn marks, several optimization strategies should be employed:
- Injection Speed and Pressure Control:
-
- Technical Parameters:
- Optimal injection speed: 200-300 mm/s
- Adequate holding pressure: 50-80 MPa
- Justification: Reducing the injection speed and pressure can prevent the creation of frictional heat and minimize the risk of polymer degradation.
- Technical Parameters:
Frequently Asked Questions (FAQs)
Q: What are the most common plastic injection molding defects?
A: The most common plastic injection molding defects include sink marks, warpage, flow lines, weld lines, burn marks, short shots, and flash. Each of these defects can negatively impact the appearance and functionality of the molded plastic part.
Q: What are the common causes of defects in injection molding?
A: Common causes of defects in injection molding include incorrect temperature settings, improper mold design, faulty molding machines, inconsistent injection pressure or speed, and poor quality plastic material or resin.
Q: How can I avoid injection molding defects?
A: To avoid injection molding defects, ensure that the mold design is optimized, using high-quality molding materials, carefully monitor and adjust the injection molding process parameters, and conduct regular maintenance on the molding machine.
Q: What is a common defect in injection molding known as “sink marks”?
A: Sink marks are depressions or dips on the surface of a molded part, often caused by uneven cooling of the molten plastic inside the mold. They usually occur in thicker sections of a plastic part.
Q: How does the injection molding process impact defects?
A: The injection molding process parameters such as temperature, pressure, and speed can significantly impact the occurrence of defects. Properly adjusting these parameters can reduce defects and improve the quality of the molded plastic part.
Q: What defects can be caused by insufficient injection pressure?
A: Insufficient injection pressure can cause defects like short shots, where the mold is not completely filled with plastic material, leading to incomplete or malformed parts.
Q: How can weld lines in injection molding affect the final product?
A: Weld lines in injection molding occur where two flow fronts meet and can weaken the structural integrity of the part. They often appear as visible lines on the surface of the molded product and can be reduced by optimizing the injection process.
Q: What type of defect is warpage in injection molding?
A: Warpage is a type of defect where the molded plastic part deforms or twists after cooling. This defect is often caused by differential cooling rates of the molding material, leading to internal stresses.
Q: How can surface defects be minimized in molding?
A: Surface defects can be minimized by ensuring uniform cooling, using appropriate mold release agents, maintaining proper mold surface finish, and optimizing the injection molding process parameters such as temperature and pressure.
Q: What role does plastic resin quality play in injection molding?
A: The quality of the plastic resin greatly affects the final product. Low-quality resin can lead to various defects, such as brittleness and poor finish. Using high-quality resin reduces the likelihood of defects and improves the durability and appearance of the molded part.