
Radishes are among the fastest-growing crops; therefore, immensely rewarding, whether for the novice or seasoned gardener. How to grow radishes? This guide will cover everything from planting seeds to harvesting bright, crisp roots. Easy to grow, radishes require no fuss and adapt well to almost any growing condition, whether grown in the garden bed or in containers. Through this blog, you’ll be familiarized with planting seasons, soil conditions, watering, and harvesting so that you will have everything ready for a bountiful harvest and enjoy fresh, homegrown radishes directly from your back garden.
Understanding Radish Varieties
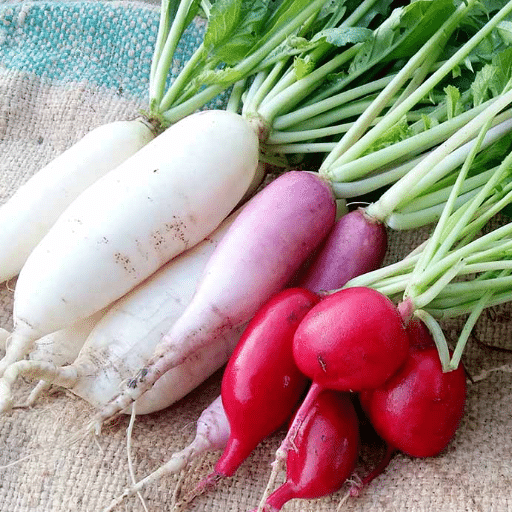
The worldwide range of varieties is rather numerous and presents with great ecological implications, varied flavors, and indeed differing growing requirements. Some types are well-known round red varieties like ‘Cherry Belle’ that are crisp and mildly spicy in taste. The other seasonally longer ones would be the likes of ‘French Breakfast,’ soft to the bite with a pleasant peppery finish. And then you have a winter sure thing with the likes of ‘Daikon’ and ‘Black Spanish,’ big and dense in kinda wake-and-bake flavor, growing best when it’s cold. Therefore, the choice of radish types depends on climate and planting season, and which definite choice will then necessarily be fine-tuned to your desires. Once this is clear, the only matter left is a satisfied and diversified harvest.
Common Radish Types
While considered common types of radishes, here is a quick rundown based on my knowledge and some info I gleaned from top sources. Being spring radishes, ‘Cherry Belle’ grows fast, stays mild, and is great for fresh eating, while ‘French Breakfast’ is known to have a tender texture with a slightly peppery flavor, making it excellent in salads. Winter radishes grow well when planted in cooler weather; ‘Daikon’ is famous for its large and crisp roots, excellent for cooking and pickling, while ‘Black Spanish’ is known for having a very dense texture with a strong earthy flavor. So, picking the right type largely depends on your climate and how you want to eat your radishes: go for spring radishes for a short-term crop and eating raw, and a winter radish crop is for heartier recipes or storing.
Choosing the Right Radish Seeds
When it is time to choose radish seeds, I start by considering my growing conditions and what I expect from the harvest. For fast-growing and crunchy additions in salads, I like spring radishes such as ‘Cherry Belle’ or ‘French Breakfast.’ They have a mild flavor and grow quickly, which is ideal for raw-use dishes. Winter varieties such as ‘Daikon’ and ‘Black Spanish’ come to mind if it’s a cooler season to plant or they are needed for cooking or storing. They are versatile and hearty with flavors that go well in hearty recipes or in storage for a long time. Seed selection depends on timing and what I will do with the radishes after they are ready.
Seasonal Considerations for Different Varieties
While choosing radishes to plant, I take the season into mind first, connecting it with what each variety needs. Spring and summer kinds, such as ‘Cherry Belle’ or ‘French Breakfast,’ are happy in the cool temps of early spring but hurry to bolt when heat arrives. To keep the beds picking smoothly, I do successive sowing every few weeks post the last frost. In autumn and winter, I like hardier types like ‘Daikon’ and ‘Black Spanish,’ which enjoy the slow cooling of the fall months. These take longer to mature, but just get better in taste and can be stored until they are needed in the cold months. The knowledge of planting seasons allows me to give the utmost yield to each crop and keep harvesting all through the year.
How To Grow Radishes
How to grow radishes? Give preference to a selected area with loose-textured soil that drains well and receives plenty of sunlight since radishes prefer such conditions. Remove stubborn weeds and debris from the area; thus, loosen the soil to at least six inches while eliminating any rocks or dangerous compacted patches that interfere with root growth. Amend the soil with organic matter, such as compost, to supply essential nutrients. Maintain soil pH levels at slightly acidic to neutral, ideally around 6.0 to 7.0, to help plant development. Following these steps in preparation will see to it that the garden makes a neat site to grow bright and healthy radishes.
Soil Requirements for Radish Plants
There is nothing to beat when it comes to radishes growing in loose, well-draining soil, enriched with organic matter. In my experience, the extra step of preparing the soil by adding some compost really helps the plants to get their nutrients while also keeping the soil moist. On top of that, keep rejuvenating the plants with slightly acidic to neutral soil conditions, with an ideal range being a pH of 6.0 to 7.0. This pH level encourages strong and healthy growth. Clearing the soil of any rocks and breaking it up to a depth of at least six inches will save you from the pesky problem of hindered root development. These measures have proved most helpful for me in maintaining a garden full of lush, healthy radishes.
Best Locations in Your Home Garden
I’ve always tended to believe that the best spots outside for radishes are those with full sun. Radishes require a minimum of six hours of sunlight daily to encourage a fast pace of growth and to properly develop their roots. Besides that, I ensure that the soil is well-drained and does not get waterlogged due to standing water, leading to root rot. A slightly elevated or flat location is the cockpit for worries of water standing after a heavy downpour. Prioritizing these conditions always worked her favor in creating an ideal environment for a healthy and tasty radish.
How to Sow Radish Seeds Effectively
While sowing the seeds of the radishes, I loosen the soil to about 6 inches deep and remove the rocks and debris to obtain a fine and crumbly condition. Then I make shallow furrows, about half an inch in depth, with a spacing of 12 inches between them, giving the seeds enough room for growth. I scatter the seeds thinly in the furrow, about 1 inch apart, and cover them lightly with soil. I water gently but thoroughly after planting so that the soil settles around the seeds. The seeds germinate in 3-10 days with the soil kept moist but not soggy. Healthy and abundant radish harvests have repeatedly resulted from adhering to these steps.
Planting and Growing Radishes
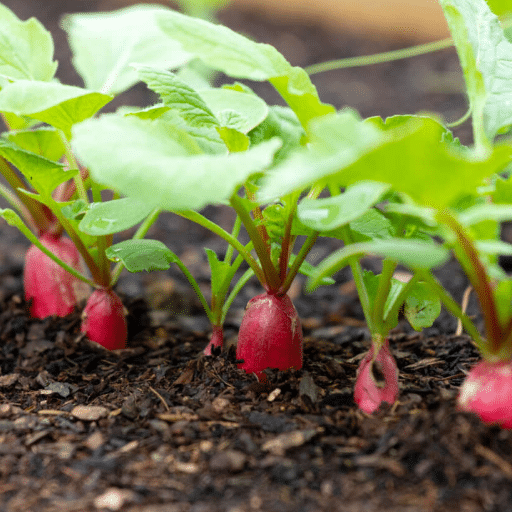
Radishes happen to be a perfect choice for beginners with quick germination times and little care. Successful harvesting entails planting radish seeds in well-draining, nutrient-rich soil with abundant sunlight. Keep the rows 12 inches apart and plant the seeds thinly, spaced about an inch apart. Cover lightly with soil. After planting, the area should be watered thoroughly, but gently, and care must be taken to ensure the soil stays moist during germination, which occurs over an average duration of 3-10 days. Radishes are cool-season crops, making spring and fall the best periods for growing. With due care paid to spacing, watering, and soil care, strong and flavorful radishes can be harvested within 4 weeks.
Step-by-Step Guide to Plant Radishes
First off, radishes need to be cultivated with consistent care once they are growing. Keep an evenly moist soil, not too much water, or else the roots would crack or split. Thin the seedlings early by leaving about 2 inches between plants, as this will enable the roots to mature without crowding. Radishes prefer a soil with good drainage and plenty of organic matter; hence, regular weeding and light hoeing should be done around the plants to keep the soil loose and fertile. Lastly, check for pests such as root maggots or flea beetles, and take immediate remedial action should any infestations arise. Follow these simple steps, and you will have beautiful radishes.
Watering Techniques for Healthy Growth
Watering radishes effectively is very important for their healthy growth and development. It is best to water radishes evenly to maintain a level soil moisture content without saturating the soil with water. Generally, deep watering once or twice every week is fine, depending on your climate and soil type. Keep an eye on the top inch of soil; if it feels dry to the touch, it is time to water. If you have a soaker hose or drip irrigation, this helps maintain consistent moisture levels and prevents overwatering. It is best to water early in the morning since the foliage will dry by noon, thereby reducing fungal attacks. With these watering practices, your radishes will be crisp and tasty.
Sunlight and Space Needs for Radishes
Radishes need full sunshine, growing well under six hours of direct sunlight. I ensure that the place where I plant them will never be in the shade of any taller plants. When it comes to spacing, I like to sow seeds one inch apart, and after germination, they are thinned out to two inches apart. This keeps the plants from crowding each other and gives the radish enough space for development; hence, good health and yield.
Growing Radishes Indoors and in Pots

If you want to go for the indi-roots type of activity, circumstances must be just right. Get a pot that measures a good 6 inches at least for the radish roots to be accommodated. This potting soil should be well-draining and rich in nutrients. Given at least six hours of sunlight exposure daily, a windowsill would be great or otherwise superbright light-sunlight is crucial. If they are somehow unable to get sufficient natural light, a grow light will do. Plant the seeds at roughly even 1-inch intervals, then thin them to 2 inches apart once they’ve reached the sprouting stage. Do not keep the soil too dry or waterlogged; moisture should always be standing-ideal conditions for a radish to grow healthy. So, with this rhythm of care, your indoor-grown radishes will bear fruit.
Best Practices for Container Gardening
The first thing I always consider in container gardening is selection of the right receptacles – ensuring that the containers have adequate drainage to prevent waterlogging. I select a fairly light potting mix, of good quality, which retains moisture but also drains. Next comes the placement of the receptacles: the placement should be such that the plants receive the exact amount of sunlight required, as most plants require at least six hours of direct sunlight. Then there comes the watering of the plants. For this, I always check the moisture of the soil, just to keep it moist and never soggy. A balanced, slow-release fertilizer may be used to feed the plants that supply nutrients during their whole life cycle. These simple yet very effective techniques have always given me a very good container garden.
Choosing the Right Potting Mix
Potting mix selection priorities usually consist of lightness and drainage ability, as potting mixtures cannot stand drying away roots by excess water. Most plants are in the container, and the blends are labeled accordingly, usually containing components such as peat moss, perlite, and vermiculite, which aid in maintaining aeration and water in the pot. For certain plants like vegetables and flowers, I would choose special mixes that may include compost or organic matter. I would never use ordinary garden soil for my pots, as it dries up, compacts quickly and gives a direct impediment to root growth.
Light Requirements for Indoor Radish Growth
Radishes grow best with bright, direct light. I place this plant indoors so that it receives at least six hours of sunlight. Under conditions of insufficient sunlight, I supplement with a grow light positioned just close enough to give light rays but not close enough to produce heat. Proper light exposure is essential for the health of a radish. Poor light means tall and weak stems, but poor rooting. Closer attention is needed toward the light source and readjustments with the growth of plants to supply them with the energy they require for flourishing.
Harvesting Radishes
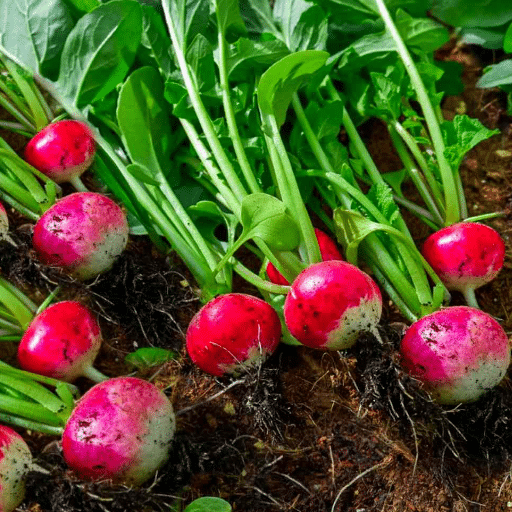
Harvesting radishes correctly is the secret to attaining that particular flavor and texture of radish. Usually, radishes mature in about three to four weeks, but much depends on their variety. You need to check the root size by brushing away some soil to see if it has reached an ideal diameter, usually around 1 inch. Do not let the radish stay much longer in the soil, or it will develop a woody or bitter flavor. Radishes are best pulled out by grasping the greens and tugging gently. Healthy radishes, with a bit of crunch and flavor, make a treat when eaten fresh.
When to Harvest Radishes
Radishes are typically harvested around the 3-4 week mark after planting, depending on the variety. You would gently brush away some soil from the root to inspect whether it has reached a 1-inch diameter. It should not be left for too long, as it would harden and/or taste bitter. Whenever I am ready to pick them, I would just gently grasp the base of the greens and pull them out. This became a crisp, well-flavored time.
How to Harvest Radishes Properly
Radish harvesting is all about timing. I always check the days-to-maturity on the seed packets for the variety I’ve planted, which is usually between 20 and 45 days. To make sure they are ready, I gently brush away the soil from a few roots to check if they’ve reached about 1 inch in diameter. Harvesting should be done in the morning when the soil is still cool and moist, so radishes come out smoothly without any injury. Picking is done only for mature ones, while leaving the others to grow if I have successive plantings. After pulling, the tops are removed so radishes can be stored fresh and crisp. Thanks to this straightforward and timely approach, I’ll always have radishes at their best in aesthetics and flavor.
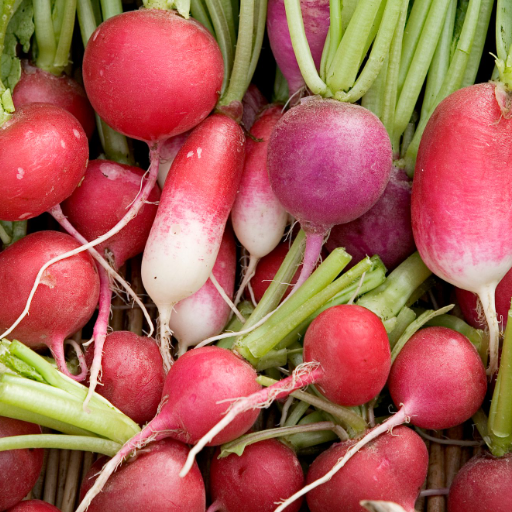
Storing Your Harvest for Freshness
The radishes would preferably need to be kept fresh and crisp for as long as possible; for this, I’d gently brush off any dirt and air-dry them completely. I would then put them into a clean plastic perforated bag or a container with a freshly disposed of damp paper towel to keep the moisture just right. They go inside the crisper drawer of my refrigerator, which is just the right cool temperature to extend the shelf life. This process usually keeps my radishes crisp and mighty tasty for almost two weeks.
References
-
University of Minnesota Extension: This source offers detailed guidance on growing radishes, including soil preparation, planting depth, and optimal growing conditions. Read more here.
-
Utah State University Extension: This guide explains the best practices for planting radishes, including temperature requirements, germination tips, and care instructions. Read more here.
-
University of Kentucky Cooperative Extension Service: This PDF document provides insights into growing radishes in various conditions, including cold frames and containers. Read more here.
Frequently Asked Questions (FAQ)
What type of radish should I grow in my garden?
There are many different types of radishes, including salad radishes, daikon radishes, and French breakfast radishes. If you’re looking for radishes that grow quickly, consider salad radishes, which are typically smaller and mature faster. Daikon radish is a larger, long white variety that can be sown in cooler weather and is great for culinary uses. Experimenting with various varieties of radish can help you find which ones grow best in your kitchen garden, as each type may have unique preferences for soil and climate conditions.
How often should I sow radish seeds for a continuous harvest?
To achieve a continuous harvest of radishes, you should sow seeds every 10 days. This staggered planting will ensure that you have radishes ready to harvest throughout the growing season. Radishes grow best in cooler temperatures, so consider sowing winter radishes in the late fall for a late fall harvest. Remember to space the seeds properly to give each radish room to grow, which can help prevent bolting and produce larger, healthier radishes.
How do I care for my radish plants after they germinate?
Once your radish seeds germinate, it’s crucial to provide the right care for your radish plants. Radishes prefer well-drained soil, so ensure that the raised bed or grow bag has good drainage. Watering is essential, but be careful not to overwater, as this can lead to root rot. Thinning your radishes when they are a few inches tall will help give each plant enough space to grow larger. Additionally, keep an eye out for pests and weeds that may compete with your radish plants for nutrients.
Can I grow radishes in pots?
Yes, growing radishes in pots is a great option, especially if you have limited garden space. Radishes are easy to grow in containers as long as the pot is deep enough to accommodate the roots. Choose a pot that allows for at least 6 inches of soil depth for optimal growth. When growing vegetables in pots, ensure that the container has drainage holes to prevent water from pooling. You can also consider using a grow bag, which is a flexible and portable option for planting radishes.
What should I do if my radishes bolt?
If your radishes bolt, it means they have started to flower and produce seeds, which can make the roots tough and inedible. To prevent this, ensure that you are planting radishes during their ideal growing season and providing consistent moisture. If you notice signs of bolting, you can still harvest the radishes, but they may not be as tasty. Consider planting another round of seeds every 10 days to maintain a steady supply of radishes and avoid the risk of bolting in the first place.


