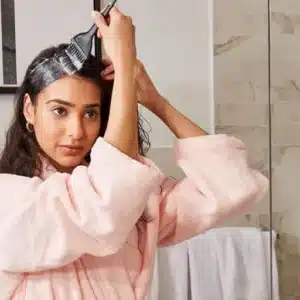
During the hair coloring process, timing and preparation can significantly impact achieving the desired results. You may find yourself asking, “Can I dye my hair after so many days without washing?” This question is more common than you think, and the answer depends on a few critical factors, including your hair type, natural oil production rate, and the type of dye you are about to use. The placement of this article is to ascertain whether unwashed hair is a help or hindrance during the coloring process and to provide specific insights into how to prepare your hair for the best and safest results. Whether you are an at-home regular, a rarely used, or a never-have colored your hair person, this guide addresses some concerns, providing you with the facts you need.
Understanding Hair and Dyeing
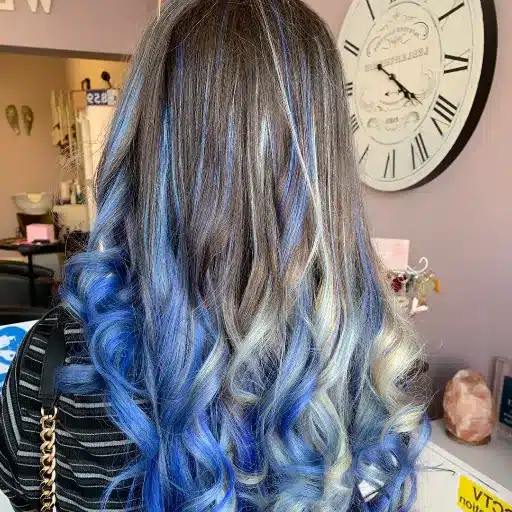
The state of the hair, whether washed or unwashed, can significantly influence the coloring results, which can depend on various factors. Usually, unwashed hair has a coating of natural oils mixed with product residues that act as a defensive layer for the scalp during dyeing, mainly with permanent or ammonia-based dyes. An overwhelming presence of grease or grossly filthy hair will prevent the dye from sinking into the marrow, resulting in uneven color absorption, either in patches or with infinite variation. Generally, it is recommended to wash hair at least 24-48 hours before application so that the natural oils can protect the scalp without leaving residue to interfere with the effectiveness of the dye.
Impact of Hair Cleanliness on Dyeing
Hair cleanliness might be the most critical factor determining the dyeing result. Natural oils act as barriers to protecting the skin from irritation caused by harsh chemicals in dyes such as ammonia and peroxide. In case you washed your hair just before dyeing, such natural oils are stripped away and the scalp can, hence, become sensitive or feel uncomfortable. Too dirty hair, however, with product buildup and super oily hair, can hinder the color absorption, resulting in uneven absorption or muddled colors.
Expert Recommendation: According to experts, it is recommended not to shampoo hair 24 to 48 hours before applying hair dye. This way, local oil production can provide protection to the scalp and strengthen the bonding of the dye to the hair cuticle. The semi-permanent hair color, however, requires that the hair be pre-washed and clean, as the formula relies on direct application without the chemical reaction that occurs with permanent dyes. Ensuring hair preparation according to type and dye used guarantees uniform results and long-lasting effects.
Benefits of Natural Oils
- Protection for the Scalp: Natural oils, such as sebum, create a barrier on the scalp that lessens the risk of irritation in treatments involving dyeing or bleaching.
- Moisture Penetration: They trap moisture within the hair shaft, so hair does not dry out or lose elasticity, something indispensable for hair health in general.
- Strengthens Hair: Nutrients from natural oils, including vitamins and fatty acids, nourish the hair’s structural framework, reducing breakage and split ends.
- Enhanced Shine: When natural oils are evenly distributed, they impart a silken glow to the hair, making it look smooth and shiny.
- Antibacterial Agents: Certain natural oils, such as coconut or tea tree oil, possess antimicrobial properties that help preserve scalp health by warding off minor infections and dandruff.
When It’s Better to Dye Clean vs. Dirty Hair
Whether your hair is better clean or dirty before dyeing depends heavily on the dye used and the hairstylist’s recommendation. For permanent hair dyes, it is often better for the hair to be a little dirty as natural oils in the scalp act as a protective barrier, preventing irritation by chemicals in the dye. The contrary is true for semi- or demipermanent dyes. Successfully, those dyes can work well with freshly washed hair because, without oil and buildup, the hair can provide for equal color absorption. Aside from being so dirty that it contains numerous product residues, such hair can be an obstacle to the dye’s penetration, which may, therefore, yield uneven results. Always follow the instructions on the dye product or consult a professional stylist.
Preparing to Dye Your Hair
Prepare your hair for dyeing by keeping it clean but not wholly devoid of oils. For permanent dyes, hair that has not been washed for 24-48 hours protects the scalp and helps in the efficient development of the dye. Semi-permanent and demi-permanent dyes, on the other hand, work best on clean hair, free of any buildup, and should be applied according to the instructions provided with the product. It is recommended to perform a strand test to ensure the desired results are achieved.
Assessing Your Hair Condition
Assessing your hair condition is a crucial step in any dyeing process, as it determines your hair’s ability to withstand chemical treatments. Do an analysis of the hair texture at the beginning, whether fine, medium, or coarse. Assess the hair elasticity properties. Try to stretch it gently; healthy hair stretches in wet conditions without snapping. Then also, check the porosity of the hair by keeping a clean strand in water. If it quickly sinks, then you have highly porous hair that absorbs moisture very quickly. This might be a hindrance to color retention. If possible, also consider the condition of your scalp by making sure it is not irritated or sensitive. These assessments will provide key points to tailor the dyeing process to your specific hair needs, reducing potential damage and enhancing results.
Choosing the Right Hair Products
Choosing the right hair products will be a matter-of-fact decision J analyze my hair type and the needs brought about by it. For instance, I ensure that shampoos and conditioners are suitable for my hair texture, whether it’s oily, dry, or chemically treated. Then, I look for products that state ‘sulfate-free’ and ‘pH-balanced’, as these terms will protect my scalp and hair health, respectively. I’m writing down ingredients that exclude harmful ones, such as parabens or silicones, and opting for beneficial ones like keratin and natural oils. Finally, I consider the porosity issue behind the product so that it will be the best candidate for heavy absorption, taking into account my hair type.
Steps to Prepare Your Hair for Coloring
- 1
Assess the Hair for Damage
Evaluate the current condition of the hair. Look for signs of damage, such as split ends, brittleness, or excessive dryness. Healthy hair yields better color results and has a lower chance of breaking during the coloring process. - 2
Deep Condition the Hair
Deep conditioning treatments should be applied to the hair a few days before coloring to restore moisture levels and bolster the strength. However, deep conditioning should be avoided on the same day as coloring because extra oils can hinder the dye from being absorbed. - 3
Clarify Your Hair
Clarifying shampoos are great for removing any buildup from styling products, hard water minerals, or oils. This keeps the hair cuticles free and ready to properly absorb the dye. - 4
Avoid Washing Hair Right Before Coloring
On the day of coloring, try not to wash the hair just to maintain its natural oils on the scalp. Such oils act as a protective barrier, preventing irritation caused by chemicals in the dyes. - 5
Perform a Strand Test
By applying color on a small portion of hair, you will see how the dye interacts with your hair’s present shade and texture. Strand testing makes one expect the end result, but learning that the dye color might be completely different from the intended or expected one is a surprise. - 6
Protect Your Skin and Surrounding Areas
Apply petroleum jelly or another barrier cream to the entire hairline, ears, and neck. This will help prevent skin staining. - 7
Prepare Tools and Set Up Environment
Gather all necessary tools, including brushes, gloves, a mixing bowl, and a timer, and set up a clean and well-lit working area to work with precision and comfort. - 8
Go Through the Instructions in Your Hair Dye Kit
If available, follow the manufacturer’s instructions carefully. Each product may have varying details regarding application time, mixing ratios, and subsequent steps in the processing. - 9
Detangle and Section Hair
Detangle all sections of hair with a brush, which makes the application process easier. Divide the hair into small sections to guarantee an even application and complete coverage. - 10
Ensure Hair Has Porosity Level for Coloring
Whether the hair porosity levels actually align with the desired coloring method should also be verified. Low porosity hair probably has to be helped with a heat source in order to open the cuticles. In contrast, high porosity hair may have to be additionally conditioned so that it does not over-absorb pigment.
Effects of Natural Oils on Hair Dye
Natural oils can make a significant difference in the hair dyeing process. Oils such as coconut, argan, and olive create a protective barrier around the hair shaft, shielding it against damage caused by chemical methods. They maintain moisture or improve hair health, and with plenty of oil on the hair, dye penetration is less likely, resulting in inconsistent application of coloring or faint coloring. Proper usage entails applying oils lightly or using them solely as pre-treatment so that protection does not interfere with color absorption.
How Natural Oils Protect the Scalp
The natural oils play a crucial role in maintaining scalp health by moisturizing, soothing irritation, and forming a protective barrier. Coconut oil, for instance, has antimicrobial properties that help prevent bacteria and fungi from causing infections. Argan oil nourishes and heals the scalp skin with vitamin E and fatty acids, preventing it from drying and flaking. Olive oil acts as an emollient to help lift dead skin cells that contribute to dandruff. Such oils cover up the scalp from harsh elements like UV rays and pollutants, maintaining a balanced and healthy environment.
Balancing Oiliness with Hair Dye
When oiliness is a concern after hair dyeing, the goal is to maintain the scalp’s balance without compromising color retention. Begin using a sulfate-free shampoo explicitly created for color-treated hair as it will gently cleanse the excess oils and at the same time preserve the vibrancy of the dye. Using clarifying shampoos once a week can help remove buildup that can lead to greasy hair. Avoid over-conditioning near the roots, as this can exacerbate the oiliness. Use dry shampoos between washes to absorb excess oil without stripping hair. Other options include not washing your hair too often and limiting hair touching; all of these measures go a long way in reducing oil production, thereby ensuring a healthier and more manageable environment for the scalp.
Tips for Managing Greasy Hair Before Dyeing
Dyeing Process for Unwashed Hair

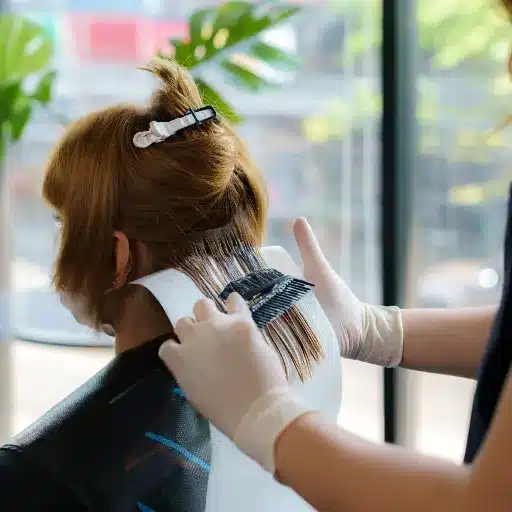
Proper Sectioning of Hair
The hair should be divided into smaller sections to facilitate an even inconvenience. Clips are used to hold the hair up, typically dividing it into four quadrants, which provides the operator with more precise control during the dyeing process.
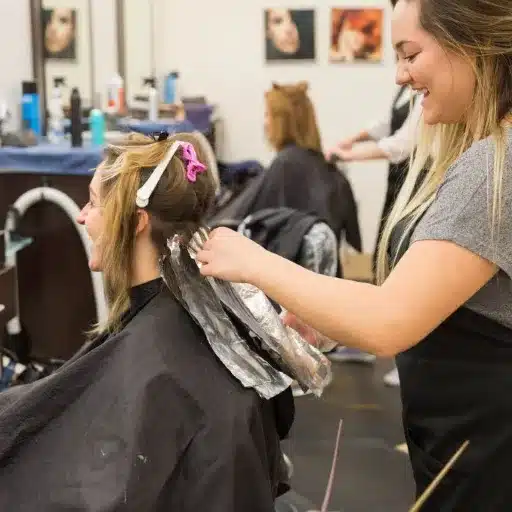
Dyeing
Begin dyeing at the roots, as this area undertakes the majority of the processing, especially when gray hairs are involved. Use an applicator brush to accurately apply the dye and work the color through the hair to the ends for even coloring.
Time Assessment
Stay close to the recommended processing time provided by the manufacturer. Dye that is left beyond the recommended time can start working against itself, resulting in uneven results or damaged hair, while shorter removals do not allow for full color development.
Final Rinse
At the end of the processing period, wash the hair with lukewarm water until the water runs clear. Avoid using hot water, as it can cause the cuticle to lift and prematurely fade the color.
Care after Dyeing
Use a conditioner specifically designed for color-treated hair or after dyeing, which is usually included in the package itself, to seal the cuticle. This also restores moisture and helps retain color. In contrast, avoid using excessive thermal styling products immediately after dyeing, as this may cause the color to fade.
Step-by-Step Guide to Dyeing
Preparation
Prepare your downstream toolkits, which include gloves, paintbrushes, mixing bowls, timers, and dye kits. Have an old shirt or a salon cape on to protect your clothing. Conduct a patch test 48 hours before dyeing to check for any potential reaction.
Sectioning the Hair
Divide the hair into four equal sections with clips for better control. This basically makes the application uniform and easier to separate when dealing with small amounts of hair.
Mixing the Dye
Mix the dye by following the instructions in the kit. Keep the dye in a non-metallic bowl and use a plastic stick to mix, to avoid any side chemical reactions that might alter the application of the dye.
Apply the Dye
Begin applying the dye at the roots with the applicator brush. Work with confidence in small areas to ensure even coverage. Avoid applying for too long to hair that has been previously colored, as this can lead to damage or uneven tones.
Processing Time
Keep to the time given in the instructions on the dye. Do not extend it, as this could damage the hair or alter the intended color result.
Rinsing
As soon as the working time has ended, wash the hair with warm water until the water runs clear. Avoid using hot water, as it can open the cuticle and cause the color to fade prematurely.
Aftercare
Use a color-safe conditioner or a post-dye treatment included in the kit to help seal the cuticle and lock in the color. This step restores moisture and promotes long-lasting vibrancy. Avoid excessive heat styling immediately after dyeing to protect the color and the hair shaft.
In this way, you will gain a bright and well-done finish with hair still in good condition.
Tips for Applying Hair Dye Effectively
- Always Perform a Strand Test
Always try performing a strand test first on the product you plan to use on your entire hair. The purpose is to ensure the color comes out as you intend and to check if you and possible adverse reaction to the product. - Divide Hair into Sections
Divide your hair into four quadrants for an even distribution of product. Each section should run neatly with clips, working one section at a time. - Apply Dye to Dry, Unwashed Hair
Hair dye adheres to dry and unwashed hair more effectively because the natural oils on the scalp act as a barrier, protecting the skin and enhancing color absorption. - Start at the Roots
Applying dye should begin at the roots, as this is the end of the main processing time required. Slowly work the dye down to the ends for a level color. - Set Up a Timer to Get Exact Timing
Always strictly adhere to the recommended processing time for the dye instructions. Over-processing may cause uneven coloring and hair damage. A timer will ensure precision.
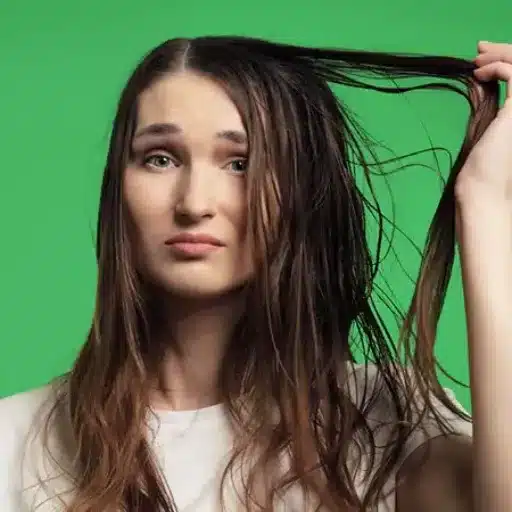
What to Expect When Dyeing Greasy Hair
Benefits & Challenges
When dyeing greasy hair, you can expect several benefits, but also face several potential challenges. A slight presence of natural oils can protect the scalp from irritation by harsh chemicals in the dye, creating a buffer between the skin and the coloring agents. Next, consider these natural oils as a plus since they can help strands retain moisture, resulting in less dryness after dyeing. Nonetheless, when hair is too greasy, strands may not hold the dye uniformly, resulting in uneven results. It is necessary to strike the right balance; hair should not be too dirty or weighed down with styling products, as these can hinder dye absorption. Always follow the instructions on the product and/or consult a professional if you are unsure about the best outcomes.
Post-Dyeing Care
The correct after-dye procedure is bestowed upon locks for a vibrant color and healthy-looking hair. Do not wash your hair for at least two days after dyeing, as this will ensure the color sets. Employ sulfate-free shampoos and conditioners that are safe for color-treated hair to retain color quality and prevent unnatural dryness. Steer clear of heating devices or use heat protection sprays if need be, to reduce strand damage. Deep conditioning treatments or hair mask infusions at least once a week will restore moisture and keep your hair soft. Avoid exposing dyed hair to the sun or soaking in chlorine water for too long without taking precautions, such as wearing a hat or using a leave-in UV protector spray. Following these, one can surely retain their hair color and integrity.
Maintaining Vibrant Hair Color
It is just as necessary to consider the proper products that maintain the color’s vibrancy. In this regard, its specialty shampoos and conditioners are sulfate-free, which helps prevent fading by holding the cuticle layer of the hair. Try to work on washing less than more. Use lukewarm or cold water wherever possible. Watch out for environmental hazards by wearing hats or using sprays with UV protection. Apply a deep conditioner at least once a week to replenish moisture and strengthen your hair, keeping colors vibrant for longer. Use strictly nonprofit chemical products that are specially targeted for color-treated hair.
Products for Color-Treated Hair
From what I read in the best recommendations online, sulfate-free shampoos and conditioners are the key protectors, gentle enough to cleanse without stripping the color. They must be well-imbued with moisturizing agents, such as argan oil or keratin, to help maintain softness and repair damage. Top up the maintenance by using a color-enhancing mask or treatment once a week to bring the shades back and prevent fading. Always use professional-grade products labeled explicitly for color-treated hair for optimal protection and longevity.
Tips for Reducing Damage after Dyeing
Frequently Asked Questions (FAQs)
Reference Sources
- Debunking Myths about Hair Coloring – Hair Cuttery
- Can I dye my hair when it’s greasy? – Reddit Discussion
- Ask An Expert: Should I Wash My Hair Before I Color It? – Hair.com
- Can You Dye Greasy Hair? 10 Steps To Perfect Color – Stylecraze
- Should my hair be dirty or clean when getting a color? – Zodiac Spa


