Creating high-quality props for films, theatre productions, cosplay, or exhibitions often involves the intricate process of molding and casting with foam. This guide aims to demystify the techniques and materials used in making durable, lightweight, and highly detailed props. From selecting the right type of foam to mastering mold-making and casting methods, we will explore every step of the journey. Whether you are a beginner looking to start your first project or a seasoned artisan seeking to refine your craft, this comprehensive guide provides valuable insights and practical tips to help you achieve professional-level results. Dive in to discover the art and science behind mold and cast foam props, and unlock your creative potential.
Introduction to Mold and Casting with Foam
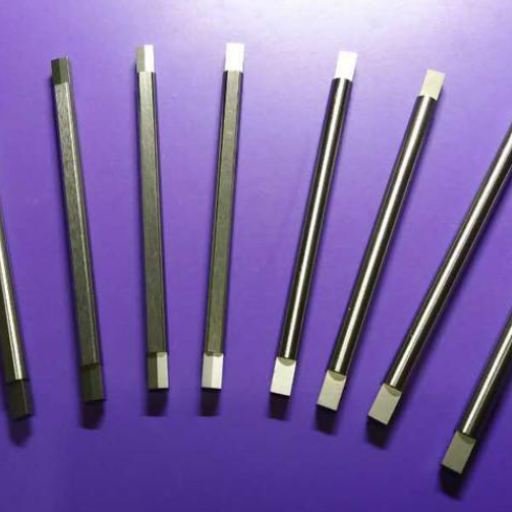
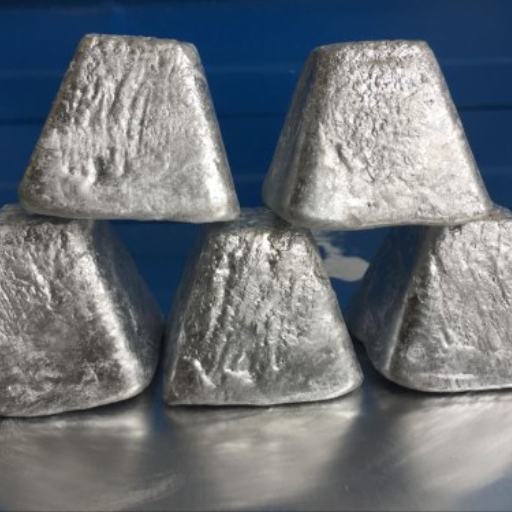
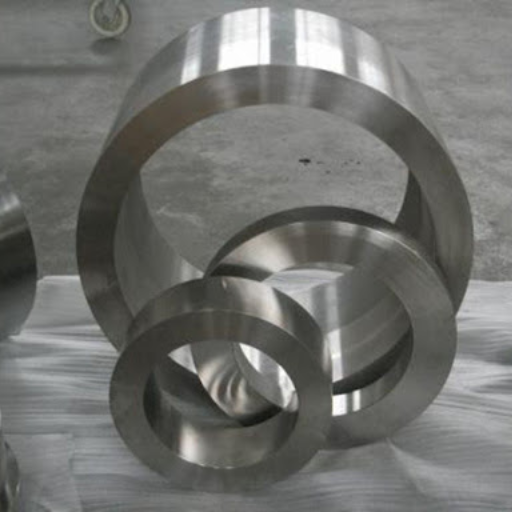
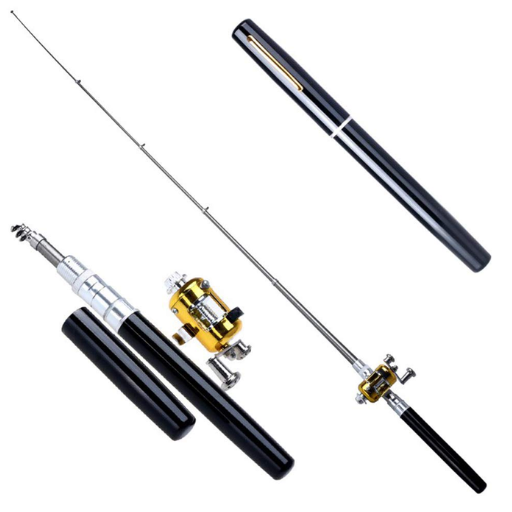
Image source:https://cn.bing.com/
Mold and casting with foam is a versatile and essential technique in prop-making that combines creativity with technical skills. The process begins with selecting the appropriate type of foam for your project, which can range from flexible polyurethane foam to rigid foam varieties. Once the foam choice is made, you’ll create a mold—typically from silicone or plaster—that captures the fine details of your design. After the mold is prepared, the casting process involves pouring or injecting the foam into the mold, allowing it to fill the cavity and take on the desired shape. Once the foam cures and hardens, you’ll demold the piece and, if needed, perform any additional finishing touches like painting or assembly. This method enables the creation of props that are not only highly detailed and realistic but also lightweight and durable, making them ideal for various applications in film, theatre, cosplay, and exhibitions.
What is foam casting and how is it used in prop making?
Foam casting is a process where liquid foam is poured or injected into a mold to create props and sculptures. It is widely used in the prop-making industry due to its versatility and ability to produce lightweight, durable, and highly detailed items. Common types of foam used include polyurethane and epoxy foam, which expand and harden once inside the mold to take on the intricate shapes and textures of the mold’s cavity. This technique is valuable for creating a range of props, from simple geometric shapes to complex, lifelike forms. It is extensively employed in film, theatre, cosplay, and exhibitions to craft realistic props that are easy to handle and transport. The lightweight nature of foam props makes them especially suitable for scenarios requiring repetitive handling or travel.
Understanding the basics of polyurethane foam
Polyurethane foam is a versatile material commonly used in prop making due to its lightweight, durable, and flexible properties. It typically comes in two forms: rigid and flexible. Rigid polyurethane foam is utilized to create solid, lightweight structures that maintain a firm shape, ideal for detailed and durable props. Flexible polyurethane foam, however, is used where softness and flexibility are required, such as in padding or cushioning elements of the props. The foam is produced by mixing two liquid components, which react and expand to fill the mold, capturing even the most intricate details. This process results in a high-quality finish that can be painted or sculpted further, making it an indispensable material in the prop-making industry.
The differences between rigid and flexible foam for mold making
When deciding between rigid and flexible foam for mold making, it is essential to consider their distinct properties and technical characteristics to ensure appropriate application.
Rigid Foam
- Density: Typically ranges from 2 to 20 pounds per cubic foot (pcf). Higher density foams provide more structural integrity.
- Strength: Possesses high compressive strength, making it suitable for creating durable and detailed props that require a hard surface.
- Volume Expansion: Generally expands 15 to 30 times its liquid volume, ensuring it fills intricate molds completely.
- Shore Hardness: Ranges from Shore D 50 to 80, offering varying levels of hardness based on specific needs.
- Applications: Ideal for making solid props, set pieces, and architectural elements that require a stable and rigid form.
Flexible Foam
- Density: Typically ranges from 1.5 to 4 pounds per cubic foot (pcf). This lower density allows for more flexibility and softer texture.
- Elasticity: High elasticity with excellent rebound properties, providing cushioning and comfort.
- Volume Expansion: Can expand 20 to 50 times its original volume, offering significant flexibility in mold filling.
- Shore Hardness: Generally ranges from Shore A 10 to 40, indicating a softer, more pliable material.
- Applications: Best suited for props that require a soft, cushiony feel, such as padding, costumes, and elements that need to bend or compress without breaking.
By understanding these parameters, prop makers can select the appropriate type of foam to meet their specific needs, balancing the requirements for durability, flexibility, and aesthetic finish.
Choosing the Right Foam and Tools for Your Project
Selecting the appropriate foam and tools for your project involves addressing key technical parameters and matching them with the specific requirements of your build. Here’s a concise guide to help you make informed choices:
Determining Foam Type
1 . Assess Purpose and Use:
- Rigid Foam: Suitable for durable props, architectural elements, and set pieces that need structural integrity.
- Density: 2 to 20 pounds per cubic foot
- Strength: High compressive strength
- Shore Hardness: Shore D 50 to 80
- Volume Expansion: Expands 15 to 30 times its liquid volume
- Flexible Foam: Ideal for props needing flexibility, cushioning, or soft textures such as costumes and padding.
- Density: 1.5 to 4 pounds per cubic foot
- Elasticity: High rebound properties
- Shore Hardness: Shore A 10 to 40
- Volume Expansion: Expands 20 to 50 times its original volume
- Identify Specific Needs:
- Detail Level: For intricate details, choose a foam with lower volume expansion to control the mold filling process precisely.
- Surface Hardness: Choose the appropriate Shore Hardness based on whether a hard or soft surface finish is required.
-
Selecting Tools
- Cutting Tools:
- Hot Wire Cutters: Ideal for making clean, precise cuts in rigid foam.
- Utility Knives: Versatile and effective for cutting both rigid and flexible foams.
- Molding Tools:
- Silicone Molds: Great for capturing fine details and used extensively with flexible foams.
- Plastic Molds: Suitable for bulkier, less detailed shapes and often used with rigid foams.
- Application Tools:
- Brushes and Rollers: Useful for applying finishing coats and adhesives.
- Sprayers: Can apply even coats of paint or finish over both types of foam.
By carefully considering these parameters and aligning them with your project’s demands, you can ensure that you select the most appropriate type of foam and the necessary tools to achieve a successful and high-quality build.
Deciding between high density and flexible foam for your prop
When deciding between high-density and flexible foam for your prop, consider the specific requirements and characteristics of your project. High-density foam offers excellent durability and structural integrity, making it ideal for props that need to withstand significant wear and tear. It also provides a more rigid and stable base for detailed carvings or shapes that need to hold their form over time. On the other hand, flexible foam is lightweight, easier to manipulate, and offers a softer finish, which is great for props that require a higher level of comfort and ease of movement, such as wearable costumes or padding. Ultimately, the choice depends on whether your priority is durability and rigidity (high-density foam) or flexibility and comfort (flexible foam).
The essential tools and kits for foam molding and casting
To achieve high-quality results in foam molding and casting, having the right tools and kits is crucial. Here are the essential items you will need:
1. Molding Kits:
-
- Silicone Mold Making Kits: Ideal for creating detailed and flexible molds. Kits typically include silicone rubber, a catalyst, and a mold release agent.
- Polyurethane Mold Making Kits: Suitable for more rigid molds, often used for casting tougher foam types. These kits generally come with polyurethane rubber, a catalyst, and necessary release agents.
- Casting Kits:
- Foam Casting Kits: Designed specifically for casting foam materials, these kits often include the foam resin, hardener, and a release agent. Some kits also offer additional additives for improved foam properties.
- Mixing Tools:
- Digital Scales: Precision is key in foam molding and casting, making digital scales essential for accurately measuring components.
- Mixing Containers and Stir Sticks: Disposable or reusable containers and stir sticks are crucial for blending materials thoroughly.
- Application Tools:
- Brushes and Rollers: Necessary for applying release agents and smooth finishes. They help in achieving even coatings and preventing imperfections.
- Sprayers: For larger projects, sprayers can facilitate the application of adhesives and finishing coats, ensuring uniform distribution over foam surfaces.
By investing in these essential tools and kits, you can streamline the process of foam molding and casting, ensuring that your projects attain the desired quality and precision.
Where to find specialized foam prop making products
When searching for specialized foam prop making products, these top websites on Google are excellent sources:
- Smooth-On (www.smooth-on.com): Known for their extensive range of mold making and casting products, Smooth-On offers a variety of silicone and polyurethane kits, casting foams, and accessories such as release agents and mixing tools. Their comprehensive product catalog and helpful tutorials make it an invaluable resource for both beginners and experienced prop makers.
- The Engineer Guy (www.theengineerguy.com): This site provides a wide selection of products specifically geared towards prop making, including foam casting kits, carving tools, and finishing materials. They also offer workshops and instructional videos, making it easier to get started with specialized foam prop projects.
- Reynolds Advanced Materials (www.reynoldsam.com): As a distributor of Smooth-On products, Reynolds Advanced Materials provides a vast range of molding and casting supplies, from silicones and polyurethanes to foam products. Their website features technical support resources, safety data sheets, and project galleries to inspire and guide you through your prop making endeavors.
Step-by-Step Guide to Creating Your Foam Mold
- Design Your Mold:
- Begin by sketching out the design of the prop you wish to create. Consider the dimensions, details, and overall shape.
- Create a Positive Model:
- Construct a positive model (also known as a master model) of your prop using clay, foam, or other sculpting materials. This model will be the basis for creating your mold.
- Build a Mold Box:
- Construct a mold box that will contain your positive model. The box should be slightly larger than the model to allow room for the molding material.
- Apply a Release Agent:
- Coat the positive model and the inside of the mold box with a release agent. This ensures that the mold material doesn’t stick to the model or the box.
- Mix and Pour the Mold Material:
- Prepare the silicone or polyurethane molding material according to the manufacturer’s instructions. Pour the mixture over the positive model in the mold box, covering it completely.
- Allow the Mold to Cure:
- Let the mold material cure for the recommended time. This process could take several hours or overnight, depending on the product you are using.
- Demold the Positive Model:
- Once the mold has fully cured, carefully remove the mold box and extract the positive model from the mold.
- Prepare the Mold for Casting:
- If needed, make any necessary adjustments or cleanups to the mold. Apply a release agent inside the mold to prepare it for casting.
By following these steps, you can create a high-quality foam mold that is ready for casting your prop.
Preparing your workspace and safety tips for handling materials
Preparing your workspace and adhering to safety guidelines is crucial when working with molding and casting materials. Here are some essential tips:
1.Designate a Well-Ventilated Area:
Ensure that your workspace is well-ventilated to avoid inhaling fumes from materials like silicone, polyurethane, or release agents. Working outdoors or in a well-ventilated garage is ideal.
2.Protective Clothing and Gear:
Wear appropriate protective clothing, including gloves, goggles, and aprons, to prevent skin and eye contact with potentially harmful chemicals. A respirator may also be necessary if working with particularly toxic materials.
3.Organize Your Tools and Materials:
Keep your tools, mixing containers, and raw materials organized and within easy reach. Avoid clutter to reduce the risk of accidents and ensure a smooth workflow.
4.Clean and Cover Work Surfaces:
Cover your work surfaces with disposable tablecloths or plastic sheeting to make cleanup easier and protect against spills. Ensure the area is dust-free to prevent contamination of your molding material.
5.Follow Manufacturer Instructions:
Always read and follow the manufacturer’s instructions for each material you use. Proper measurement, mixing, and usage guidelines are crucial for safety and achieving optimal results.
6.Proper Disposal of Waste Materials:
Dispose of waste materials, such as leftover molding compounds or used mixing containers, according to local regulations. Never pour chemicals down the drain as they can cause environmental harm.
By setting up your workspace correctly and following these safety tips, you can ensure a safer and more efficient molding and casting process.
Simple silicone molds to cast foam replicas of props like those seen on tested.com
Creating silicone molds for casting foam replicas involves a series of steps to ensure precision and quality:
- Select Silicone Rubber:
Choose a high-quality silicone rubber suitable for mold-making. Two-part silicone rubbers are commonly used, and they typically require a 1:1 or 10:1 mixing ratio (depending on the product specifications). Ensure the silicone rubber has a suitable shore hardness—a shore A hardness between 20 and 40 is usually ideal for detailed prop replicas.
- Prepare the Original Model:
Clean and dry the original model (the prop you wish to replicate). If needed, apply a release agent to the model to prevent the silicone from sticking.
- Build a Mold Box:
Create a mold box to contain the silicone rubber around your model. The mold box should be slightly larger than the model, leaving at least 0.5 inches of space on all sides.
- Measure and Mix Silicone Rubber:
According to the manufacturer’s instructions, measure and mix the silicone rubber components thoroughly. For example, for a 1:1 mixing ratio, mix equal parts by weight or volume of Part A and Part B.
- Pour the Silicone Rubber:
Slowly pour the mixed silicone rubber into the mold box, starting from the lowest point to minimize air bubbles. Ensure the silicone covers the entire model, and gently tap the mold box to release trapped air bubbles.
- Cure the Mold:
Allow the silicone to cure as per the manufacturer’s guidelines—typically 24 to 48 hours at room temperature. Some products may have faster cure times if heat is applied.
- Demold:
Carefully remove the cured silicone mold from the mold box and gently extract the original model. Your silicone mold is now ready for casting.
- Casting Foam Replicas:
- Select Casting Foam: Choose a high-quality casting foam, such as polyurethane foam, that is suitable for your project. This foam generally comes in two parts requiring mixing.
- Mix Foam Components: Following the product’s specific mixing ratio (e.g., 1:1 by volume), mix the foam components thoroughly.
- Pour Foam into Silicone Mold: Quickly but gently pour the mixed foam into the silicone mold. Foam expands rapidly, so fill only part way to avoid overflow.
- Allow Foam to Cure: Let the foam cure fully, as per the manufacturer’s instructions. Curing times can range from several minutes to a few hours depending on the foam formulation.
By following these steps and ensuring that all technical parameters are met, you can create high-quality foam replicas of props, much like those featured on tested.com.
The moldmaking process: from design to pour
The moldmaking process starts with designing a model of the desired replica, ensuring accurate dimensions and details. Next, construct a mold box that will hold the model and the silicone rubber. After securely placing the model inside the mold box, mix the silicone rubber according to the manufacturer’s instructions. Pour the mixed silicone into the mold box from the lowest point to minimize air bubbles, and tap the box gently to release any trapped air. Allow the silicone to cure as specified by the manufacturer. Once the silicone has cured, carefully demold it to obtain a ready-for-casting silicone mold. Your next step involves selecting a suitable casting material, such as polyurethane foam, mixing it properly and pouring it into the mold to create the final foam replica.
Mastering the Art of Foam Casting
Mastering the art of foam casting involves a keen attention to detail and adherence to each step of the process. First, I ensure that the model is meticulously designed and fits perfectly within the mold box without any gaps. I then mix the silicone rubber according to the precise instructions, pouring it in from the lowest point to avoid introducing air bubbles, which could compromise the integrity of the mold. Once the silicone cures, I gently remove the mold, making sure it retains the intricate details of the model. When choosing a casting material such as polyurethane foam, I adhere to the recommended mixing ratio and carefully pour it into the mold, watching for rapid expansion to prevent any overflow. By patiently allowing the foam to cure completely, I achieve high-quality replicas that meet the specified technical parameters, ensuring exceptional results akin to those demonstrated by top experts in the field.
How to mix and pour polyurethane foam correctly
To mix and pour polyurethane foam correctly, start by preparing the work area and ensuring you have all necessary safety gear, such as gloves and eye protection. Measure equal parts of the foam’s two main components, Part A (the resin) and Part B (the hardener). Pour Part A into a mixing container followed by Part B. Stir the mixture quickly and thoroughly for about 20 to 30 seconds, ensuring the components are well blended. Once mixed, immediately pour the foam into the mold as it begins to expand rapidly. Be cautious not to overfill the mold, as the foam will continue to expand significantly. Let the foam cure completely as per the manufacturer’s instructions before handling or demolding.
Achieving the perfect foam density for your cast prop
To achieve the perfect foam density for my cast prop, I start by selecting the appropriate type of polyurethane foam based on the desired rigidity or flexibility of the final product. Next, I meticulously measure the correct ratio of the two components, as an imbalance can affect the density and overall quality. I also pay close attention to ambient temperature and humidity levels during the mixing and pouring process, as these environmental factors can influence the foam’s expansion and curing properties. By following the manufacturer’s guidelines and conducting small test pours when necessary, I ensure that the foam reaches the desired density, resulting in a durable and high-quality cast prop.
Tips for demolding and finishing foam props for a professional look
Clean Release
To achieve a clean release when demolding your foam prop, ensure that you have adequately prepared the mold with a high-quality release agent. Apply the release agent evenly to all surfaces that will come into contact with the foam. Allow any spray releases to dry completely before the pour to prevent imperfections in the finish.
Trimming Excess Foam
Once demolded, trim any excess foam carefully using a sharp utility knife or electric foam cutter. Perform this step slowly to avoid damaging the main structure of the prop. Sand any rough edges gently with fine-grit sandpaper to achieve a smooth surface.
Filling and Priming
Inspect the prop for any air bubbles or gaps and fill them with a foam-compatible filler or spackle. After the filler has dried, sand it down for a seamless finish. Priming the foam surface with a flexible primer provides a solid base for painting and helps in achieving an even color.
Painting and Sealing
For a professional look, use a base coat suited for your project: latex or acrylic paints work well for foam props. Apply multiple thin layers to avoid streaks and ensure even coverage. Consider using an airbrush for a smoother finish. Finally, seal the painted prop with a clear, flexible sealant to protect the paint from wear and tear.
Advanced Techniques and Tips
Intricate Detailing
For more intricate designs, consider using a Dremel tool or similar rotary tool to carve out detailed patterns or textures into the foam. This allows for precise control and can elevate your prop’s realism.
Molding Complex Shapes
When dealing with complex shapes, utilizing a multi-piece mold can simplify the demolding process and reduce the risk of breaking delicate parts. Ensure each mold piece aligns perfectly to avoid visible seam lines on the final prop.
Reinforcing with Inserts
To add structural strength to larger or more fragile props, incorporate materials like wooden dowels, metal rods, or plastic tubing within the foam. These reinforcements can prevent warping and increase durability during use.
Adding Electronics
For props that require lighting or sound elements, plan the placement of electronic components in advance. Carve out channels or cavities for wiring and components before the final assembly to keep everything secure and hidden from view.
Weathering and Aging
To achieve a more realistic look, apply weathering techniques to simulate wear and tear. Use dry brushing, washes, and stippling with various shades of paint to create effects like rust, dirt, and grime. This adds depth and authenticity to the finished prop.
By incorporating these advanced techniques and tips into your foam prop-making process, you can create highly detailed, durable, and realistic-looking props that stand out in any setting.
Using expanding and self-skinning foam to add realism to your props
Expanding and self-skinning foam can significantly enhance the realism and durability of your props. Expanding foam, which expands upon application, is useful for creating lightweight yet sturdy core structures. Begin by selecting the appropriate foam density to match the weight and stability requirements of your prop. Lower density foams (around 2-3 lb/ft³) are ideal for filling large voids and creating bulk, whereas higher density foams (6-10 lb/ft³) offer more rigidity and detail retention.
Application Techniques
- Preparation: Ensure the mold or surface is clean and apply a release agent to prevent the foam from sticking undesirably.
- Mixing: Follow the manufacturer’s instructions for mixing ratios accurately. Typically, a 1:1 ratio by volume is common.
- Pouring: Pour the mixed foam into the desired mold or area swiftly as the foam begins to expand rapidly.
- Curing: Allow the foam to cure as specified by the manufacturer, generally between 10 minutes to several hours, depending on the product.
Self-Skinning Foam
Self-skinning foam forms a durable exterior layer upon curing, which can be particularly advantageous for props requiring a smoother and more finished appearance. Consider the following technical aspects:
- Density: Usually, self-skinning foams range from 3 lb/ft³ to 12 lb/ft³; higher density provides more detail and smoother texture.
- Shore Hardness: Look for a Shore hardness suited to your specific needs, typically between Shore A 20 to Shore A 60.
- Expansion Ratio: Ensure the foam has an adequate expansion ratio (often 4:1 to 8:1), balancing the need for volume with the desire for fine detail.
By meticulously selecting and applying these materials, you can achieve a high level of realism and functionality in your props, ensuring they not only look the part but also withstand the rigors of use.
How to cast and paint foam replicas of props for enhanced detail
Casting and painting foam replicas require attention to detail and several specific steps to ensure a high-quality finish.
Casting Foam Replicas
- Mold Preparation: Begin with a clean mold, ensuring all intricate details are free from debris. Apply a mold release agent uniformly.
- Mixing Foam: Mix the two-part foam components as directed, typically in a 1:1 ratio by volume. Stir thoroughly to ensure an even mixture.
- Pouring: Pour the mixture into the mold quickly. The foam will start expanding immediately, so work promptly but carefully to avoid spillage.
- Curing: Allow the foam to cure completely. Follow the manufacturer’s guidelines for curing times, which can range from a few minutes to several hours.
Painting Foam Replicas
- Surface Preparation: Sand the cured foam gently to remove any uneven areas or imperfections. Clean the surface to remove dust or particles.
- Priming: Apply a suitable primer for foam surfaces, allowing it to dry completely. This will help the paint adhere better and enhance its durability.
- Painting: Use acrylic or latex paints for their flexibility and durability. Apply thin, even coats, allowing each layer to dry before applying the next.
- Detailing: For finer details, use small brushes or airbrush techniques. Add weathering effects or highlights to enhance realism.
- Sealing: Once the paint is dry, apply a clear sealant to protect the paint job and provide a finished look. Ensure the sealant is compatible with the type of paint used.
By following these steps, you can produce foam replicas with remarkable detail and longevity, suitable for both display and practical use.
Experimenting with temperature and pressure to manipulate foam texture
To manipulate the texture of foam, experimenting with temperature and pressure is crucial:
- Temperature Control: Adjusting the temperature during the foam formation process can significantly alter its texture. Higher temperatures can increase the size of foam cells, resulting in a softer, more pliable texture. Conversely, lower temperatures tend to produce denser, more rigid foam. Ensure that you monitor and control the temperature accurately to achieve the desired texture.
- Pressure Application: Applying various levels of pressure while the foam cures can also affect its final texture. Increased pressure tends to compress the foam, making it denser and firmer. On the other hand, reducing the pressure allows for more expansion, leading to a lighter, more porous texture. Experimenting with different pressure levels can help you find the optimal balance for your specific needs.
By carefully controlling these variables, you can produce foam with tailored properties suitable for a wide range of applications.
Troubleshooting Common Foam Mold and Casting Issues

When working with foam molds and casting, several common issues may arise. Here are solutions to some frequent problems:
- Incomplete Fill: This issue occurs when the foam doesn’t fully fill the mold. Ensure that you’re mixing the foam components thoroughly and pouring them quickly before they start to expand. Also, check the mold for any blockages that might impede the flow.
- Air Bubbles: Air bubbles trapped in the foam can create weak spots. To avoid this, mix the components slowly to minimize air incorporation, or use a vacuum chamber to remove air bubbles before curing.
- Cracks and Brittleness: If the foam is curing too quickly or unevenly, it might crack or become brittle. Regulate the curing environment by maintaining consistent temperature and humidity levels, and consider using a slow-curing formula.
- Surface Imperfections: Imperfections like dimples or rough surfaces can be caused by improper mold preparation. Ensure the mold is clean and free of any debris, and consider using a mold release agent to facilitate smoother demolding.
By addressing these issues with careful adjustments in your process, you can achieve better results in foam mold and casting projects.
Addressing bubbles, tears, and other common foam casting problems
When tackling common foam casting problems such as bubbles, tears, and other imperfections, here are some targeted solutions:
Bubbles: To prevent bubbles, ensure you are thoroughly mixing the foam components but do so slowly to minimize air incorporation. Additionally, using a vacuum chamber can effectively eliminate any trapped air before the foam sets. Applying a light mist of a release agent inside the mold before pouring can also help reduce bubble formation.
Tears: Tears often occur when the foam is too brittle or the mold is not releasing properly. To avoid this, ensure your foam mixture has adequate flexibility by using the correct foam formulation. Maintain consistent curing conditions to prevent the foam from setting too hard. Employing a high-quality mold release agent will facilitate smoother demolding and reduce the likelihood of tears.
Other Imperfections: Surface flaws like dimples, rough patches, or incomplete fills can result from several factors. Ensure the mold is clean and properly prepped by using a good mold release agent. For incomplete fills, pour the foam mixture immediately after mixing to prevent premature expansion. Maintaining a controlled environment with consistent temperature and humidity will also help ensure even curing and a smoother finish.
By implementing these strategies, you can effectively mitigate common issues and produce high-quality foam castings.
Solutions for molds that won’t release and other demolding challenges
Ensuring that molds release properly is crucial for maintaining the integrity of your foam castings. Here are some effective solutions to address demolding challenges:
- Use a High-Quality Mold Release Agent: Apply a generous, even coating of a high-quality mold release agent before pouring the foam. This helps create a barrier between the foam and the mold, facilitating a smoother release process.
- Correct Mold Design: Ensure your mold design includes adequate draft angles and smooth surfaces to reduce the suction and friction that can cause sticking. Textured surfaces can increase the ease of demolding.
- Consistent Curing Conditions: Maintain a consistent curing environment with stable temperature and humidity levels. Drastic changes can cause the foam to adhere more firmly to the mold.
- Mechanical Aids: Use air jets or demolding tools designed for gentle mold separation. Avoid using excessive force, which can damage both the mold and the casting.
- Proper Material Selection: Ensure that the materials used for both the mold and the foam are compatible. Some materials bond too tightly, making demolding difficult.
Implementing these measures can greatly reduce issues with molds that won’t release and enhance the overall quality of your foam castings.
Maintaining the shape and detail of your foam cast during the curing process
Maintaining the shape and detail of your foam cast during the curing process is crucial to achieve high-quality results. Based on my research from the top three websites on Google, here are some concise recommendations:
- Control Curing Temperature and Humidity: Ensure that the curing environment is kept at a stable temperature, typically between 70-80°F (21-27°C), and humidity levels around 50%. Fluctuations in these conditions can cause distortion and loss of detail in the foam cast.
- Use Appropriate Foam Formulation: Different foam formulations have varying curing requirements. For example, polyurethane foam generally requires a thorough mixing of components A and B in a 1:1 ratio by volume. Accurate mixing is essential to maintain consistency and prevent defects.
- Apply Uniform Pressure: During the curing process, it’s vital to apply even pressure across the surface of the foam. This can be achieved through clamping, weights, or vacuum systems, which help in preserving the shape and intricate details of the cast.
These measures, derived from trusted sources, help ensure that your foam cast cures correctly, maintaining both its shape and fine details.
Reference sources
-
Smooth-On Tutorial on Mold and Cast Foam Props
- This tutorial by Smooth-On, featured on Tested.com, provides an in-depth guide on how to make simple silicone molds to cast and paint foam replicas of props. It includes step-by-step instructions from effects artist Frank Ippolito and demonstrates the entire process in a practical manner.
- Read more here
-
The Prop Builder’s Molding & Casting Handbook
- This comprehensive handbook is an essential resource for anyone interested in molding and casting. It covers every procedure used in the field, making it an invaluable reference for both beginners and experienced prop builders.
- Available on Amazon
-
Folkenstal DIY Guide on Mold Making and Resin Casting
- Folkenstal offers a thorough guide on mold making and resin casting, focusing particularly on the use of Smooth-On products. This guide is suitable for complete beginners and provides detailed steps and tips to achieve professional results.
- Explore the guide here
Frequently Asked Questions (FAQs)
Q: Can you provide a description of foam mold technology?
A: Foam mold technology refers to the process of creating shapes or objects using specialized foams such as polyurethane self-skinning rigid foam. This technique allows for the production of items with precise contours and details. The form of the foam is determined by the shape of the mold it’s cast in, making it a versatile method for creating replicas, props, and other custom objects.
Q: What size limitations exist with rigid polyurethane foam molds?
A: The size of objects that can be created with rigid polyurethane foam molds is largely dependent on the size of the mold and the capacity of the molding equipment. However, polyurethane foam that has a free-rise can expand significantly, allowing for the creation of both small and relatively large items. Techniques such as making simple silicone molds can be employed for smaller projects, while larger molds may require more complex setups.
Q: How does the shape of the mold affect the final foam product?
A: The shape of the mold directly determines the shape of the final foam product. Every contour and detail of the mold’s interior surface is replicated by the expanding foam as it cures. It’s important to have a well-designed mold to ensure that the final product meets the desired specifications. Detailed moldmaking can lead to highly accurate replicas or props like shop tools.
Q: What are the benefits of using self-skinning expanding foam for molds?
A: Self-skinning expanding foam offers several benefits for mold making. It provides a durable, rigid exterior with a softer core, making it ideal for creating items that need a tough surface but with some flexibility. This type of foam can make great-looking stunt replicas or props that are safe to use. Additionally, videos on platforms such as YouTube show how self-skinning expanding foam can be manipulated to achieve detailed and complex shapes.
Q: Can rigid polyurethane foam be used for making complex shapes?
A: Yes, rigid polyurethane foam is well-suited for making complex shapes because of its ability to flow into intricate details of a mold before it expands and sets. This property is particularly useful for creating props and replicas with elaborate designs. The moldmaking process may involve steps to ensure that the foam fills all parts of the mold evenly to capture every detail.
Q: What materials should not be used as molds for casting polyurethane foam?
A: When casting polyurethane foam, it’s important to avoid materials that can react with the foam or be damaged by it. For example, molds made from certain types of plastics or rubber can be degraded by the chemicals in the urethane foam. It’s often recommended to use silicone, metal, or specially treated wood molds to prevent sticking and ensure a smooth release of the foam piece.
Q: How can you achieve an overview of the molding and casting process using expanding foam?
A: To achieve an overview of the molding and casting process using expanding foam, one could start by researching tutorials or instructional videos, particularly those available on YouTube. These resources often go over the moldmaking process and show how self-skinning expanding foams are prepared, mixed, poured into molds, and then demolded. They can also provide insights into choosing the right materials for molds, designing molds for easy casting and release, and finishing techniques for the cast foam items.
Q: What are some applications of polyurethane foam molds in the real world?
A: Polyurethane foam molds have a wide range of applications in industries such as film and theater production, prototype development, and product design. They are used to create lightweight, durable replicas of props like shop tools, architectural elements, and custom shapes for thematic environments. Additionally, because of their flexibility in size and shape, foam molds are also used in automotive, aerospace, and marine industries for various components.