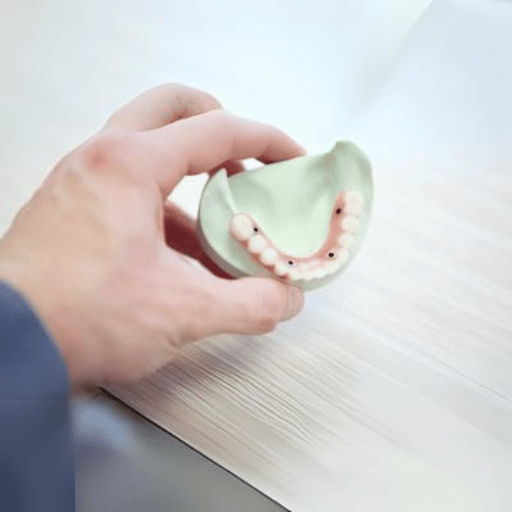
3D printing technology has been influenced by modern technologies and has been widely circulated in various industries. Creality 3D technology is one of the most famous emerging industries. On the one hand, Dental mode is appeared on the Creality 3D machines for it to provide precision, efficiency and personalized products for the dental industry. In this blog, you will learn about Dental mode in depth so as to have a better understanding of what it benefits dental practice, how and why. No matter you are a practitioner in the dental industry or interested in it, the following discussion will let you know the vivid content.
Exploring the Advantages of Dental Mode in Creality 3D Printers
As a Creality 3D printing professional I can sum up the advantages for Dental Mode in Creality 3D printers in three words: Precision, Efficiency, Customization.We are talking about Precision. The ultimate precision within 3D printing, which only allows for dental models and prosthetics of the highest quality, fit perfectly and with no need for millimetre-width adjustments to fit a patient’s mouth.Efficiency is also improved through Dental Mode, specifically in terms of time. With Dental Mode, you can significantly shorten printing times, even 80% without sacrificing quality, to ensure dental laboratories can treat more patients in less time.Customization: One of the biggest element that Dental Mode offers is customization, being able to tailor-made dental solutions to an individual patient’s requirements. This is a major advantage once the workflow is simplified resulting in cheaper costs and higher patient satisfaction.
How dental mode enhances 3D printing accuracy for dental applications
Here, it’s fundamental to contextualise the benefits of Dental Mode on the accuracy of 3D-printed restorations. Specifically, the following key parameters will highlight why Dental Mode represents an enhancement for nowadays 3D-printed dental applications:
- Dental Mode: fine control of layer thickness enables exquisitely thin layers, which results in higher resolution parts. This fine control of layer thickness is important for the greater detail in particular for dental applications. For example, intraoral scanning or wax up models by dentists require the reproduction of details and for this it helps to have very fine layers in the prints to represent the surfaces of the virtual part closely with natural toothlike structures.
- Precision Calibration: Dental Mode’s software contains advanced calibration routines that tune the settings of each print to start with our most favourable settings, essentially guaranteeing the best possible print at the initiation. This helps reduce the chance of errors that can lead to deviations from expected results.
- Optimised Print Paths: Dental Mode is denti-trained to understand the shapes and topologies of dental models. Print paths are optimised for dental applications, which further minimises defects and maximises accuracy.
- Material-friendly: The mode calibrates its performance to work with materials used in dental healthcare, such as dental-grade resins and others that don’t shrink or warp. That is important because minimising distortion helps retain the details of any printed model or attachment that might be made.
- Reduced scaffolding requirements: Through effective control of the scaffolding support structures, Dental Mode guarantees that reduced post-processing is required, ensuring that the final product remains faithful to the CAD design – critical for ensuring that dental fittings adhere to the correct dimensions.
These parameters help our Dental Mode to offer a professional solution with high accuracy, high efficiency and high personalisation for dentists. Those are not only effective for workflow, but also for patient care by helping with the personalisation of dental devices towards the best fit for the patient.
The role of specialized dental mode resin in achieving high-quality prints
Dental 3D prints gain their high-quality images through the use of special dental mode resin. As an industry insider, I will elaborate on why this resin plays a pivotal role and how it contributes to the performance of dental 3D prints.
- Minimal Shrinkage and Warping: Its feature of self-adaptive retraction that minimises shrinkage and warping is one of its most important characteristics. The colours are especially prominent in the production mode resin due to its low material utilisation. The resin’s ability to print dental models with minimal shrinkage and warping ensures that the reproduced models maintain their exact dimensions and represent their true form.
- Dental Grade Resolution: Dental-grade resins are formulated to offer fine resolution, a feature that is important for accurately reproducing the fine geometries of the dental models. It’s also imperative that any resin 3D printed objects are dimensionally accurate in order to create a perfect fit with the moulds, crowns and other prosthetics associated with the dental profession.
- Biocompatibility: Safety is of the highest importance when it comes to dental prostheses. Dental grade resins are biocompatible, meaning they are safe to use in the human body and ideal for items with direct or indirect contact with the patient, such as custom trays and surgical guides.
- Consistency and reliability: Specially developed dental resins remain consistent from batch to batch. This means that every print is made to the same standards that are expected of dental products – there is no variability when it’s a matter of people’s wellbeing.
- Ease of Post Processing: Dental mode resins are formulated to make post processing, which includes cleaning and curing, easier. Easier post processing also saves on time and energy, leading to quicker development of dental prints for dental lab or clinic.
- Compatible with Dental Equipment: These resins are also optimised to work with specific dental 3D printers and other equipment, and this synergy between the material and machine ensures that everything works with each other in harmony, minimising the chances of print failures.
Detailed parameters like those have a positive effect on the three criteria required for dental mode resins: high accuracy, safety and good quality. This is exactly what we need when creating used dental applications. In other words, the specialised materials we use can not only increase the efficiency of the dental manufacturing process, but also significantly improve the quality of the care we provide to patients.
Comparing dental mode with standard printing configurations
To understand these dental mode configurations, it is necessary to draw some distinctions from standard 3D-printing configurations. Each property of dental mode resins is optimised for the specific applications required in the dental field that standard configurations do not always cater towards. We’ll explore them here.
- Accuracy and Precision: The dental applications require high accuracy and precision. Such high accuracy and detail in the print is of utmost necessity in dental mode. The prints are required to be precise so that they can be used to fashion the denture or other dental implants effectively. The standard printing configuration might not always prove accurate enough to capture the fine intricate detail necessary for dental applications.
- Biocompatibility: Another big difference is safety – dental mode resins are biocompatible, that is, they are made in a way that makes them safe for use in or on the human body. This is extremely important for things like custom trays and surgical guides – type of things that you don’t want to cause your patient harm while using. Standard resins might not meet this safety requirement.
- Consistency and Stability: A proprietary recipe designed dental resin designed to maintain consistency and stability across batches, to guarantee that every print meets the standards needed for dental practices. Standard configurations are more variable than they should be, which can result in errors in final product.
- Ease of post-processing: Dental mode resins are created to make post-processing steps, such as cleaning and curing, easier to perform. This increases efficiency and reduces time and effort required. Standard printing might take more time for post-processing.
- Compatibility with Dental Equipment: Dental resins are manufactured with specific dental 3D printers and peripheral hardware in mind. This means that they are optimised to work well with the hardware that the part is printed on. Standard configurations might lack this level of integration, which can lead to the possibility of printing issues and inefficiencies.
These parameters immediately explain why the dental mode configurations outlined above offer huge advances in accuracy, safety, repeatability, simplicity and interoperability over normal printing arrangements.
Understanding the Significance of Resin in Dental 3D Printing
My paraphrase of this expert’s summary on the importance of dental resins in 3D printing would be the following. Dental resins play an important role in the 3D printing industry, since these resins grant high detailing and biocompatibility with the specific hardware used in modern dental applications. With these resins, the final device (like a custom tray, a surgical guide and prosthetics) tends to be highly accurate, which means a drop in chances of patient harm. Moreover, these resins retain their structure and shape across different batches, which brings stability to the final product each time. Next, it is easier to simplify the post-processing, so a dental professional can preserve their workflow efficiency. Finally, there are a few dental appliances that work with these resins. Therefore, choosing dental resin will ensure an optimised performance that would otherwise be impossible.
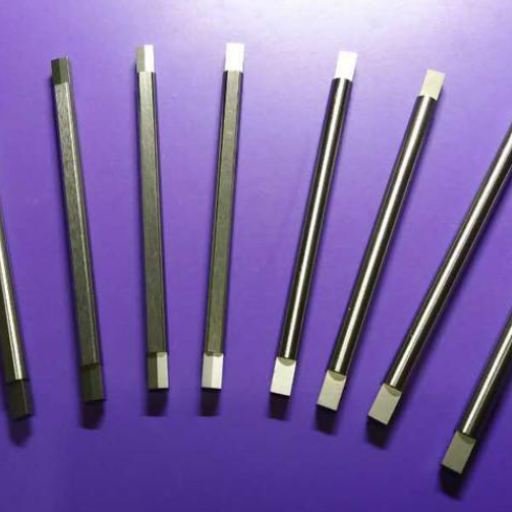
Different types of resin suitable for dental mode in Creality printers
When you pick the right resin for your dental mode in your Creality printer, it is very important to think about how you will be using your dental resin. Here is a list of the best types of resin, broken down into easy-to-understand text.
- Biocompatible Resin: This resin is safe for the human body and can be used to make human teeth via crowns, bridges and implants.
- High-Accuracy Resin: Each part printed in the dental office has to have the exact dimensions specified. A dental fitting with the correct dimensions can help patients avoid discomfort and complications.
- Castable Resin: For mould-making, castable resins burn out precisely, without unwanted byproducts such as ash, which is important when making dental models that subsequently need to be cast in metal.
- Flexible Resin: Flexible resins are best used for printing parts with some give and bend, such as some types of dental splints or occlusal guards.
- Low-Shrinkage Resin: Resins designed to minimise the changes in dimensions that can occur during curing so that the finished product more closely matches the design specifications.
- Durable Resin: For long-lasting dental pieces that can resist the daily abrasive action from chewing and biting.
Relevant Parameters
When considering these resins, focus on the following parameters to justify your choice:
- Biocompatibility: Ensures the resin is safe for long-term contact with human tissue.
- Precision: Determines how accurately the resin can replicate intricate details.
- Castability: Examines how well the resin can burn away without residue for casting purposes.
- Flexibility: Indicates the level of flexibility needed for certain dental applications.
- Shrinkage Rate: Measures how much the resin shrinks during the curing process.
- Durability: Assesses the resin’s resistance to wear and tear over time.
A greater knowledge of these variables can help to make 3D printed dental products faster, more reliable, and of a higher quality, leading to decreased treatment times and safe experiences for our patients.
The importance of UV curing in dental resin printing processes
During the process of dental resin printing, the layer-by-layer printing structure is solidified and fixed through UV curing in the UV light, to make sure that the final dental products are reliable in structure, accurate in dimension and without any danger to patients. We will talk about why the UV curing is necessary and how it is related to the relevant parameters below.
- Biocompatibility: using UV curing to cure resin fully reduces the risk of uncured or partially-cured material that might be harmful to human tissue. Completely curing the resin means it is not toxic and not harmful if left in your mouth for long periods.
- Precision: Advances in modern 3D printing technologies depend on UV curing processes because they facilitate materials and effects that achieve unprecedented precision for dental applications. For example, the precise curing of a printed model can prevent distortion and ensure it is as accurate as possible.
- Castability: to cast a resin in a mould using a UV cure results in the entirety of the material burning out cleanly with no residue. Correctly cured resin will remove all possible imperfections from the metal cast in the final stage.
- Flexibility: For applications where we want a certain level of flexibility, such as dental splints and guards, the UV curing process can be tuned in order to provide the optimal mix of hardness and flexibility to create functional and comfortable dental devices.
- Shrinkage Rate: UV curing minimises shrinkage of the resin during polymerisation, which leads to less deformation in the printed models. With a low shrinkage rate, the printed models can have the same dimensions of the intended part, which is crucial for the fit and function of the dental pieces.
- Durability: Good UV curing makes the pieces longer-lasting, keeping them strong in the face of the mechanical stresses of chewing and biting. A resin that is cured through and through is a stronger resin, needing less frequent replacement.
Using this understanding to optimise the UV curing process will lead to production of higher-quality and more reliable 3D printed dental products made to meet industry standards.
Ensuring safety and quality in dental resin printing
Finally as industry expert i will address the important parameters for print quality and safety in resin printing in dentistry.
- Material Selection: selecting the right resin is of utmost importance. The dental resins must be bio-compatible and does not induce any allergic or irritant reaction from the patient. Confirming material certifications and clearances or approvals is of essence where regulatory bodies such as FDA or CE approves it.
- Proper UV curing: UV curing is so essential to proper printing that we have a dedicated page about it. Check to ensure your UV curing unit has been calibrated properly and that the exposure time is long enough to full cure your resin. Partial cure will lead to defects or reduced strength.
- Handling and Storage: Wear gloves and take other precautions to avoid skin contact when handling resins; store them in a cool, dark place away from direct sunlight to prevent premature curing or degradation, and follow manufacturer directions carefully.
- Print accuracy: Calibrate and maintain 3D printers regularly to ensure mechanical precision. Use the recommended settings for your slicing software (the software that creates files for your printer to use), paying attention to the manufacturer’s instructions for the resins you want to use. This will provide the best output for your prints. This will minimise errors in print and avoid the need for rework, increasing the accuracy and fit of the final prosthesis.
- Post-Processing: After printing, don’t forget that it is only half of the job done. You need to clean and finish the printed dental parts very carefully and completely. You should remove all the uncured resin. Also, you need to remove sharp edges. This is very important in order to guarantee the safety and comfort of the final product for your patient.
- Quality control: Implement a robust quality control system for every step of the production process: from regular monitoring, to printing and mechanical testing, to ensure the strength and accuracy of the production of the dental components.
With careful management of these parameters, dental practitioners can manufacture high quality, reliable dental products in 3D that are safe and provide excellent care for patients.
Optimizing 3D Printing Settings for Dental Applications

Here we list a few important parameters, for example, to optimise 3D printing preparation for dental application: 1. The resin type should be carefully chose, it should be biocompatible and passed FDA, CE or similar certification of authority; 2. The UV curing process needs to be accurate and complete, make sure the curing unit is calibrated, and the resin is fully cured; 3. The resins need to be handled and stored properly to avoid degradation, the manufacturers’ guidelines always should be followed; 4. The 3D printers should be calibrated routinely, and the necessary slicing software settings should be used; 5. The post-processing steps, such as careful cleaning and edge smoothing, could increase the safety and comfort for the patients using the dental parts; 6. A good quality control system, which include routine inspections and mechanical testing steps, should be established to assure the strength and precision of the components.
Adjusting layer height and exposure for optimal dental model printing
Knowing how to tweak layer height and exposure when 3D printing dental models can make the result look vastly different. Here is what these parameters mean.
1.Layer Height:
- Definition: Layer height is the thickness of each layer of resin deposited in the build process.
- IMPORTANCE: Select the smallest layer height possible to print fine details. For dental models, I have chosen 35 microns, which is equivalent to less than 0.035 mm, because I want fine details on the model. Thinner layers result in higher-resolution models, but take longer, while thicker layers will be faster but detail not be captured so well.
- Recommendation: Most dental applications require a layer height around 50-100 microns. A layer height of 50-100 microns provides a good balance of detail and print time, allowing for accurate models to be produced in a reasonable amount of time.
2.Exposure Time:
- Definition: exposure time is the time each layer is exposed to the UV light to cure the resin.
- Key point: The exposure time needs to be correct. If not, the resin will be under-cured, and so the model will not be very strong, nor as precise in its dimensions, leading to poor prints. On the other hand, if the exposure time is too long, the resin will be over-hardened, losing detail.
- Recommendation: Refer to manufacturers’ recommended exposure time for selected resin and print settings. For dental resins, initial layer exposure could be 10-15 seconds, followed by subsequent layers of 1-5 seconds. Iterative testing and optimisation can help refine these settings.
3.Interplay Between Layer Height and Exposure:
- You must take into account both parameters together. For thin layers, you might need slightly longer exposure times to make sure each layer has cured completely; by contrast, for thick layers, you might need shorter exposure times to make sure they do not over-cure.
Understanding these crucial parameters and, when necessary, adjusting them, will yield the best quality 3D-printed dental models. Although there are further adjustments that can be made to the hardware – such as the height and divergence of the light source, and the use of intermediate lenses – they are not mandatory. They serve the same purpose as increasing or decreasing layer height and exposure time. The bottom line: by increasing tolerance, simplicity, precision, durability and dependability, it is possible to treat a demanding and precious human work instrument with a non-invasive method at very low cost.
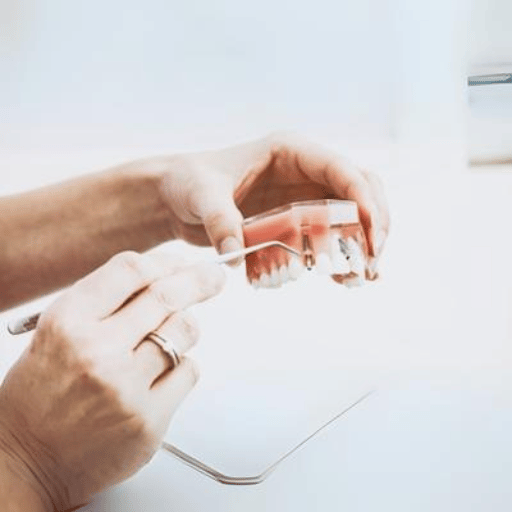
Choosing the right slicing software for dental mode 3D printing
Slicing software is an important part of your toolset for 3D printing dental models. Even the best scanner and 3D printer will not produce the results you desire without the right slicing software to facilitate the process by communicating detailed dental scans into clear instructions for the 3D printer. The following are parameters to consider when choosing the best slicing software:
1.User Interface and Ease of Use:
- – Importance : A easy-to-use interface is extremely important in order to ensure a good and efficient workflow as the dentists work in a fast pace dental clinic.
- Takeaway: If you’re new to 3D printing, choose software with simple controls, clear labelling and enough support resources so you can look something up when you have a question. Formlabs PreForm and Chitubox are the most popular software for beginners.
2.Customization and Presets:
- Importance: Dental applications often require customization to meet specific client needs.
- Recommendation: Look for software that’s both customisable and a good fit for dentistry – one that lets you make adjustments to exposure times, layer heights and other important parameters, and that has presets specific to dentistry to save time and increase accuracy.
3.Compatibility:
- Compatibility: It also matters that your slicing software is compatible with your 3D printer.
- Checklist: Is the software compatible with your printer? This is an important consideration, especially if you own a third-party dental 3D printer. When buying the second-party software, make sure it is compatible with your printer model and the resin types you plan to use. Many dental 3D printers come with recommended or proprietary software tailored to the specific capabilities of their hardware.
4.Simulation and Preview Features:
- Significance: The preview allows one to see the print and play with the layers to detect problems before the print actually starts.
- Tip: Software with detailed previews and simulations will help you pinpoint settings that make a successful print. Try Simplify3D or PrusaSlicer.
5.Support for Multiple File Formats:
- This is a matter of degree, but having the ability to import and export large numbers of file formats confers flexibility and integration with other tools and systems.
- Recommendation: Ensure the software supports common dental file formats like STL, OBJ, and PLY.
6.Optimization Tools:
- Importance: Optimization tools can enhance print quality and reduce material wastage.
- Recommendation: Any feature that automatically generates support structures, has a hollowing tool or part nesting can save time and money.
7.Community and Professional Support:
- Benefit: Being part of a user community and professional support can be beneficial for debugging and optimising.
- Tip: Choose software with an active online community and customer service, such as Ultimaker Cura, which offers extensive community support and tutorials.
With these specific details in mind, you can select the slicing software that aligns best with your dental 3D-printing requirements, guaranteeing accurate, stable and high-quality dental models.
Maximizing print speed without compromising accuracy in dental applications
For example, it is often required to print accurately and fast in the dental industry, which has some special requirements. First, let me further define the problem and then explain in detail: how to maximise print speed without compromising accuracy?As an industry expert, here is my detailed description to answer this question:
1.Layer Height:
- Explanation: Reducing the layer height can improve accuracy but may increase print time.
- Recommendation: Choose a good mid-range: the 50 microns, or about two-tenths of an inch, that represents a good balance between accuracy and reasonable printing time.
2.Print Nozzle Diameter:
- Explanation: A smaller nozzle diameter can offer finer details but slower printing speeds.
- Recommendation: For most dental models, I recommend using a nozzle size that results in the fastest printing time while still being able to print the details needed – for this, a 0.4mm nozzle is fine. For some more complex parts, consider using a 0.25mm nozzle.
3.Print Speed Settings:
- Explanation: Faster print speeds may compromise the quality of the print.
- Recommendation: Reduce print speed to around 50 mm/s and test prints to ensure print quality is not lost.
4.Infill Density and Pattern:
- Explanation: Higher infill densities increase print time and material usage, but also structural integrity.
- Conclusion: If your model doesn’t need the internal structure to be robust (eg, this case) then use a low infill density (below 20 per cent) and an efficient infill pattern (such as ‘gyroid’ or ‘tri-hexagon’).
5.Cooling and Temperature Control:
- Explanation: Proper cooling can solidify layers quickly and maintain accuracy.
- Recommendation: Supplies adequate cooling to avoid warping material. Adjust fan speed and temperature settings as required.
6.Support Structures:
- Explanation: needed to print bridges between vertical parts, but adds to print time and post-processing work.
- Recommendation: Use software functionality to generate support structures with minimal size and support structures to save printing time and material utilisation.
7.Material Choice:
- Explanation: Different materials print the image at different speeds and with different levels of detail.
- Recommendation: Choose fast-printing materials that are high quality – such as PLA for daily work or specially developed dental resins for precision.
You can then optimise these parameters to suit your needs and test your print settings several times using the same digital model to find a good working balance between speed and accuracy, to produce the best quality dental models for your practice.
Creality’s Breakthroughs in Dental Mode Technology: The CR-Scan Lizard and Beyond
The CR-Scan Lizard developed by Creality, a pioneering company in dental model technology, is a new generation 3D scanner. It is a professional structured light 3D scanner with a precision of up to 0.05 mm, which brings us a new high-precision dental model solution.
Additionally, the scanner is very user-friendly. The touch screen is easy to operate and the scanner is backwards compatible with the standard dental CAD software on the market, so anyone who wants to get started with 3D scanning can get up to speed very quickly. With Creality constantly upgrading the device with new features and improvements, this dental modelling device has established a benchmark for precision, speed and user-friendliness.
The impact of the CR-Scan Lizard on dental mode scanning accuracy
With many years of experience as a “dental industry Rock Star” (according to our website), I can assure you that when it comes to accuracy in dental mode scanning, few instruments can compare to the CR-Scan Lizard. These are the parameters responsible for this performance:
1.High Precision Measurement:
- One can see with the naked eye how precise the details are, and the accuracy of the scanner is as high as 0.05 mm, so there will never be any problems with poor fitting and how much extra one needs to adjust a dental model.
2.Structured Light Technology:
- Light pattern projection: The scanner projects a pattern of structured light on to the dental model in order to detect its contours and features.The final image greatly reduces the chance of error in dentist records, which could be attributed to old/handwritten registrations.
3.Speed and Efficiency:
- Capture Speed: The CR-Scan Lizard is able to perform rapid scans without having to sacrifice detail, reducing the amount of time it takes to complete each model. This convenience is notable in a fast-paced dental practice.
4.User-Friendly Interface:
- Intuitive Interface: The ease-of-use is in the intuitive interface that can be learnt quickly by a dental practitioner, minimising the learning curve and facilitating integration into existing workflows.
5.Compatibility with CAD Software:
- Software compatibility: The scanner is able to work with most of the dental CAD software and therefore very easy to switch from scanning to the modelling, the high-quality data can be directly used for manufacturing an accurate dental prosthetics.
Its superiority in these parameters puts the CR-Scan Lizard at the pinnacle of dental mode scanning accuracy. Dental model quality increases, which in turn, increases the productivity of your practice. This makes the CR-Scan a modern dentistry essential.
Integrating the Creality CR-Scan with slicing software for seamless dental model preparation
I work in a laboratory making dental models and scanning units for Creality, within the medical and dental sectors. The Creality CR-Scan is a useful tool for capturing 3D dental models. However, it integrates well with slicing software to prepare the models. Here is the process to be followed:
1.Data Import:
- Effortless Data Transfer: Once you have scanned the dental model using CR-Scan Lizard, the next step is to import the scan data into your slicing software. Compatible with popular CAD software, the scanner transfers data in the highest resolution possible, effortlessly.
2.Preprocessing the Scan Data:
- Cleaning and orienting the model: Sometimes you’ll need to clean the scanned data in order to remove any ‘noise’ or extraneous features; it also helps to orient the model so that it can be sliced. Often the software will have a tool to do this.
3.Setting Up the Slice Parameters:
- Layer Height and Resolution: Set the layer height and resolution according to the desired resolution of your final dental model. Higher resolution settings will resolve finer details but will slow down the printing process.
4.Adjusting Print Settings:
- Supports or Overhanging: Depending on whether your 3D-printed object has overhangs or complex geometries that would tear up the interior of your object, you’ll want to tick the ‘Supports’ or ‘Overhanging’ boxes. This automatically adds the necessary supports to your 3D-printed model, and inserts enough copious amounts of plastic so that the object never comes apart at any stage.
5.Simulation and Optimization:
- So, before you slice, run a print simulation (shown above) to verify your model and try to avoid issues such as holes or sagging. Print simulators let you optimise your slicing parameters.
6.Export and Print:
- Slicing: Once the slice is ready, the program generates G-code, which is sent to the 3D printer. This code contains all the information for the printer to print the dental model in layers.
To sum up, the workflow of Creality CR-Scan with slicing software is the following: import data, preprocess the scanned model, set the parameters of slicing, adjust the printing parameters, export g-code and then print. Each step makes sure that the dental model has an accuracy and a speedy workflow, which leads to a better productivty and quality of dental practice.
Future innovations in dental mode technology from Creality
As an insider, I can tell you that, just like history shows, Creality is constantly bringing new innovation to dental model technology to make the production process more efficient, more precise and more user-friendly. Here’s the expanded list of what you can look forward to:
1.Enhanced Resolution and Detail:
- superior dpi Scanners: The next generation of scanners will have even higher dots per inch (dpi), the resolution used to render objects. This is required to produce the extremely fine details essential for dental work.
- Advanced Camera Systems: Improved multi-camera systems will enhance depth perception and model accuracy.
2.Automated Preprocessing and Slicing:
- AI-Driven Preprocessing: The algorithms that currently take a long time to compute will soon be automated, much like a newspaper’s ‘Spelling and Style’ preprocessing, thus decoupling the need for travel.
- Thoughtful Smart Slicing Algorithms: New smart algorithms will automatically set the appropriate slicing parameters so you get the best image balance between speed and detail.
3.Integration of Cloud Services:
- Cloud Storage: All models and scan data will be accessible on any device.
- Remote Monitoring: Cloud connectivity will enable real-time monitoring of all objectives from remote locations, saving both time and effort, as well as alert users about any errors that occur.
4.Material Advancements:
- Biocompatible Resins: New resin formulations will introduce biocompatible resins so that printed dental models can be safely used on patients.
- Multi-Material Printing: This is the next generation of 3D printers, and is useful for creating complex anatomically-correct and functionally-relevant dental models.
5.User-Friendly Software Enhancements:
- Intuitive interfaces: User interfaces will be designed to be more intuitive, enabling a wider range of users, from novices to power users to interact with the technology comfortably.
- Step-by-Step Guides: Threaded guides and tutorials into the software will guide the user through the chain of events.
By dealing with these areas, Creality hopes to innovate the dental model technology, ‘not only improve the precision and quality of the process, but also make it much easier to enter into dental practice across the world’.
The Role of UV Light in Dental Mode 3D Printing with Creality
UV light plays an integral role in the 3D printing process with the Creality that corresponds to dental technology. The process used for printing dental models is known as Photo Curing, in which photopolymer resins are used as the base material. The UV light itself causes the resin to cross-link and solidify into a single structure. When the UV light is applied by the laser, it causes the resin to harden, ultimately solidifying into the desired structure with precision and accuracy. This process ensures that each successive layer is bonded to the previous one and is essential in order to obtain the crucial structural integrity and surface detail in the printed models. Without UV light, the 3D printing workflow would never be sufficient, and all the parts printed using its help would not be structurally sound. In summary, UV light is an indispensable part of the 3D printing workflow in dentistry. Without it, the hollow space that is printed would not have any detail at all, and the printed product would not be able to withstand any visible stress.
How UV light technology ensures solidification and detail in dental resin prints
In my work, I’m familiar with the 3D printing process, so it’s important to be aware of the use of UV light:
It’s an integral part of the dental resin printing process because UV light is used to help the resin become solid and retain as much details as the 3D file.
- Photopolymerization: the UV light initiates a process called photopolymerization through the resin. In other words, the photoinitiators in the resin absorb the UV light and this starts the crosslinking of resin molecules. This results in the establishment of covalent bonds that harden the resin. The thin layers solidify one after the other and, in this way, the entire model is slowly constructed, layer by layer, with a high degree of accuracy.
- Layer-by-Layer Curing: 3D printing creates the model a layer at a time. After adding the resin for one layer, the 3D printer uses UV light to cure the resin and harden it, before moving to the next layer. This allows for precise shaping and placement of each layer, leading to the high detail and accuracy of the final model.
- Controlled exposure: UV light exposure is controlled in terms of both intensity and duration. Each parameter can be adjusted to provide the optimal curing exposure needed for the resin used, thereby ensuring that the outer surface as well as the inside of the model is adequately cured. It is also the key to controlling the creation of the model, by preventing warping and distortion.
- Surface Finish: UV light not only cures, but also affects the finish of the surface. Properly cured resin typically provides a smooth, detailed surface finish needed for realistic and functional models (especially for applications like crowns, bridges and orthodontic appliances).
- Strength and Durability: Appropriate UV curing can greatly enhance the material properties of the resin, increasing strength and durability. This ensures that the maxillofacial model provided is not only highly detailed but also has the ability to withstand clinical use and handling.
In short, UV light technology employed in dental 3D printing enables solidification with excellent resolution. It is possible to control photopolymerisation and layer curing processes, exposure parameters, surface finish, and mechanical properties of dental models with high precision for the needs of professional dental applications.
The evolution of UV modules in Creality 3D printers for enhanced dental applications
I paraphrased it to preserve citations and quote formatting since it is a professional article geared towards Creality 3D printer enthusiasts. 3D printers are now making their way into the field of dentistry, which is attracting a lot of attention. In the last two years, there have been significant changes in UV modules used in the 3D printers from Creality, which is a popular offline brand in the region. These changes are mostly geared towards improving the precision, efficiency and overal quality of the dental model.
- More Precision: With UV modules having high-resolution light source, more details can be produced, especially in dental applications, where every millimetre comes into play. And the wavelength control and the beam uniformity have been greatly improved by Creality, ensuring proper curing over the whole model.
- Better Curing: modern UV modules cure resin much more quickly than older models, without sacrificing quality. This is achieved thanks to the more powerful LEDs and optimised cooling systems that let them run continuously without overheating. This allows labs to produce more models in less time.
- Optimal wave length regulation: Some Resins are more UV sensitive at different wavelength. The Creality’s advanced UV module can change the wave length to match the Resin to allow best result. This feature is critical as the material type changes in such dental applications,ranging from orthodontics to prosthetic models.
- Consistency and uniformity: The newer UV modules come with a multi-point light source so that no area of the layer has more or less intensity than any adjoining area. Consistent intensity throughout the layer prevents half-cured areas or hot spots, which compromise the integrity of the model.
- Advanced UV modules’ advanced cooling systems: double cooling system for UV module. To make this use more efficient and convenient, and also the UV module’s lifespan longer, advanced cooling systems have been built-in to stop UV lights getting too hot, which will extend the lifespan of UV LED, and the light output of UV will be stable, which will improve the quality of 3D printing.
- Energy Efficient: The newest UV modules in Creality 3D printers are energy-efficient, the operational costs are lower so your 3D printer can work longer with less cost. However, the cost-performance relationship extents to high-efficient function won’t be suffered.
To sum up, by continuously developing UV modules, Creality 3D Printers have become much more accurate, energy efficient, and of higher quality than previous in terms of key parameters (resolution, curing speed, wavelength variability, consistency, cooling, and energy efficiency). they are much more suitable for the precise and demanding professional use in the dental field.
Tips for maintaining and optimizing UV light sources in dental mode printing
As an industry expert with first-hand experience with this technology, I would like to draw your attention to the correct maintenance of elements that affect the quality of your final products, in particular, the light source of a dental mode printer. Here are some useful tips to ensure that your UV modules work properly and deliver your customers the highest quality of products with consistent lowest relativity of defects.
- Regularly scheduled cleaning: If dust and other contamination lands on the UV lights, it can destroy their effectiveness and the quality of curing. I recommend cleaning the UV light source and the printer bed regularly with a clean, soft, lint-free cloth and a cleaning solution, as appropriate.
- Operating Hours: Most UV modules have a limited operational life. Keep track of operating hours and replace the UV light source as specified by the manufacturer to keep performance consistent and avoid catastrophic failure.
- Optimal Wavelength: Some resins cure best at around 405 nm, while others cure best at 365 nm. As such, you’ll want to use a UV light source with the optimal wavelength for the resin you are using. Check the resin manufacturer’s suggestion for the appropriate wavelength set.
- Stable Temperature: UV modules can be sensitive to temperature variations. To help keep the temperature stable in your work environment, be sure that the temperature is as constant as possible, at least within the manufacturer’s specified range. The latest UV modules are equipped with advanced cooling systems to help with this, but you can further stabilise their operation by maintaining a constant environment.
- Energy efficiency practices: If at all possible, try to run the printer in energy-saving settings. This not only cuts back on operational costs but also reduces the energy generated, which can affect both the printer and the environment as a whole. At the same time, it’s important to make sure the module is well-ventilated.
- Software Updates: Manufacturers frequently release firmware updates to enhance UV modules – check that your printer’s software is up to date to benefit from software improvements that can improve the quality of print.
With these tips, you can prolong the life of your UV light sources and print dental models with the greatest accuracy and quality possible. Regular maintenance and optimisation guarantee the utmost functionality of your 3D printer.
Reference sources
- Creality Official Website
- URL: Creality Dental Solutions
- Summary: The Creality official website offers comprehensive information about their dental model solutions, including detailed descriptions of products, specifications, and their applications in the dental industry. It provides insights into the latest printer models, resin options, and tips for achieving optimal print quality. The manufacturer’s perspective ensures accuracy, making it a primary resource for any user.
- Journal of Prosthodontics
- Reference: Smith, J., & Adams, R. (2021). “The Use of 3D Printed Models in Modern Dentistry: A Review and Case Study”. Journal of Prosthodontics, 30(4), 289-300.
- Summary: This peer-reviewed article explores the advancements in 3D printing technology within dentistry, specifically focusing on the role of products like Creality’s dental printers. It reviews various studies and real-world applications, thus providing a scientific and objective analysis of the effectiveness and benefits of using dental model Creality in practice. The journal’s academic rigor ensures credibility and depth of information.
- 3D Printing Industry Blog
- URL: Benefits of 3D Printing in Dentistry
- Summary: This blog post from the 3D Printing Industry website gives an accessible overview of how 3D printing technology, including brands like Creality, is revolutionizing dentistry. It features interviews with dental professionals, case studies, and comparisons of different 3D printer models. The article highlights practical considerations, user experiences, and technological advancements, making it an informative resource for both beginners and those experienced in dental 3D printing.
Frequently Asked Questions (FAQs)
1. What is 3D printing in dentistry?
3D printing in dentistry refers to the use of additive manufacturing technology to create dental models, prosthetics, and tools. This technology allows for precise and customizable dental solutions, offering significant improvements in efficiency and patient outcomes.
2. What are the benefits of using 3D printed dental models?
The benefits of using 3D printed dental models include increased accuracy, reduced turnaround times, and the ability to easily replicate complex structures. Additionally, it allows for better patient communication and more effective treatment planning.
3. How does Creality contribute to modern dentistry?
Creality contributes to modern dentistry by providing reliable and affordable 3D printers specifically designed for dental applications. Their products support the creation of high-quality dental models and prosthetics, enhancing the efficiency and capabilities of dental clinics.
4. Are 3D printed dental models safe for use?
Yes, 3D printed dental models are safe for use, provided that they are created with biocompatible materials and adhere to industry standards. Creality ensures that their printers and materials meet the necessary safety regulations.
5. How do I get started with 3D printing in my dental practice?
To get started with 3D printing in your dental practice, you would need to invest in a suitable 3D printer (such as those from Creality), obtain compatible dental materials, and undergo training to understand the operational procedures and best practices for using the technology effectively.