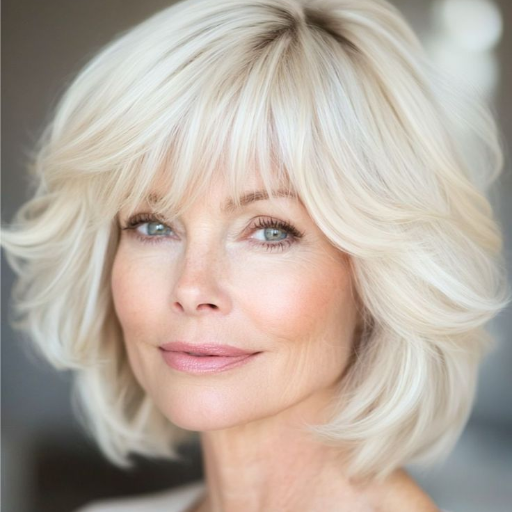
The contour can be a real game-changer in enhancing the natural beauty of an individual, especially if considered according to mature skin. While the fundamentals of contouring still apply, to make it flattering and suitable for age, one has to be very careful with the techniques and products used. This manual will take you through some simple, practical steps on attaining a lift and radiant look. From learning about the products that suit you, to those you should avoid, how to highlight certain areas, and most importantly, blending technique and fading-the foundation-surrounding-all, this post is geared toward encouraging more confidence and empowerment in your makeup journey. If you want to learn the very basics of contour makeup for mature skin or just make your skills more mature-oriented, this guide will assure you that your look is minimalistic, classy, and aptly designed with mature skin in mind.
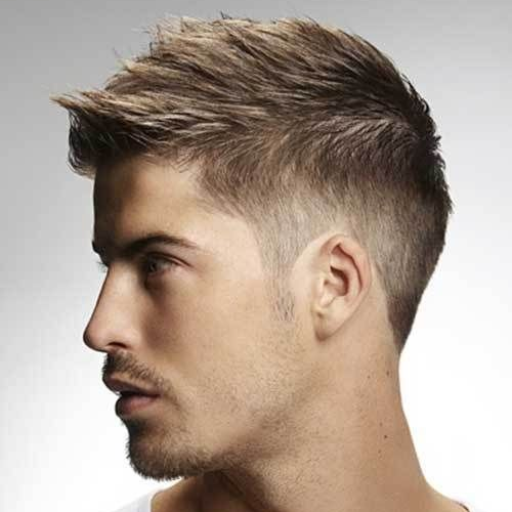
Understanding Contour Makeup for Mature Skin

Contour makeup for mature skin means the application of techniques to enhance natural features while working toward maintaining that soft, barely-there sculpture with their beauty. It’s a delicate game of choosing the right products; cream formulation is great as it helps in dispersion and does not settle into fine lines. Select lighter, natural tone shades to softly define without harsh contrasts. Application with a light hand into hollows of the cheekbones, beneath the jawline, and even on the sides of the nose is what to look for, with an earnest effort to fully blend so the contour never looks like a hard line. At this point, know that the goal was to bring forth one’s features, not hide them, so that they can freely embrace a more elegant look.
What is Contouring?
Contouring is my way of makeup to enhance my face’s natural structure by simulating shadows and highlights. When working on my features, I usually put darker shades on the hollows of my cheeks or edges of my jaw and lighter ones on the high points of my face. It is an understated process that helps in balancing and adding depth to my makeup look while simultaneously keeping it very natural, neat, and polished.
Challenges of Mature Skin
One of the greatest difficulties for mature skin is that with the loss of elasticity and firmness, the skin may look saggy or less defined. Fine lines, wrinkles, and dryness may just become aggravated with the passing of years, calling for extra hydration and prophylaxis in both skincare and makeup routines. Sometimes the application of makeup can be challenging because heavy products tend to settle into creases, which would accentuate the aging rather than leverage features. Another problem is the age spots that start coming and increasing in unevenness in skin tone, requiring products that provide coverage but still finish naturally. I focus on light, hydrating formulas and diligent preparation of the skin that gives makeup that smooth, radiant look without focusing on the problem areas.
Benefits of Contouring for Older Women
The contour serves an abundance of functions for older women: it enhances the natural bone structure and adds dimension to the face. It defines the cheekbones just enough to give lift to the jawline and in doing so offers more rejuvenation without bridging on the ridiculous. My favorite way is with a very light hand and cream contour products that blend so effortlessly and don’t settle in the fine lines at all. It balances the face and highlights its best features for a soft, natural, and younger appearance.
Choosing the Best Contour Products

Choosing contour products should indeed consider the types of skin, skin tone, and which composition suits your needs. Cream contouring works well for dry skin when some or much hydration and blending into the skin are needed, while powder contouring looks more for an oily or combination skin, giving a matte finish. The shade must be picked according to natural undertones of the skin, whereas from lighter skin, undertones stay cool, and from medium to deeper tones, they stay warm. Buildable formula is highly recommended because it goes for a subtle, natural appearance that could become more intense when necessary. Also, always try products under natural light to verify the ideal match for a perfect application, and this should be done whenever.
Types of Contour Products: Cream vs. Powder
Cream or powder contour is just a matter of considering skin type and the kind of finish desired. Cream contours work best to give the most seamless blending with a natural finish, especially if the skin is on the dry side or a dewy finish is desired. Contrarily, powder contours give a matte finish for those days when the skin is on the combination or oily side. Always matching the product to either the cool shades of my light skin days or the warm tones of deeper feels has been my best trick, helped by testing in natural light to confirm and be sure the color and formula are working exactly for me.
Best Contour Sticks and Wands for Mature Skin
When picking contour sticks and wands for mature skin, I look for a formula that is creamy and blendable without drawing attention to fine lines or texture. Hydrating options with hyaluronic acid or nourishing oils are my picks, as they impart a healthy glow that is never cakey. I prefer contour products that give a satin to soft-matte finish because they provide definition without compromising the skin’s healthy and radiant look. Some of my favorites are Fenty Beauty Match Stix for its smooth blendability and excellent range of shades, Charlotte Tilbury Hollywood Contour Wand owing to its flawless application and lovely finish, and NUDESTIX Nudies Tinted Blur Stick for its wonderful formula that contours without highlighting dry patches. These keep my skin looking sculpted but youthful.”
Importance of Highlighter and Bronzer
My highlighter and bronzer are indispensable because they work in tandem to sharpen my features by offering great dimensionality to my face. The highlighter glows in all the areas I want, like the tops of my cheeks, my brow bone, and the bridge of my nose, giving my skin that lit-from-within look. The bronzer warms up my complexion and shadows areas like my temples, jawline, and hollows of my cheeks to subtly define the contour of my face. When applied together, these two products make for a balanced and sophisticated look that makes my makeup cleaner and more dynamic-looking.”
Tips for Effective Contouring Techniques

The most fabulous contouring will happen because you have picked a shade just one or two shades darker than your natural color so that it looks unobtrusively natural. By applying it with gentle strokes, you can slowly build on the intensity, thus avoiding any harsh, obvious lines. Blending should be meticulous, using a good contour brush or sponge that bridges your contour smoothly with other makeup, thereby creating a perfect transition. Contour is applied in the hollows of the cheeks, sides of the nose, jawline, and hairline to add some definition and various planes of the face. To build on the contrast necessary for a defined look, the contour has to work hand-in-hand with a highlighter. And must remember, there must always be a step back from time to time to see it in natural light to make sure everything blends well together. From shading to sculpting the face
Shading and Sculpting the Face
To shape and highlight effectively, I first prep the skin with a marvelous moisturizer and primer that gives a smooth base. Selecting the right contour, just a shade darker than my skin tone, is essential; also take into consideration a highlighter that matches my undertone. Applying contour to the hollows of your cheeks, along the sides of your nose, edges of your jawline, and near your hairline will help to create depth. Whereas the highlighter is for the very high points: the tops of the cheekbones, the bridge of the nose, the brow bone, and the cupid’s bow. Blend everything out: diffuse any harsh lines with either a sponge or a brush that you like. Lastly, we check the defined areas in natural light to make sure everything has an even and flawless appearance.
Easy to Apply Techniques for a Sculpted Look
To give myself the effect of sculpture, I first apply cream or powder contour of a shade or two darker than my skin tone onto the hollows of my cheeks, jawline, and the sides of my nose to create natural shadows and define my features. For the highlighting finish, I would go satin on the high points of my cheekbones, down the bridge of my nose, and the center of my forehead to pick up light. I then always blend with a damp sponge or brush so nothing will be harsh, and it’s smooth and pretty. It’s applied in light layers, building as I go to maintain control. Last but not least, I check my makeup in natural sunlight to make sure the balance and precision of the sculpted look.
Enhancing Features with Makeup for Older Women
A makeup feature enhancement for older women starts with giving prime importance to hydration so that an even and smooth base is formed, as mature skin tends to be drier. A lightweight foundation that builds up easily will keep the coverage very even, without drawing attention to the fine lines. Choose eyeshadows in soft, neutral tones to maximize the brightness of the eyes, steering clear of colors too heavy or dark. Mature skin really benefits from cream blush and highlight, which leave a fresh kind of dew on the cheeks that glistens, thereby complementing the complexion, rather than accentuating wrinkles. Define your brows softly and gently with a pencil or powder for a lift, and finish with a richly moisturizing lipstick or gloss that defines the lips. Blend everything well, and then fit makeup in natural sunlight for a final adjustment and polished appearance that can work in harmony with nature rather than against it.
Using Concealer to Smooth Fine Lines
Concealer blocks out fine lines in a few steps, which eventually will lead to an unintentional decrease in the lines. I always go for a concealer that is light in texture, creamy, and in a color that either matches my skin tone or is just a few shades lighter. Then I apply just a little bit with my ring finger or a very soft brush to prevent too much product from collapsing into the lines and drawing attention to them. I smooth it in by patting rather than rubbing, allowing it to meld into the surrounding areas as much as possible. Then I set the product lightly with translucent powder to avoid creasing; however, the application of powder is very light to keep that natural, hydrated finish.
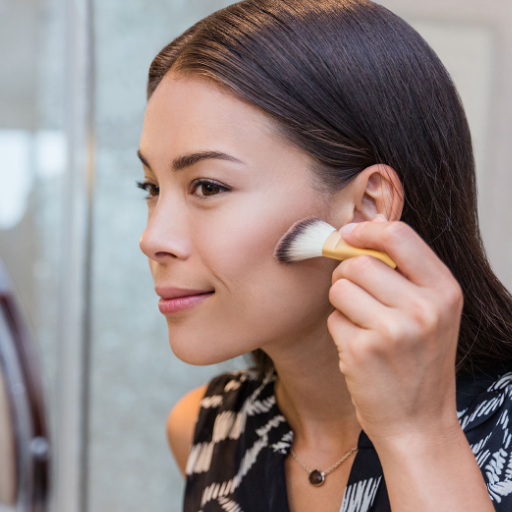
Blusher and Cream Blush for a Radiant Finish
To apply blusher for a radiant finish, I choose colours that complement my natural undertone-peachy tones to warm up the complexion or pinks for a fresh, youthful glow. I use a soft, fluffy brush to apply powdered blush to the apple of my cheeks and blend outward and upward towards my temples for a lifting effect. With cream blush, I prefer the tapping method using either my fingers or a sponge for a smooth finish and dewy effect; layering the two allows for increased dimension and longevity. To keep everything in place all day, I use a light dusting of translucent powder, but very sparingly so as to maintain that glow.
Creating a Dewy Look with Contour Makeup
The dewiness of the makeup is initiated with a liquid or cream contour because they blend more easily and maintain the appearance of a glow. Application goes just where it’s needed to thin the face: under the cheekbones, along the jawline, and at the edges of the forehead. Next, using a damp makeup sponge or synthetic brush, I blend out the contour so that it does not have sharp edges and appears very natural. Then, to create the contrast of dew on the cheeks, I layer the liquid highlighter on the highest points: the top of the cheekbones, the bridge of the nose, and the brow bone. Another mist of hydrating setting spray seals everything and never kills the glisten.
Common Mistakes to Avoid

Same with too much product: an unnatural, cakey look. Always start with smaller amounts and build up. Another is not blending well, especially around the edges of the contour and highlighter, leaving harsh lines. Choosing the wrong color for your contour or highlighter can also do you no favors- select colors that complement your skin tone. Skipping skin prep like moisturizing or priming could also be the cause of uneven or patchy makeup appearance. And going overboard with setting spray or using a product unsuitable for your skin may prove to be counterproductive toward the dewy look you want.
How Contour Makeup Can Settle into Fine Lines
Contouring makeup settling into fine lines is often related to the application or choice of product. Heavy cream-based contours tend to settle into lines if not well blended or if applied with too much product. Hence, I go for light formulas and use thin layers, building only where really needed. Skin preparation is very important; I never skip moisturizing or priming to have a smooth canvas. Setting the contour with translucent powder seals it without drawing attention to texture, thereby granting a flawless finish all day long.
Choosing the Right Shade for Your Skin Tone
In matching a shade to my skin tone, the first step is to determine what type of undertone I have, which can be either cool, warm, or neutral. I know different colors react well with my skin: cool undertones pair well with pink or blue-based shades, whereas warm undertones work well with golden or peachy shades. For contouring, I usually go for something about one to two shades darker than my natural skin tone, while the highlighter should be just a bit lighter. I always test whatever I’m going to use on my jawline, in natural light, to guarantee the perfect match and avoid any dramatic contrast. Paying attention to these small details ensures I always achieve the best results in cohesion.
Overdoing Contour: Tips for a Natural Look
In order not to overdo contour and apply the natural look, one should apply a light hand and build up gradually, rather than applying too much at once. Blend well, either with a brush or sponge, to ensure there are no harsh lines left on the skin and to get a seamless finish. Use contour shades that are just slightly darker than your own skin tone, and make sure to work in good lighting so that you can see accurately what you are doing. Finally, set your contour with a good translucent powder so that it stays in place but never looks overtly obvious or wet.
References
-
Indique Hair: This site offers premium-quality braiding hair made from 100% virgin human hair, ensuring long-lasting and natural-looking braids.
-
Ywigs: They provide bulk human braiding hair made of 100% authentic human hair, emphasizing its natural appearance and versatility.
-
The Good Trade: This guide discusses eco-friendly and ethical hair extensions, including Remy human hair, which is responsibly sourced and high-quality.
Frequently Asked Questions (FAQ)
Tips for Contouring Mature Skin to Enhance Your Features
Contouring mature skin requires specific techniques to ensure a flawless finish. Start by identifying your face shape and the areas you wish to enhance, such as the cheekbones and jawline. Use a contour wand that is easy to blend, as this will help you achieve a more natural look. Applying a primer beforehand can also help your makeup glide on smoothly and last longer. Remember to use a buildable product to avoid harsh lines, allowing for subtle sculpting that looks professional. Finally, always blend well to avoid emphasizing fine lines and wrinkles.
Highlighting Techniques for a Glowy Finish on Mature Skin
Highlighting is crucial for giving mature skin a radiant, youthful appearance. To apply the highlighter, choose a cream or liquid formula designed for precision, as these products can provide a more natural look compared to powder. Focus on areas where the sun would naturally hit, such as the tops of the cheekbones and the bridge of the nose. For a dewy finish, opt for products that are dermatologist approved to ensure they are safe and beneficial for your skin. Always remember to blend well to avoid any harsh contrasts that may draw attention to imperfections.
Step-by-Step Guide to Define Your Features with Contour Makeup
Creating a step-by-step guide for contour makeup can help mature women feel confident in their application. Start by choosing the best products to use that are suitable for mature skin, focusing on those that are easy to blend. Use a contour shade along the hairline and under the cheekbones to create a shadow effect, then apply a highlighter on the high points of your face. To tackle dark circles, use a brightening concealer in the eye crease. Finish with a setting spray to lock in your look, ensuring it lasts throughout the day.
Creating a Naturally Sculpted Look for Women Over 50
Women over 50 can achieve a naturally sculpted look with the right makeup techniques. It’s essential to choose products that enhance your features rather than mask them. Use a contour shade to define your features subtly, and apply it sparingly to avoid emphasizing fine lines and wrinkles. A cream formula often works best, as it can glide onto the skin and be easily blended. Pair your contour with a glowy highlighter that brings radiance to your complexion without being too overpowering. This approach will create a youthful, vibrant look that celebrates the beauty of mature skin.
Best Products to Use for Contouring and Highlighting on Mature Skin
Choosing the best products for contouring and highlighting mature skin can make all the difference. Look for cosmetics that are specifically formulated for mature skin, offering hydration and a blendable texture. Cream contours and highlighters are usually better options because they can easily glide on the skin and provide a more natural finish. Additionally, products that are dermatologist approved can help ensure they are suitable for your skin type. Don’t forget to consider shades that complement your skin tone for the most flattering results.