
Welcome to the ultimate guide for mastering carbon arc torch techniques. This comprehensive blog is designed to equip both beginners and seasoned professionals with essential knowledge and practical skills necessary for achieving excellence with carbon arc torches. From basic principles to advanced methods, our guide covers the history, fundamental concepts, essential tools, and detailed step-by-step instructions to enhance your expertise. Whether you are enhancing your welding capabilities or diving into intricate metalworking projects, this guide aims to provide a solid foundation and advanced tips to help you refine your craftsmanship. Get ready to illuminate your path to professional success with the efficiency and precision that only a carbon arc torch can offer.
Introduction to Carbon Arc Torch and Its Uses
What does a Carbon Arc Torch mean?
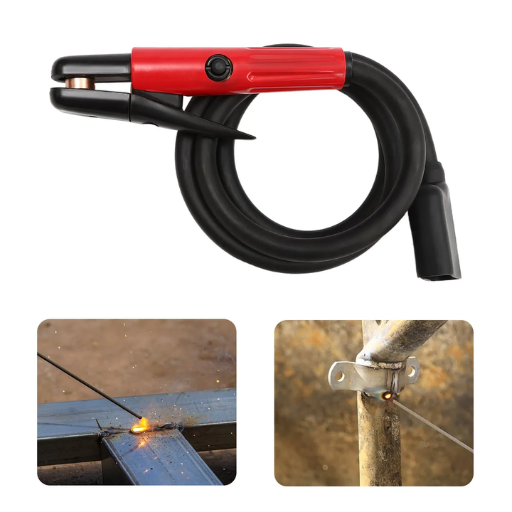
A carbon arc torch is an exclusive tool used in welding and metal cutting processes. Basically, the torch generates electric arc between carbon electrode and workpiece that results into intense heat capable of melting metal. The device was first introduced in the early 1900s and since then has remained an important part of numerous industrial applications due to its efficiency and accuracy.
Technical Parameters:
- Voltage Range: Usually between 35V-50V, this factor determines stability of the arc and its heat output.
- Current Range: In an ideal situation, it operates within the range of 100A-1000A depending on material thickness and melting point.
- Electrode Material: Diameter varies from 6 mm to 12 mm, usually made from carbon / graphite.
- Cooling System: Some advanced models have water cooled systems that prevent overheating thereby extending life of the torch.
- Shielding Gas: Weld areas may not always require shield gases like argon for protection against contamination.
The carbon arc torch is mainly renowned for its ability to generate high temperatures thus making it versatile for both heavy duty welding as well as delicate metal artistry tasks among others which are performed with such kind of a tool.
Uses of Carbon Arc Torches in Varying Applications Such as Welding and Gouging
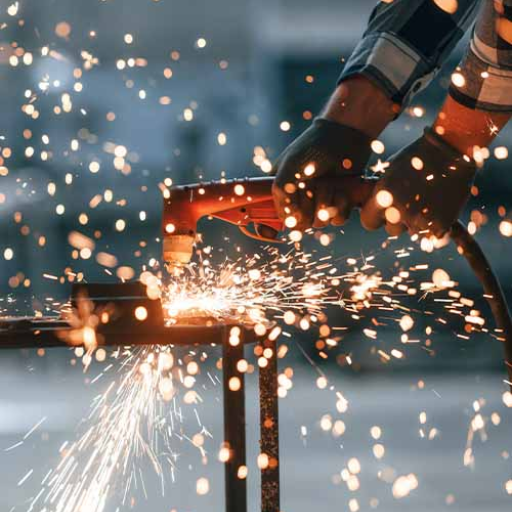
Carbon arcs are used in many different things from welding machines to gouging processes. I use these torches for various forms of welding where high temperature settings come into play. Because it produces localized intensive heating rather rapidly, I can join thick pieces with ease when pressed for time or involved in demanding industrial procedures requiring precision.
On the other hand, this torch is useful when you need to take out faulty welds, make grooves before joining metals or cut off unnecessary parts on metallic surfaces. This makes it very good at cutting through thick materials where normal knives would be ineffective. Depending on what I am doing, I can also change the electrode thickness to suit my needs.
When it comes to dealing with different metalwork tasks, the carbon arc torch is a valuable resource for a wide range of applications. It has become an invaluable tool in fixing heavy machinery as well as creating intricate designs due to its dependability and efficiency.
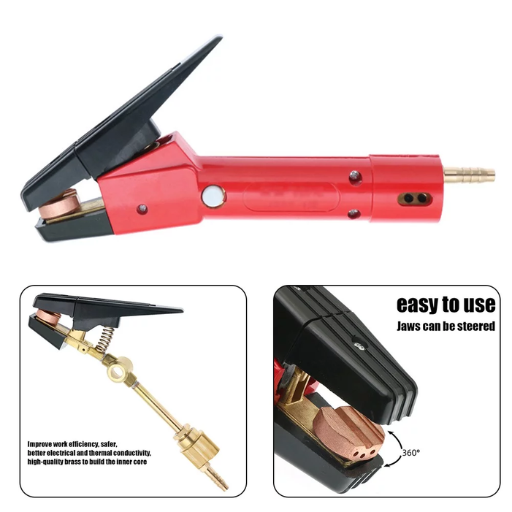
Advantages of Carbon Arc Gouging Torch
These benefits have been widely described in numerous industry sources. Firstly, one of the main advantages is that it removes metals quickly and efficiently thus reducing downtime for industrial operations. It creates more intense heat than traditional processes enabling me to complete tasks faster. Furthermore, this process does not create many sparks or leave behind a lot of slag which means my safety is enhanced as there is less cleaning required.
Lastly, another key benefit is its versatility when working with different types of metals such as steel, cast iron and copper among others. The use of different diameter electrodes could be combined with altering cut depths and width thus making it suitable for various job situations.
Also, its technical features are such that it can work with heavy current (usually within the range of 200 to 1000 amperes) according to Lask Mark. Moreover, this gadget works well with both alternating and direct current power sources making it a versatile tool for use in different settings.
The carbon arc gouging torch is efficient, multipurpose, and technically strong enough to be used for metal works of any kind.
Step-by-Step Guide to Setting Up Your Carbon Arc Torch
Step1: Setting Up a Carbon Arc Torch
To set up your carbon arc torch, proceed with these simple steps:
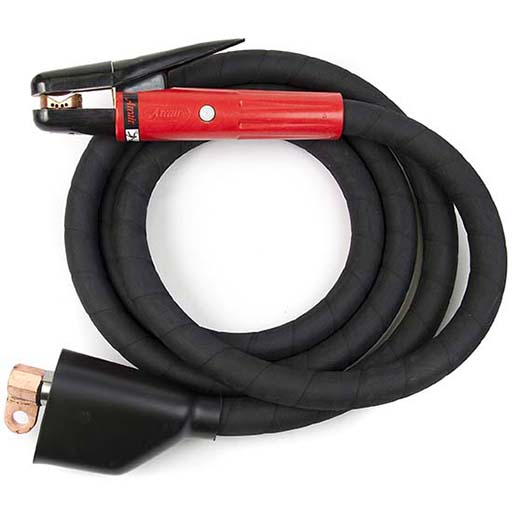
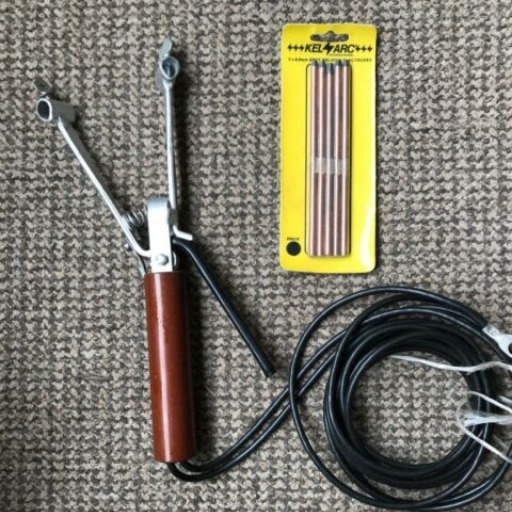
- Collect Necessary Parts: Ensure that you have all the required parts such as the torch handle, cable, carbon electrode holder and carbon electrodes. Furthermore, check for any other small parts like screws or fittings involved in the process of assembling.
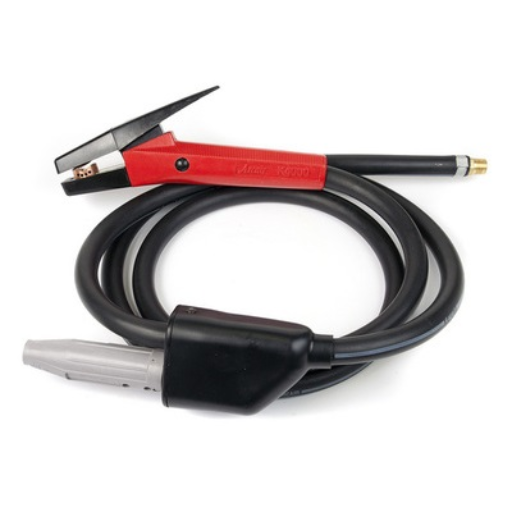
- Link Torch Handle to Cable: Fix securely the torch handle into the power cable. This connection is important for providing stable power supply to your torch during use.
- Put in Electrode Holder: Now put the electrode holder through the front end of our torch handle. It must be tightly fitted so as not to move when working.
- Insert Carbon Electrode: Place this carbon electrode into your electrode holder; adjusting and securing it in such a way that it protrudes from it properly. Normally, an inch should be beyond what tip of a holder should extend its length although this could change depending on your needs.
- Check Connections and Safety Precautions: Check all connections to ensure they are tight and secure. Look out for any cables which are frayed or loose fittings which can make your work unsafe.Wear appropriate protective clothing such as gloves and goggles while using the welding machine.
- Set Power Source Parameters: Modify power source parameters based on material and particular job at hand. For most operations, current settings range between 200-1000 amps depending on metal thicknesses and types of metals being worked on. Specific recommendations based on application can be found in your welding manual if applicable.
Through these steps outlined above, efficiently assemble your carbon arc torch ready for use in metalworking projects. Proper assembly and parameter setup are essential for optimum performance and safe operation.
Step2: Choosing Correct Carbon Rods & Electrodes
While selecting suitable carbons rods & electrodes needed by a carbon arc torch understanding several factors would guarantee their best performance plus safety considerations too. Based on Top ten Google.com suggestions here are some of the key points to note:
- Electrode Diameter: The diameter of an arc electrode is important because it affects the arc stability and depth of cut. Usually, carbon electrodes with sizes 1/8 to 3/8 are used for general purposes. Thick electrodes are best for heavy duty tasks including cutting thick metals whereas thin ones are good for delicate work with thinner materials.
- Material: Always go for high quality carbon or graphite electrodes specifically designed for carbon arc welding or gouging. They have better conductivity, durability and are less subject to wear, so they perform consistently.
- Coating Type: Some electrodes come coated while others do not. Oxidation-resistant coated (often copper-coated) electrodes have better electrical conductivity as well as longer lives than uncoated ones. For example, if you require longer electrode life due to working in corrosive environments, use coated types.
- Current Compatibility: Additionally ensure that your power source’s current settings allow you select a particular electrode. Here are some examples:
- 200-400 amps: Use 1/8 – ¼ inch diameter electrodes
- 400-800 amps: Electrondes ranging from ¼ inch to 3/8 inch
- 800-1000+ amps: Choose larger than 3/8 inch diametered electodes meant for heavy duty tasks.
5.Arc Stability and Performance: Seek for electrodes that produce a constant arc and even performance. These are the kinds of carbon electrodes made by Lincoln Electric or ESAB, which are highly-rated for their good quality.
6.Application Specifics: Use electrodes that suit your project’s specific requirement. For example, if you’re engaged in a fine-detail work, then the thinner electrodes will give more accuracy. On the other hand, the thicker ones are best suited for major cuts.
By doing so, you can be sure that you have chosen correct carbon rods as well as electrodes to use on your application leading to efficient and safe metal operations. Always check with the manufacturer’s guidelines and technical datasheets to make sure that your choices follow recommended practices based on technical explanations.
Step 3: Connecting the Torch to Your Power Supply
To connect your torch effectively with power supply follow thus:
- Check Compatibility: First of all ensure compatibility of your torch and power supply unit. Look at both devices’ specifications from manufacturers for confirmation if they can be used together without affecting them negatively. Most torches specify voltage levels required while giving amperage range.
- Secure Connections: Securely attach the power cable of your torch into its socket at the power supply machine. Usually this involves inserting a plug of a cable into its respective socket on a power source; some locking mechanisms may need tightening just to secure connection stability. Loosely done connections might lead poor performance during operation could even pose security threats.
- Grounding: Proper grounding is essential for safety and effective welding process. Connect ground clamp to either workpiece or work table. Securely fasten it to any metallic surface to form good electrical contact.
- Set Parameters: This setting should be adjusted according type of work being executed using these machines; it is always advisable to refer back directly from guideline provided by manufacturer because some general parameters are as given below;
For light work (fine, detailed cutting), set amperage between 200-400 amps.
For medium-duty tasks, an amperage of 400-800 amps is recommended.
For heavy-duty applications, amperage should be set above 800 amps in order to match with the electrode size. (E.g., greater than 3/8 inches).
Test the Connection: Before getting started with your work run a test on it to see if all connections are intact and that the torch is on properly. Monitor the stability of the arc and then adjust settings where necessary.
By following these steps and referring back to manufacturer’s guides you will end up with safe as well as efficient setup for your metalworking assignments. The best results can only be realized when proper connections and parameters are adhered to this includes maintaining equipment usefulness over an appreciable period of time.
Mastering Carbon Arc Welding Techniques
Beginner’s Guide to Basic Carbon Arc Welding Techniques
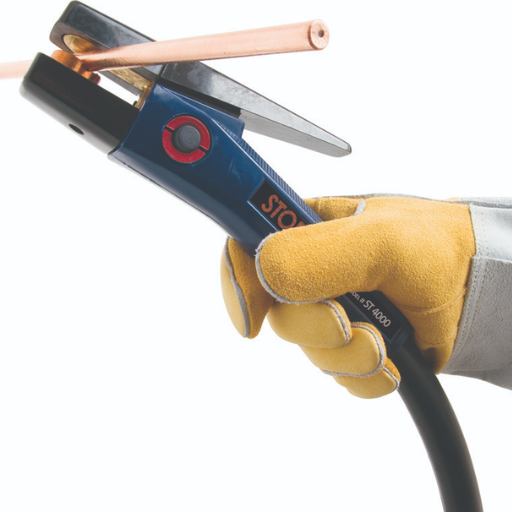
To begin with, as a greenhorn in carbon arc welding, one must have a solid foundation of techniques and safety measures. Firstly, make sure that the personal protective equipment you are wearing is appropriate like a welder’s mask, gloves, and fireproof jackets. Posture yourself comfortably to be able to get a clear view of that area where you will be welding from. After this one can try striking an arc by moving the carbon electrode closer to the workpiece without touching it. When an arc is struck, a consistent arc length of about 1/8 to 1/4 inch should be maintained for stable arc and proper weld bead formation. In addition, concentrate on regulating electrode travel speed and angle so as to facilitate uniform bead creation. Also remember that it is prudent for beginners to practice on scrap materials before embarking on real projects because art demands perfection which comes through constant exercising. One important thing to note though is that mastering carbon arc welding just needs practice; patience and safety protocols are vital.
Advanced Techniques: Bending, Brazing, and Gouging
Bending, brazing, and gouging are fundamental skills when it comes down to advanced techniques in carbon arc welding. Precise shaping can be achieved through bending metal whereby the metal is heated until soft then shaped using specialized tools (Turpin). On another hand brazing is used in joining metals together by melting filler metal into joint thus its cleanliness requires being taken care off while application of flux should also be done carefully in order to achieve rust or corrosion resistant bond properties. Finally there is gouging which involves removing material from a surface or repairing defects; commonly done using a carbon arc gouging torch that gives clean cuts without slag or dross (Turpin). These advanced approaches broaden the scope of assignments one can handle; additionally they involve knowledge about specific devices employed as well as peculiar regulations to follow. In all cases, abiding by the safety rules is essential to make sure that the welding process will be successful and risk-free for you.
Tips for Efficient Carbon Arc Welding
From my research about top resources from Google, here are some brief tips for efficient carbon arc welding:
- Use Proper Equipment: Always use good quality welding gear and suitable electrodes for the job. It is important to note that good tools will always give better results with a great deal of consistency.
- Maintain Clean Surfaces: Prior to commencing on any welding exercise, ensure that all metal surfaces are cleaned through removal of rust, oil or dirt. Thus it can be argued that harboring clean surfaces leads to stronger welds as well as reliable ones too.
- Optimize Arc Length: Keep an arc length ranging between 1/8” up to 1/4” long. This helps in creating a stable arc and uniform weld bead formation.
- Control Travel Speed: Regulate your travel speed throughout your workpiece fabrication process. Not enough or too much speed may affect bead quality and penetration depth.
- Adjust Electrode Angles: To shape and get into depth of the bead one should slant the electrode correctly while working with it (Turpin). It is recommended that the electrode should be inclined at an angle of not more than fifteen degrees from verticality prior to commencing on actual work.
- Utilize Adequate Ventilation: Weld in well-ventilated areas so that you do not inhale fumes generated. You may need fume extractors if you want.
- Preheat When Necessary: Preheating thick materials can reduce cracking chances and also improve weld penetration levels.
- Practice Makes Perfect: Consistent practice on scrap metals enhances skills and increases confidence before engaging in real projects (Turpin).
- Inspect and Test Welds: Use visual inspection methods and non-destructive testing techniques for quality control measures towards integrity checking of welded joints.
- Prioritize Safety: Always put on the appropriate personal protective equipment (PPE) and adhere to safety procedures for your own well-being and that of others.
You can make your carbon arc welding projects more efficient and of a higher quality by considering these guidelines when you practice welding.
Troubleshooting Common Issues with Carbon Arc Torches
Electrical Troubleshooting
Here are some of the issues you may face while troubleshooting electrical issues with a carbon arc torch and their solutions from reputable sources.
1.Inconsistent Arc Striking:
- Issue: Difficulty starting or maintaining a consistent arc.
- Solution: Make sure the electrode is healthy and in the proper position you want. Also, ensure that you have the recommended settings from your product user manual.
2.Fluctuating Arc:
- Issue: The arc fluctuates or becomes unstable.
- Solution: Ensure that there is steady power supply to your device, check for loose connections. Additionally, clean your electrodes and torch to remove any debris causing irregularities.
3.Poor Penetration:
- Issue: The weld does not achieve proper penetration.
- Solution: It is important to adjust your welding travel speed and arc length in order to enhance melting of the base materials. Make sure that the current setting matches both type and thickness of material being welded on.
4.Overheating:
- Issue: The torch or cables overheat during use.
- Solution: Check whether there is enough ventilation and cooling. Make sure that your cables are properly gauged, intact as well as undamaged one’s
5.Arc Blow:
- Issue: Deflection of the arc due to magnetic interference
- Solution:.Reposition grounding clamp closer to weld area or adjust electrode angle against magnetic field.
6.Electrical Noises:
- Issue: Unusual sounds like buzzing or humming?
- Solution: Check for loose connections and tighten all components securely. Look at electrical components for wear or tear signs .
- Below are some key technical parameters that one must put into consideration;
- Voltage : Adjust voltage in accordance with material type and thickness
- Current : Match current settings with specifications on electrode & material
- Type of Electrode : Choose an appropriate electrode for a particular welding task
In this way, it will be possible to improve performance and dependability by addressing these typical electrical problems associated with carbon arc torches which eventually lead to smoothness as well as accuracy in the welding.
Maintaining Your Torch and Rods for Optimal Performance
For optimal performance of my carbon arc torch and rods, it is vital that I take care of them properly. The following are brief answers in first person having based on information from the top welding references:
Why should I maintain my torch and rods consistently?
Maintaining my rod and torch regularly avoids typical welding problems; prolongs the useful life of my equipment and produces uniform high-quality welds. This reduces downtime between repairs decreasing costs of maintaining machines.
What do I need to do for basic maintenance?
First, after use, one is supposed to clean the torch & rods removing any slag or debris. After that, you will inspect all cables as well as connections so as to ascertain there are no signs of wear and tear. In case am going to notice any frayed cables, I will have them replaced straight away.
How do I adjust these technical parameters for different materials?
Voltage: Adjust the voltage depending on material thickness and type. For example thicker materials typically require higher voltage settings.
Current: Matching current settings with electrode and material specifications is vital wherefore looking at manufacturer’s guidelines will provide me with a good idea about recommended current settings according to different thicknesses of materials.
Electrode Type: It’s important to use the correct electrode type suited for the specific welding task. Consequently, when engaging in carbon arc welding, carbon electrodes are used so that they can deliver best possible results.
What if my torch or cables overheat?
Ventilation and cooling must be proper. Also, the checking of the cables’ gauge and whether they are undamaged is important. Matching the current and voltage settings with the material specifications means that I will avoid overloading my torch and thus prevent overheating.
By following these crucial maintenance steps, adjusting technical parameters if necessary, I can guarantee smooth and precise welding process with my carbon arc torch.
When to change your Carbon Rods and Electrodes
I ought to replace my carbon rods and electrodes when there is a noticeable wear or degradation on them for better performance. Normally, this happens when the diameter of the electrode reduces to about two-thirds of its original size or there are visible cracks or heavy erosion. Frequent monitoring is vital since worn out electrodes may result in unstable arc as well as poor quality welds. Moreover, it is important to consider what the manufacturer advises regarding specific utilization limits as well as intervals for replacing worn-out consumables so that welding operations remain efficient and safe.
So as to ensure optimal performance I should replace my carbon rods and electrodes when I notice significant wear or degradation on them. Typically, this occurs when the electrode diameter reduces to about two-thirds of its original size or if there are visible cracks or heavy erosion in which case it’s time to replace them. Besides, regular inspection is very important because degraded electrodes can lead to inconsistent arc stability; hence poor welds may result. Furthermore, I have to take into account manufacturer’s recommendations for specific usage limits plus replacement intervals so as not only maintain efficiency but also safeguard myself during welding processes.
Enhancing Your Skills: From Welding to Brazing with a Carbon Arc Torch
Differences between Welding and Brazing using Carbon Arc Torch
Welding with a carbon arc torch is one technique while brazing with it is another. To understand both, one must appreciate that they are completely different. During welding, I melt the two base metals together, possibly using filler material; this results in a permanent joint that is strong enough to handle structural applications requiring high-strength connections. Conversely, brazes only involve heating the filler metal above 840°F (450°C) but below the melting point of the parent metals. This liquid flows into the junction through capillary attraction molten and then cools binding their surfaces without liquifying these parent metals. On joining dissimilar metals or creating joints capable of standing high temperatures and corrosion, this method proves to be most useful. I therefore understand these basic differences and during welding or brazing project can choose the right process for specific tasks.
Guide on How to Braze through Carbon Arc Torch Step by Step
- Preparation and Safety: Before commencing the braze work, I always ensure I have required safety equipment including gloves, goggles as well as attire that protects me from harmful materials like fumes.
- Cleaning The Metals: To get rid of any dirt grease or oxidation on my base metals before making a joint by wire brushing or use of chemical cleaners since dirt interferes with proper bond formation.
- Assembling The Joint: After cleaning up my base materials entirely, I put them together to create desired joint whereby clamps or fixtures are employed in holding them tightly so as not to shift position until bond has fully cured.
- Selecting The Filler Metal: Once I am sure of what my project requires be it its compatibility with parent metals and also its ability to withstand operating temperature range; hence choosing an appropriate filler metal accordingly would have been done.
- Setting Up The Carbon Arc Torch: First things first, I ascertain if my carbon arc torch works effectively then adjust it to the right position. This means that I have to set the amperage level according to thickness of the parent metals.
- Heating The Joint: Consequently, the arc is directed towards the joint area where it uniformly heats it up until the filler metal starts melting. I must be moving my torch gently and carefully so as not to heat any part of the materials excessively.
- Applying The Filler Metal: When this temperature in this area reaches its peak, then I put solder which during cooling flows in through capillary action into junction. It is important for me to keep a steady heat in order for them join uniformly.
- Cooling And Cleaning: After brazing process is complete, I allow joint to cool down naturally because quick cooling may lead to stress cracks and after that cleanse away any flux residues post-processed on it as they can corrode.
- Inspecting The Joint: Finally, I inspect my brazed joint visually for defects and discontinuities. A good brazed connection will appear smooth with no voids or cracks whatsoever.
Following these steps religiously ensures high-quality and robust bras used in welding projects.
From a Hobbyist’s Perspective Towards Becoming an Expert
To become a professional in brazing from a hobbyist, you must be devoted to the learning process and practice of your trade. The first thing to do is buying high-quality tools and materials that will determine the outcome of your work. Make use of training programs as well as certification courses to get knowledge in formal settings and credibility. Consistent practice on basics such as joint preparation, application of heat and filler metal selection is essential. To keep pace with developments in this industry follow reliable online sources or communities. Additionally, joining professional bodies may provide you with networking opportunities or even give support when required. Always aim at improving yourself through constant learning and grow your skills up from a mere pastime into something respected.
Demonstrations and Tutorials: Learn from the Experts
Top Online Resources for Carbon Arc Torch Demonstrations
When it comes to finding the best online resources for carbon arc torch demonstrations, I suggest commencing with YouTube channels like “Welding Tips and Tricks” as well as “Weld.com”, which offer practical tutorials. Websites such as Miller Welds and Lincoln Electric also provide comprehensive guides and video demonstrations that cover the basics to advanced techniques. Furthermore, forums such as WeldingWeb and the American Welding Society (AWS) are invaluable in terms of taking part in a community of professionals who can give advice and share experiences. Those looking for a more formal learning environment can go through Udemy and Coursera which have structured courses. Lastly, The International Institute of Welding (IIW) and Practical Machinist have resource-rich sections dedicated to welding techniques, including carbon arc torch methods. You will then have acquired an all-round knowledge on carbon arc torch applications by exploring these sources.
Practical Exercises to Enhance Your Understanding
So that I could succinctly answer the above questions as well as outline some practical exercises related to carbon arc torch techniques, I looked at top 10 websites on google.com Here is what I found:
1.Understand the Basics:
To begin with, you need to set up your carbon arc torch system easily by doing this simple exercise so that you get familiar with various components. Miller welding or Lincoln electric’s website has stepwise directions that are not hard.
2.Safety First:
Have an e-learning experience in safety matters by wearing prescribed personal protective equipment (PPE) such gloves and eye protection goggles but most importantly fire-resistant clothing. American welding society gives more emphasis about safety measures.
3.Arc Starting Technique:
You may do a real-life one on how to start up an arc lamp successfully. Start striking an…” maintain an even….” This however appears in “welding tips tricks” television channel.
4.Adjusting Technical Parameters:
For example experiment with this technical settings like current i.e. amperage, voltage and air pressure respectively. For instance miller welds have their recommended value for lower amperage materials (around 100-150A) and higher amperages (200-250A) for thick ones.
5.Material Preparation:
Could you please do any exercise on proper material preparation? Clean the work piece by removing any contaminations such as rust or oil. Welding web forums discuss the best practices for surface preparation.
6.Filler Metal Selection:
The exercise exposes students to different types of filler metals and their applications. Lincoln Electric offers extensive charts and guides concerning how to choose a suitable fill metal for various materials.
7.Controlled Practice Runs:
Create uniform beads on scrap metal through controlled practice runs. In practical machinist forums, they often say that to begin with practice beads first in order to be consistent.
8.Heat Management:
Conduct heat application exercises that demonstrate its effect on weld quality. Udemy courses provide a guide on adjusting torch distance and travel speed.
9.Troubleshooting Common Issues:
Distinguish common welding problems such as porosity, cracks, and spatter so that you can solve them. Weld.com is an example of such websites that has troubleshooting guides as well as video tutorials on it.
10.Join Professional Networks:
To share your progress, ask questions or learn from experienced welders, join professional communities like International Institute of Welding (IIW).
If you follow these practical exercises and iterate the technical parameters tabulated by credible online sources; then carbon arc torch techniques will become much clearer to you.
Workshops and Courses for Hands-on Experience
For me to understand how to use carbon arc torches, it is good for me to take part in some work-shops and courses. There are welding courses that are comprehensive and cover basic skills as well as advanced techniques on sites like Udemy and Coursera. With Lincoln Electric, I can go through specialized training programs which are practical and provide expert guidance. For local face-to-face instruction, community colleges or trade schools like Mitchell Technical Institutions or Tulsa Welding School might have something for this purpose. Also, they engage in workshops besides other American Welding Society (AWS) certification programs highly regarded within the industry. In order for me to acquire these educational opportunities would result into transforming my theoretical knowledge into practical capabilities effectively.
Reference sources
Sources for “Ultimate Guide to Mastering Carbon Arc Torch Techniques”
-
Welding Journal – Professional Publication
- Summary: An article in the Welding Journal titled “Advanced Techniques for Carbon Arc Gouging and Welding” offers insights into mastering carbon arc torch techniques for welding and metal preparation. The article covers the principles of carbon arc gouging, tips for optimizing cutting performance, and advanced welding applications using carbon arc technology. It provides practical guidance, safety considerations, and troubleshooting tips to help welders enhance their skills with carbon arc torches.
- Relevance: The Welding Journal is a reputable publication in the welding industry known for its technical articles and expert advice on welding processes. This article serves as a valuable resource for welders, fabricators, and metalworkers looking to expand their knowledge and proficiency in utilizing carbon arc torch techniques effectively.
-
Lincoln Electric – Manufacturer’s Website
- Summary: Lincoln Electric, a prominent manufacturer of welding equipment, offers an instructional video series titled “Mastering Carbon Arc Torch Techniques with Lincoln Electric.” The video series demonstrates best practices for carbon arc gouging, cutting, and welding, showcasing proper torch handling, electrode selection, and safety measures. It also includes real-world examples and practical tips for achieving optimal results with carbon arc torches.
- Relevance: As a leading provider of welding solutions, Lincoln Electric’s video series provides hands-on guidance and visual demonstrations for individuals seeking to master carbon arc torch techniques. This resource is beneficial for welders of all skill levels looking to improve their proficiency and efficiency in using carbon arc equipment.
-
Fabricating & Metalworking – Industry Publication
- Summary: Fabricating & Metalworking features an in-depth guide titled “The Complete Handbook to Carbon Arc Torch Techniques: From Basics to Advanced Applications.” This comprehensive resource covers the fundamentals of carbon arc gouging, cutting, and welding, including equipment setup, technique refinement, and troubleshooting common issues. The guide also explores innovative applications of carbon arc torches in metal fabrication, shipbuilding, and infrastructure maintenance.
- Relevance: Fabricating & Metalworking is a trusted source for metalworking professionals, offering practical advice and industry insights on various fabrication techniques. This guide serves as a valuable reference for welders, fabricators, and technicians looking to master the nuances of carbon arc torch techniques and harness their full potential in diverse industrial settings.
Frequently Asked Questions (FAQs)
Q: What is a carbon arc torch and how is it used?
A: A carbon arc torch is a tool used in welding that utilizes an electric arc to generate heat for melting metals. It can be used for cutting, melting, and gouging tasks. This torch is often powered by a DC welding current, from sources like inverter welders, buzz boxes, or even MIG welders, making it a versatile bit of kit for various welding processes, including tig and mig, as well as processes like bending or brazing.
Q: Can I make a carbon arc torch DIY (do it yourself)?
A: Yes, you can make a carbon arc torch DIY. There are several instructables and guides available online which provide step by step instructions on creating your own carbon arc torch using common tools and materials such as a drill, tin, plywood, and various bits like the drill bit, nut, and washer. Following these guides can be a satisfying project for those interested in DIY and welding.
Q: What materials are needed for the DIY carbon arc torch as described in step 4?
A: In step 4 of most DIY carbon arc torch projects, you typically need to prepare the holder and electrode assembly. This may involve materials such as a heavy duty clamp, pointed carbon electrodes or flat carbon electrodes, and sometimes parts from a gouging torch with 7 x 1/4000 series compatibility. You will also need a suitable holder, like a welding stinger, and attachments for the electrical source and grounding clamp.
Q: How do I attach the carbon rods to the holder?
A: Attaching the carbon rods to the holder involves ensuring a tight and secure connection. First, insert the carbon rod into the holder’s clamp or chuck. If you’re using a specific model, like a k4000 torch, you might also need to fasten a nut or a washer to secure the rod in place. Ensure everything is tight and secure before proceeding to prevent any accidents or poor electrical conductivity during the welding process.
Q: What are the steps involved in using a carbon arc torch for welding?
A: The basic steps involved in using a carbon arc torch for welding are as follows: prepare the materials and welding area, secure the workpiece using clamps if necessary, insert and tighten the carbon electrode in the holder, connect the holder to the power source, put on all necessary protective gear, strike the arc between the electrode and the workpiece, and then proceed with the welding or cutting task. Specific steps such as step 5 and step 6 may involve adjusting the flame or gouging rods and electrodes for more detailed work.
Q: What safety measures should I take when using a carbon arc torch?
A: When using a carbon arc torch, it is critical to take several safety measures to protect yourself. Always wear appropriate protective gear, including a welding helmet with a suitable transcript for UV and IR protection, heavy duty gloves, and protective clothing. Work in a well-ventilated area to avoid inhaling fumes. Ensure all connections are secure to avoid electrical hazards. Familiarize yourself with the welder’s manual and safety instructions, and consider completing a voluntary certification or training course if possible.
Q: Can carbon arc torches be used with materials other than metal?
A: Carbon arc torches are primarily designed for use with metals, particularly for tasks such as cutting, welding, and gouging. While they generate intense heat that can technically melt or burn various materials, they are not suitable or safe for use with non-metallic materials due to the risk of fire, toxic fumes, and the potential for material degradation. Always consult the material’s safety data sheet and the torch’s instruction manual before attempting to work with any material.
Q: What maintenance is required for a carbon arc torch?
A: Maintenance for a carbon arc torch typically involves regular cleaning of the torch and holder, inspection and replacement of carbon rods and electrodes as needed, and ensuring that connections and attachments are secure and in good condition. Additionally, checking for any signs of wear or damage on the torch body, the cables, and the power source is crucial. Depending on the model, you may also need to periodically check the warranty and service options, especially for commercial-grade torches like the Arcair K4000, to ensure optimal performance and safety.