The aesthetic value as well the functional performance of ABS 3D prints can be both improved through giving them a professional and polished look. Acetone vapor smoothing is one of the best ways to smooth out ABS prints. It entails exposing the 3D printed object to acetone vapors, which in turn slowly melt the outer layer of print causing it to have a shiny and smooth finish. Therefore, this guide will take you step by step on how to go about it, i.e., from setting up your workspace and getting your materials ready to performing the vapor smoothing effectively and safely. This technique is necessary for all beginners as well as professionals who want to better their quality and output of their 3D printed projects.
What is Acetone Vapor Smoothing?

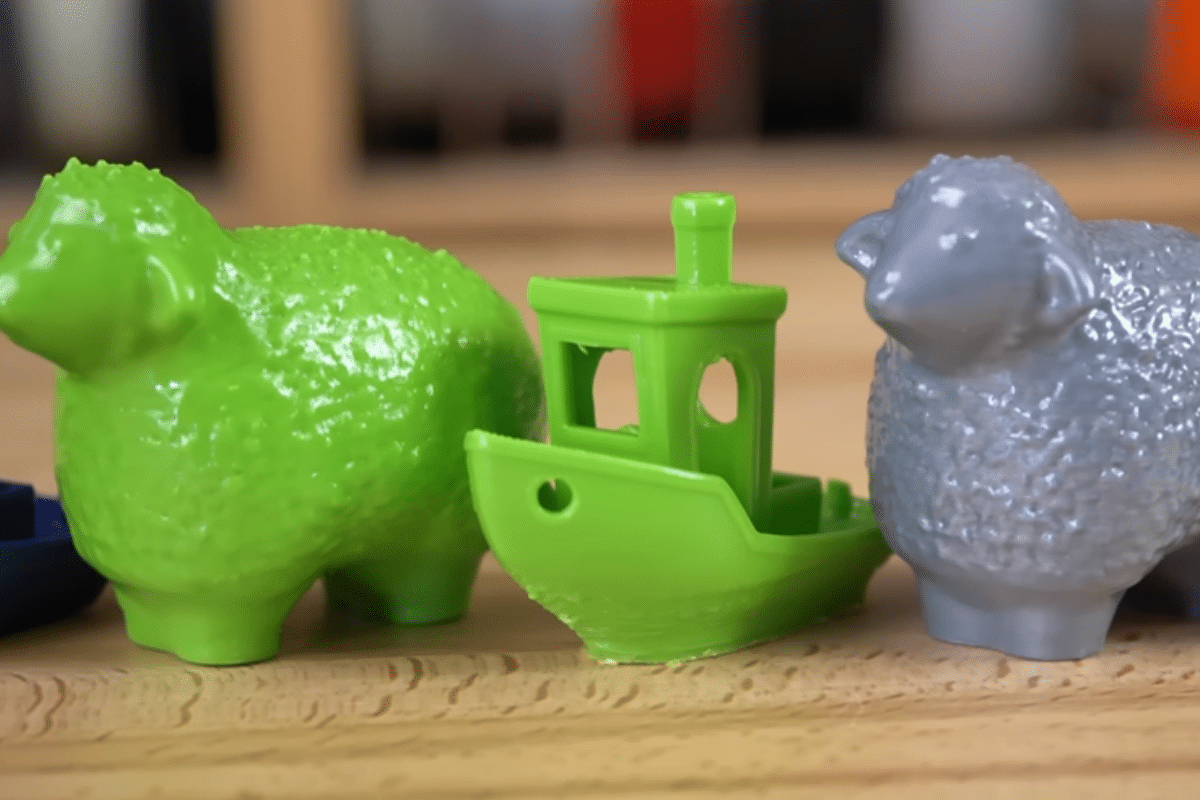
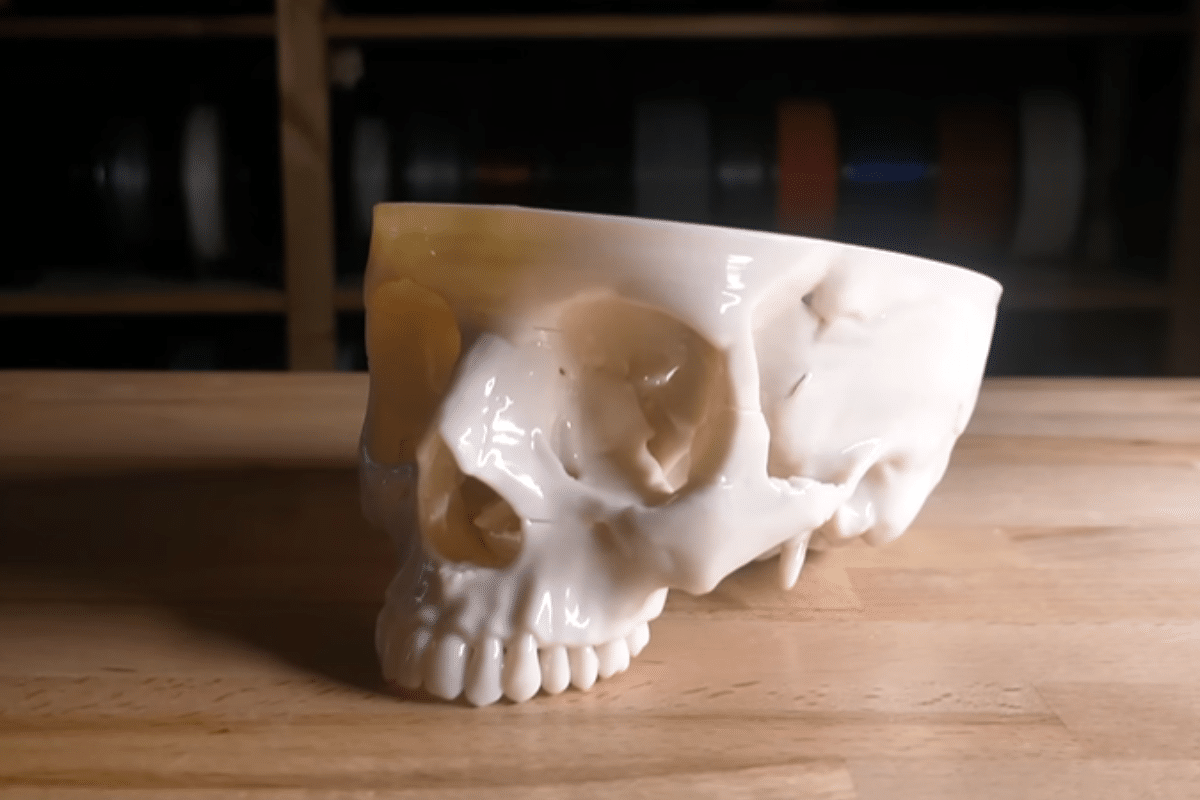
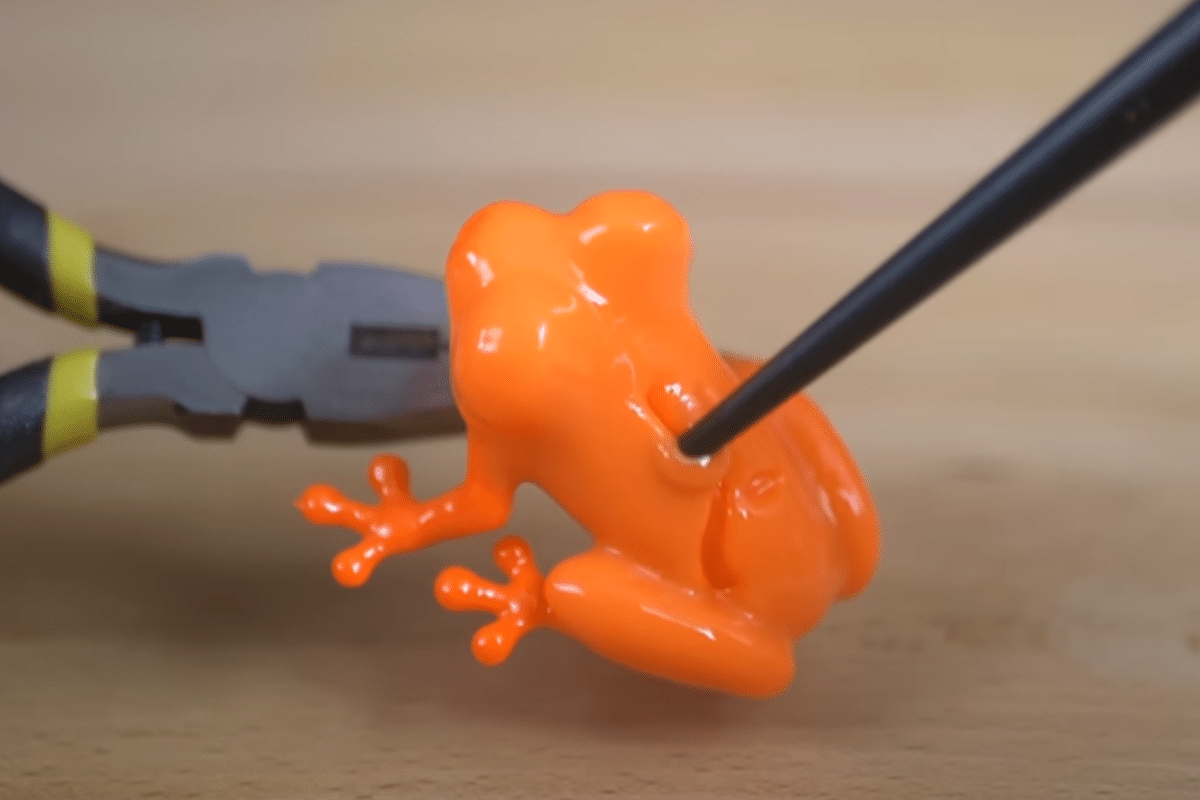
Acetone vapor is a technique for finishing ABS (Acrylonitrile Butadiene Styrene) 3D prints. This entails placing the printed object in a closed container with small amounts of acetone. The acetone evaporates and its fumes partially react with the surface of the ABS print. This controlled exposure will then allow the top-most layer to melt and fuse, hence creating a smooth glossy finish. Hence, this approach enhances not only both its appearances but also durability by improving visual and tactile qualities.
Understanding Acetone Vapor
Acetone vapor is gasified form of acetone which is commonly used as a solvent in various industrial and home use products. Upon being exposed to air, it immediately evaporates into vapors that can be used to create smoother surfaces on ABS prints. These fumes therefore act by dissolving the outermost layer of ABS giving a shiny sleek appearance when it re-solidifies again. Since Acetone vapor can easily ignite and can cause health problems, proper handling practices must be done to avoid accidents. Therefore; an efficient smoothing process must have good ventilation system, protective device on one’s body plus avoiding open flames or anything that may cause sparking for smooth and effective plastic parts post processing operations should be adhered to closely.
The Science Behind Acetone Vapor Smoothing
This is achieved through a reaction between acetone vapor and ABS plastic. When applied to the surface of the ABS print, acetone vapor temporarily dissolves the outermost layers of plastic. As a result, the surface is melted effectively allowing the plastic to reflow and even out imperfections or layer lines. Afterward, when there is no acetone vapour and it evaporates, plastic re-solidifies making it polished and glossy.
The efficiency of this process depends on several factors including concentration of acetone vapor, duration of exposure as well as environmental conditions. The idea is to keep an optimal environment so that smoothing will be uniform enough without overexposing printing that might cause unintended distortions. In order to achieve best outcomes it is important to observe due care in handling procedures as emphasized by various studies and user experiences from top online sources which call for cautionary practices such as proper ventilation and use of personal protective equipment (PPE).
How Acetone Interacts with ABS Filaments
One of the ways Acetone attacks ABS filaments is by reacting with polymer chains located on the surface of the plastic. The effect makes ABS soft and eventually melt, making it capable of filling gaps and smoothing layer lines when it comes into contact with acetone vapour. The material becomes less viscous after its polymer chains are saturated with acetone molecules, which in turn facilitates even glossy finish through surface tensions. After evaporation of acetone, that is when ABS rerecords itself to form a smoother appearance. For the filament not to be overly degraded or distorted during the process of smoothening, exercise control over exposure properly for this reason precision and safety requirements are important.
What Are the Best Materials for Acetone Vapor Smoothing?
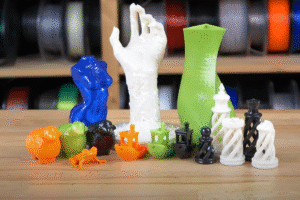
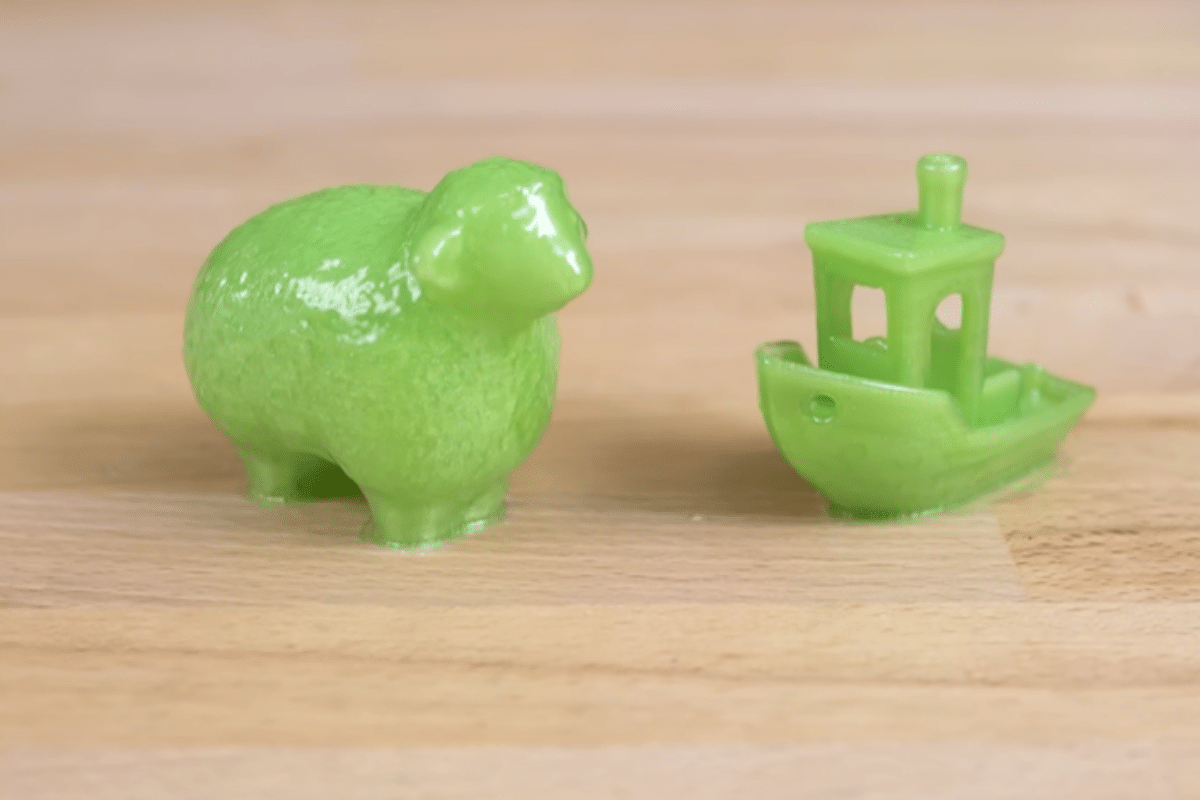
The best materials for acetone vapor smoothing are those that easily melt or dissolve when they come into contact with acetone. Acrylonitrile Butadiene Styrene (ABS) is the most commonly used filament for this process due to its high solubility in acetone, hence making it perfect for obtaining a smooth and shiny surface. Polystyrene (PS), together with some co-polyesters and polymer blends that contain much styrene, can also be vapored smooth by means of acetone. Nevertheless, ABS still stands out as the best choice since it can be found anywhere and reacts well to acetone fumes.
ABS Filament vs. PLA Filament
ABS (Acrylonitrile Butadiene Styrene) and PLA (Polylactic Acid) are two of the most commonly used filaments in 3D printing, each with their own unique properties. ABS is popular for its strength, durability and ability to withstand higher temperatures. It also has a better smoothness when it comes to aceton vapor smoothing; hence it is more flexible and has a better post processing options. However, ABS is difficult to print with because of warpage tendency and requirement for heated print bed and well ventilated area due to fumes produced.
On the other hand PLA which can be derived from renewable resources like corn starch or sugarcane, is friendlier to the environment. This is easier to print since it requires lower temperature melting point as contrasted with heated bed that would prevent warping taking place. PLA produces less fumes thus making it ideal for home use and educational setting. Despite being easy to work with, PLA is more brittle and cannot tolerate heat as much as ABS therefore limiting mechanical stress or high temperature application.
In conclusion choosing between ABS and PLA filaments depends on factors such as length of time required for printing, durability aspects of the project, environmental concerns that accrue while using this kind of material together with its post-processing capabilities among many others concern regarding 3D-printing methods for ABS materials.
Using ASA with Acetone Vapor Smoothing
ASA (Acrylonitrile Styrene Acrylate) is a common 3D printing filament, with an added value on its weather-resistant characteristics. ASA can be polished with acetone vapor, similar to ABS. In this method, the ASA print is exposed to vaporized acetone which causes the outermost layer to dissolve minimally and then hardens up into a lustrous glossy finish. The most outstanding advantage of using ASA instead of ABS lies in its ability to withstand UV rays; hence, it becomes appropriate for outdoor applications. Moreover, ASA shares several mechanical properties with ABS such as strength and durability while still undergoing acetone vapor smoothing that would minimize print lines as well enhance the look of the final product. However, it’s important to apply similar precautions just like during handling ABS including ensuring good ventilation and wearing appropriate protective gears during smoothening so that one doesn’t get exposed to harmful fumes by all means.
Other Compatible 3D Printing Materials
PETG (Polyethylene Terephthalate Glycol) is preferred among other compatible materials to be used in 3D printing. It combines the ease of printing associated with PLA and the strength as well as heat resistance of ABS, making it ideal for functional components that need a balance between flexibility, toughness and environmental resistance.
Another material to consider is TPU (Thermoplastic Polyurethane) which is well known for its highly elastic nature. TPU has found most use in creating parts that undergo repetitive movement or have impact forces exerted on them, such as phone cases and wearable devices. To avoid stringing and maintain accuracy, it is best printed at low speeds.
On the other hand, Nylon commonly referred to as Polyamide ranks high due to its incredible strength, durability and elasticity. It performs best when producing parts that take high amounts of stress or are subject to friction such as mechanical components or gears. However, printing with Nylon requires specific settings and often a heated bed to avoid warping and enhance optimum layer adhesion.
The choice of material depends on the requirement peculiarities of your project— where you want more printability while maintaining mechanical performance versus being environmental resilient.
How to Perform Acetone Vapor Smoothing Safely?
Acetone vapor smoothing is a commonly used method in creating a smooth and glossy finish for ABS (Acrylonitrile Butadiene Styrene) 3D printed parts. Follow these procedures to do it safely:
- Choose an open aired place: To avoid inhaling harmful acetone vapour, ensure that you are in an area with proper ventilation.
- Use protective clothing: Put on gloves, safety goggles and a respirator mask to safeguard your skin, eyes and the respiratory system.
- Have a container ready: A glass jar or sealed receptacle that can fit your 3D printed part will work. Have some paper towels at the bottom lining.
- Put Acetone: Slightly wet the papers using little amount of Acetone. Do not put too much as it will lead to uneven smoothing due to excess Acetone being present.
- Hang the printed object: Place the printed part directly over the paper towels or use a metal wire or something non-corrosive like suitable stand to suspend above them.
- Close tightly: Keep close for about 10-20 minutes while monitoring keenly so as not be over exposed.
- Remove and Release air out: Take out of container when desired finish reached and let residual acetone evaporate fully by putting it in open air location ventilate well air wise.
It tells how one can achieve a professional finishing on ABS prints while taking care of his/her safety if he/she follows this procedure.
Essential Safety Precautions
When it comes to acetone vapor smoothing, important safety measures should be observed to avert accidents and health risks.
- Work in a Well-Ventilated Area: Work from rooms with enough air circulation can reduce chances of inhaling dangerous acetone fog which may jeopardize human life. This may entail using fans or carrying out the process in an open are so that there is good dispersion of the fumes.
- Personal Protective Equipment (PPE): Always wear gloves made of acetone-resistant material, goggles, and respiratory mask with organic vapor cartridges. This gear helps to minimize direct contact with acetone thereby averting skin and eye irritations plus some respiratory conditions.
- Proper Storage and Handling: Acetone should be stored in a cool dry place in containers that are specifically designed for this class of corrosive substances. Due to its high flammability, keep away from flames or sparks acetone materials soaked in it.
- Controlled Environment: Employ a controlled surface where accidental spills or tipping over of the container holding the acetone might be avoided. Keep spill containment materials nearby for prompt management if there is any unintentional leakage.
- Monitoring and Timely Intervention: It is important to observe closely how well you are doing your smoothing so that you do not leave the part too long in the vapours since it will result into damage deformation. You need to always have a clock set whereas at intervals one has to confirm how much progress one has made.
By following these essential safety precautions, you can safely perform acetone vapor smoothing and achieve the desired finish on your ABS 3D printed parts.
Setting Up a Well-Ventilated Area
To work safely with acetone, you must set up a well-ventilated area.
- Choose the Right Location: Choose an open place or a garage with big windows that can be opened freely to allow for maximum air flow. If indoor, use a room installed with fans to suck out fumes.
- Utilize Exhaust Fans and Fume Hoods: The installation of exhaust fans or fume hoods can greatly improve ventilation. Position the exhaust fan to remove air directly from the workspace to outside.
- Air Purifiers: Think about using air purifiers fitted with activated carbon filters to decrease acetone vapour concentration in the air. This step is especially important when working in confined spaces.
- Open Windows and Doors: When possible, keep doors and windows open so as to facilitate continuous fresh air intake. More than anything else, opening windows on either side of a room creates cross-ventilation.
By doing this, you will be able to create a well-ventilated workstation which minimizes your exposure to acetone fumes thus increasing overall safety.
Handling Acetone Fumes and Flammable Liquids
To guarantee safety in your workplace, you must respect the handling of acetone fumes, and other flammable liquids.
- Wearing Appropriate Personal Protective Equipment (PPE): When dealing with acetone, it is vital that you always have gloves on, safety goggles on and lab coat or an apron worn to protect your skin and eyes from getting wetted.
- Appropriate Acetone Storage: Tightly sealed containers for acetone made from compatible materials such as high-density polyethylene (HDPE) should be used. Keep these containers in cool dry places, out of direct sunlight and away from any source of heat.
- Preventing Ignition Sources: To avoid ignition sources for example open flames or sparks which can initiate a fire when coming into contact with acetone because it is highly flammable; keep it away from such sources. Explosion proofing all electrical systems within the workspace is also necessary.
- Spill Management: If there’s a spillage happening at that moment, prevent free movement by using absorbent substances like sand or prepared spill kits suitable for collecting spilled combustible liquids. These absorbents should be disposed of locally in accordance with respective local hazardous waste regulations.
- Safe Disposal Options: Do not empty acetone into drains or throw it away in regular garbage cans. Hazardous waste disposal regulations at both local and federal level require that we treat acetone as hazardous waste before disposing of it.
Adherence to these guidelines will help to manage risks related to exposure to acetone vapors and flammable liquids thereby creating a safe working environment.
What Equipment is Needed for Acetone Vapor Smoothing?
For secure acetone vapor smoothing, the following tools are necessary:
- Airtight Container: Opt for a tight container that can hold your printed parts but not use up much of the solvent.
- Acetone: Make use of pure or industrial grade acetone to create the vapour.
- Platform or Mesh Stand: Place it inside the container to lift up the 3D printed parts above the level of acetone.
- Heat Source: The base part needs gentle heating through a low heat source like warm water or heating pad which will lead to more evaporation of acetone.
- Personal Protective Equipment (PPE): Wear gloves, respirator mask and safety goggles for protection against contact with skin and inhalation hazards associated with this chemical compound.
- Tongs or Gloves: These are used when putting objects into and out from containers respectively so as not come into direct contact with hands.
These basic requirements ensure a polished look on your printed parts while ensuring safety is maintained in all steps.
Building a Smoothing Chamber
To create an effective chamber for smoothing acetone vapour, please adhere to the following instructions:
- Choose the Right Container: A glass or metal container with a tight-fitting lid should be selected. You can use a glass jar, metal canister or repurposed paint tin among other options. The size of this container must allow for fitting of your 3D prints without any acetone vapours escaping into the environment.
- Prepare The Platform: Put a grill rack made from metal mesh or perforated plate inside the container. This will act as the platform where you will place your 3d printed parts above acetone so that there could be even distribution of acetone vapour around them.
- Introduce Acetone: Pour some little amounts of acetone into the base part of the chosen container. Usually one to two tablespoons should suffice since only vapor is required.
- Heat Up The Container: Use mild heat source to warm up the container thereby speeding up evaporation of acetone. A heating pad set at low temperature or placing it in warm water bath can do well but never expose it under direct fire flame due to its flammable nature.
- Seal The Container: Ensure that you tightly seal off all openings through which air might get in contact with vaporized acetones because this may endanger your life if not done properly besides hindering effectiveness.
-
Observe The Process: Close up everything by placing printed objects on platform and then cover with container lid. Watch closely while waiting for smoother appearance which usually takes about ten to twenty minutes before opening carefully within aeration.
By following these steps, you can create a functional and safe smoothing chamber to achieve a polished finish on your 3D printed parts.
Utilizing a Zortrax Apoller
The Zortrax Apoller is a device that automatically and safely creates a smooth, shiny finish for 3D-printed objects. It does this by means of what is called smart evaporative smoothing: it uses solvents such as acetone to even out the surfaces of ABS, ASA and HIPS prints. What happens with this machine is there’s an even distribution of solvent vapours throughout the entire thing so all surfaces end up being equally smooth without having to do anything manually.
To use the Zortrax Apoller:
- Prepare the Chamber: Open the chamber of Apoller then put inside your parts that were printed using a 3D printer. Ensure the parts are dry and clean so as not to disrupt the process of smoothing with any impurities.
- Choose Solvent: Depending on what material was used for printing your 3D models, select acetone or MEK (methyl ethyl ketone) as a solvent. Both work well with this device.
- Set Parameters: Using an easy-to-use interface on its touchscreen, you can adjust different parameters for better smoothness when necessary. For example time or intensity may be changed during vapor circulation cycle through print’s side walls optimization.
- Start Process: Once everything is ready close down chamber tightly and start smoothing operation. To take care about environment there are hermetic seals preventing any loss of solvent plus systems recovering solvents built into device.
- Monitor and Finish: Normally whole procedure lasts around three hours. After that time passes by here comes ventilation phase which will remove all remaining fumes out from cabinet automatically so you can safely take off finished pieces after they have been smoothed.
Zortrax Apoller saves not only money but also significantly improves physical properties and visual appearance of objects made by additive manufacturing technology.
DIY vs. Commercial Smoothing Tools
In terms of making 3D prints smooth, do-it-yourself and commercial tools both have their benefits and drawbacks. One advantage to DIY techniques like using brushes to apply acetone or homemade vapor chambers is that they are inexpensive while still allowing for a high level of control. However, these approaches can demand substantial amounts of time and energy with inconsistent outcomes being produced sometimes. Moreover, safety becomes an issue as poor handling of solvents may create health hazards.
Conversely, the Zortrax Apoller among other professional machines for smoothing provide a more efficient user experience. These systems are intended to deliver reliable results consistently and easily at professional quality levels too. Such features include automatic solvent circulation, air-tight chambers together with built-in safeguards which altogether make them foolproof even for amateurs or beginners in the field. Although it might be costly initially compared with DIY options; still the efficiency gains made by these devices along with superior finishes achieved often justify their purchase price tag eventually anyway. To sum up: If what you need is accuracy plus convenience then go commercial otherwise stick with cheaper methods where experimentation is key especially if working on tight budgets.
What Steps are Involved in the Acetone Vapor Smoothing Process?

Below are guidelines to perform the process of acetone vapor smoothing:
- Preparation: Good ventilation in your working area is a must. Get gloves plus goggles for safety measures too. Use a container that can be sealed such as a metal chamber or glass jar.
- Setting up the Chamber: Put a support platform in the container which will hold your 3D printed model; make sure it is raised and not touching acetone directly.
- Add Acetone: Pour some amount of acetone into the bottom part of your container while making sure that it does not touch the print. Usually, few milliliters are enough.
- Heat the Acetone (Optional for Fast Results): You may heat gently so as to speed up its vaporization but be more careful because extra precautions should be taken against overheating during this step.
- Sealing Off the Chamber: Tighten the lid on container which will enable vapors from acetone to fill it up. These fumes smoothen surface of 3D prints over time.
- Watch Over Progress: Observe how much smoothing is being done throughout. This may take anywhere between minutes and an hour depending on size printed as well desired finish.
- Take Out and Air It: Open carefully after achieving required level smoothness then pick out what you have printed before allowing fresh air into contact with them for any remaining acetone to evaporate within well ventilated place.
With these steps one can achieve good finishing on their models by using acetone vapor in 3D printing process.
Preparing the 3D Printed Part
To start the method of acetone vapor smoothing, one must first know how to prepare your 3D printed part. Follow these basic steps:
- Clean the Print: Take away any extra material or supports from the 3D-printed design. Smooth out uneven surfaces and rough edges with sandpaper or a plastic scraper;
- Search for Defects: Inspect the 3D printout for cracks, gaps or other flaws that could affect its appearance after being smoothed over with vaporized acetone;
- Dry off the Print: Make sure it is completely dry before proceeding onto next stage as even slightest bit of moisture can disrupt acetone vapour smoothing process.
- Handle with Care: Be gentle when handling delicate pieces during preparation stages – especially those parts which are more complex than usual.
By following these necessary steps in preparing your object for acetone-smoothing you will be able to achieve a sleek finish on top of your rough model.
Application of Acetone
There are two main things to consider when applying acetone vapor to a 3D printed part. These are safety and technique. To smooth your 3D prints effectively, do as follows:
- Prepare the container: The container you use should be made of glass or metal because these materials can contain acetone vapor safely. Add a small amount of acetone at the bottom of the container. You may also soak paper towels or sponges in acetone for even distribution of vapors.
- Hang the print: To avoid direct contact with acetone, either suspend it with wire or place it on a platform. Ensure that all sides of the model are evenly exposed by placing it at the center of your container.
- Seal off everything: Close the lid tightly to keep all acetone fumes within its environment – this will allow them to react properly with surfaces on prints. Be ready for variations in exposure time which mainly depend on size and complexity of prints.
- Keep an eye on smoothing progress: Check regularly so as not to overdo since over-exposure can lead to loss in details or even structural integrity. Normally, this process takes between several minutes up until half an hour.
- Take out print; let’s ventilate: Carefully remove finished prints from their containers after achieving desired smoothness levels; then let them sit somewhere aerated until every trace amount evaporates off completely so that they become safe for handling/displaying purposes.
These exact steps will give professional results while using acetone vapor smoothing method for finishing up 3D printed models.
Achieving the Desired Surface Finish
A lot more than merely adhering to the acetone vapor smoothing approach is involved in getting the desired surface finish on your 3D printed models.
- Post-Processing Techniques: Other post-processing techniques may involve sanding, priming, and painting apart from acetone vapor smoothing. To eliminate layer lines, begin with a coarse-grit sandpaper and work your way up through finer grits. Applying primer before painting can also hide imperfections better and give a smoother surface for paint to stick on.
- Optimizing Print Settings: The initial print settings determine how smooth or rough the finish will be. A lower layer height and higher print resolution should be selected so as to reduce visibility of layer lines which in turn saves you from doing much of post processing work.
- Material Choice and Print Orientation: PLA and ABS among other materials respond well to post-processing techniques while others do not. Also, you can clean up your prints by orienting them in such a way that fewer supports are required thus reducing finishing effort needed.
Integrating these steps with acetone vapor smoothing will improve the final look as well as enable you to achieve professional grade finishes on your 3D prints.
How to Handle Common Problems in Acetone Vapor Smoothing?
Acetone vapor smoothing can be a challenging process when trying to get the right look for your 3D prints. Some common issues and their solutions include:
- Too Smooth: If the object being smoothed appears too smooth and loses detail, it was likely exposed to acetone vapor for too long. To avoid this, begin with shorter exposure times and gradually increase them while keeping a close eye on the model.
- Uneven Surface: Sometimes only parts of an object are made smoother than others during smoothing due to uneven distribution of acetone spray within the chamber. To achieve uniformity in finish across all regions of your workpiece, make sure that you use a large enough enclosure box which should also be properly sealed allowing even exposure to vapors from acetones.
- Cracks on the Surface: Rapid cooling down of models following treatment could result in cracking up on surfaces. Therefore, it is advisable that one allows them cool slowly under controlled conditions so as not to experience such problems.
- Safety Measures: Since acetone is highly flammable and can pose risk if inhaled or absorbed through skin contact; there are some precautionary measures which must always be followed strictly when handling this chemical compound during any form of its application like gloves should never miss out plus working at well ventilated areas equipped with safety goggles etcetera.
Quality enhancement and protection against dangers related with acetone vapor smoothing process involve dealing with these challenges.
Common Mistakes and How to Avoid Them
- Insufficient Ventilation: Most people do not allow enough ventilation when using acetone, thereby risking inhalation of noxious gases. Establish your workplace outside or next to an open window while utilizing fans for fumes dispersion.
- Incorrect Amounts of Acetone: Poor smoothing outcomes can be caused by excessive or inadequate amounts of acetone. Use controlled quantities, just enough to form uniform vapor and avoid putting acetone directly around the print where it may pool.
- Improper Temperature Regulation: Rapid changes in temperature can cause cracking and distortion on your prints. Keep the smoothing chamber at a constant temperature and avoid placing it in drafty areas or environments with extreme temperature fluctuations.
These are some pitfalls to watch out for as well as suggested preventive measures which will enable you achieve maximum efficiency during acetone vapour polishing without compromising the quality of your 3D prints.
Solving Issues with Layer Lines and Uneven Surfaces
Taking care of layer lines and uneven surfaces in 3D prints can greatly improve the appeal and usefulness of your models. Below are some methods that work best:
- Optimize Print Settings: You may reduce visible lines by changing parameters like layer height, print speed or temperature settings. Lowering the layer height will give you finer lines that are less noticeable while the best print speed and temperature settings ensure even extrusion.
- Post-Processing Techniques: Surface imperfections can be smoothed out using techniques such as sanding, chemical smoothing (e.g., acetone vapor for ABS) or applying filler primers. Layer lines become increasingly invisible when sanded with different levels of grits.
- Filament Quality: Smoother prints may result from using high-quality filament. Filaments which have a uniform diameter and composition extrude more consistently thereby leading to fewer defects on the surface.
These strategies will help you enhance the smoothness as well as general outlook of your 3D printed models thus mitigating against layer lines and uneven surfaces.
Preventing Warping and Other Defects
Preventing warping in 3D prints is very important to ensure that the outputs are of high quality. Here are some effective measures that are based on the current best practices:
- Employ a Heated Bed: A heated bed helps keep the temperature even across the print base, which in turn keeps the first few layers warm and stuck together thus reducing chances of warping.
- Optimize Bed Adhesion: The use of correct bed adhesion is very vital. Examples include glue sticks or hairspray, or you can also use special bed surfaces such as PEI sheets which increase grip while preventing edge lift.
- Calibrate Temperature Settings: You should calibrate your extruder and bed temperature settings so that they match with the filament type being used; this will help to prevent differential cooling whose effect may be warping. Each type of filament should be extruded within its recommended range of temperatures for both nozzle and bed.
- Control Environmental Conditions: Ensure that ambient environment remains stable in terms of temperature throughout printing operation since rapid cooling leads to shrinkage. Drafts and fluctuations in temperature can be avoided by using an enclosed printer which shields off these factors from affecting prints.
- Implement Brims and Rafts: By adding brims or rafts onto a model, more surface area comes into contact with the bed thereby making it more stable hence minimizing chances of warp during printing process.
These strategies significantly cut down on warping as well as other common flaws therefore enhancing reliability and quality improvement in 3D prints.
What are the Benefits of Acetone Vapor Smoothing?
Acetone vapor smoothing is widely employed in the post-printing stages of 3D models to enhance surface finish especially those made from Acrylonitrile Butadiene Styrene (ABS) filament. The following are its key merits:
- Better Appearance: All visible layer lines on a print are effectively removed by acetone vapor smoothing so that it can have a polished look similar to injection molded parts which are glossy.
- Increased Strength: This process smoothes between layers thereby making them stick together better thus creating stronger and more durable objects eventually.
- Less Friction: Such a polished surface has lower friction between it and other things hence useful for functional components that require smoothness at interfaces or improved aerodynamic properties.
- Ease of Cleanliness: Dust does not easily settle on shiny finishes so maintenance plus cleaning processes for these printed items become simpler compared to others with different textures.
- Enhanced Paint adhesion: Primers, as well as paints, bond excellently onto smooth surfaces leading to superior final finishing properties of painted 3D prints.
Your 3D printed models can benefit both visually and functionally by applying acetone vapor smoothing.
Improving Aesthetic Appeal
When it comes to making 3D prints look good, there are a few things you can do. First of all, sanding is an important step in the process because it smooths out rough surfaces and gets rid of visible layer lines. You can get a nearly perfect surface by using sandpaper with progressively finer grits. Another thing you could try is priming and painting your print. This will greatly improve its appearance — filling in any small imperfections with primer, then adding color and texture with paint. Additionally, as mentioned before, acetone vapor smoothing can also make the surface shiny like glass which makes it even more beautiful than before. By doing all these post-processings together, not only will your 3D printed models look great but they will surpass any expectations you may have had regarding their aesthetic appeal.
Enhancing Surface Durability
It is important to make 3D printed models last longer and perform better. One of the best ways to do this is by using heat treatment; it means baking the parts after printing them so they become stronger and more resistant to wear or damage. Coating with chemicals is another option whereby one applies epoxy or polyurethane over the surface as protection against scratches and impacts. Also, fibre composites may be used for reinforcing purposes which add toughness. By stuffing with fibers or using composite filaments instead, you can create those components that do not easily break when under stress. Thus if followed these strategies will greatly enhance the durability of your 3D printed models thus making them more practical for use in real life situations.
Use Cases in Different Industries
3D printing has transformed the way many industries work by providing new ideas and speed. The medical field uses 3D printing to make custom prosthetics, dental implants, and even bioprinted organs that have greatly improved patient care. Rapid prototyping in the automotive industry enables quick and cheap production of new parts or designs. In aerospace, this technology is employed in creating light but strong components which increase fuel efficiency as well as performance enhancement Consumer goods companies also adopt 3D printers for personalized products manufacturing thereby meeting individual needs while reducing waste creation at the same time. These wide-ranging applications show how impactful three-dimensional printing can be across various sectors.
Frequently Asked Questions (FAQs)
Q: What is acetone vapor smoothing for ABS 3D prints?
A: Acetone vapor smoothing is a post-processing technique used to achieve a smooth surface finish on ABS 3D-printed parts. It involves exposing the ABS parts to acetone vapor, which dissolves and smooths the surface of the prints.
Q: How do you perform acetone vapor smoothing for ABS parts?
A: To perform acetone vapor smoothing, place your ABS part in a smoothing box and add liquid acetone in a controlled manner to create acetone vapor. Ensure the vapor envelops the surface of your ABS part evenly to achieve a smooth finish.
Q: Can I use acetone vapor smoothing on PLA prints?
A: No, acetone vapor smoothing is not effective for PLA prints. Acetone specifically dissolves ABS, but it does not have the same effect on PLA. For smoothing PLA, other methods like sanding or using a different solvent are recommended.
Q: Is acetone vapor smoothing suitable for complex geometries?
A: Yes, one of the advantages of acetone vapor smoothing is its ability to evenly smooth complex geometries that would be difficult to sand or polish manually.
Q: What safety precautions should I take when using acetone smoothing?
A: Always work in a well-ventilated area and wear protective equipment such as gloves and safety goggles. Acetone is highly flammable and can be harmful if inhaled, so proper ventilation is crucial. Avoid any open flames or sparks near the acetone vapor.
Q: How long should you expose ABS prints to acetone vapor?
A: The exposure time can vary, but typically ranges from a few seconds to a couple of minutes. Longer exposure can lead to melting or warping of the part. It’s best to start with short exposures and gradually increase if needed.
Q: Can I use nail polish remover for acetone smoothing?
A: Regular nail polish remover may contain additional ingredients that can interfere with the smoothing process. It’s recommended to use pure liquid acetone for best results in acetone vapor smoothing.
Q: What is the difference between an acetone bath and acetone vapor smoothing?
A: An acetone bath involves submerging the ABS part in liquid acetone, which can be more aggressive and lead to uneven smoothing or melting. Acetone vapor smoothing uses acetone steam to gently dissolve and smooth the surface, offering better control and a finer finish.
Q: Can acetone smoothing improve the strength of ABS prints?
A: Acetone smoothing primarily enhances the surface finish and aesthetic quality of ABS prints. It may slightly affect the strength by creating a more uniform surface, but it is not intended as a method to improve the internal structural integrity of the part.
Q: What are the common issues faced during acetone smoothing?
A: Common issues include over-smoothing, where excess acetone exposure leads to loss of detail or warping, and uneven smoothing, which occurs if the vapor does not distribute evenly. Proper technique and controlled exposure can mitigate these issues.


