

3D printing has brought about a radical change in the way we make and prototype things, opening up endless prospects for innovation in various industries. Knowing how to make an STL (stereolithography) file is necessary if you want your 3D prints to be successful, no matter if you’ve been a 3D modeler for years or have just embarked on this path. What this manual does is present a direct step-by-step process of generating STL files so that they are ready for printing. We’ll go through all the fundamentals — from creating your design using CAD software down to exporting it as an STL file — giving useful advice based on experience and addressing common pitfalls one might encounter along the way. After reading this article, not only will you feel more comfortable with 3D printing but also possess enough skills and insights into turning your models into reality by means of efficient 3D printing techniques.
How to Create an STL File from a 3D Model

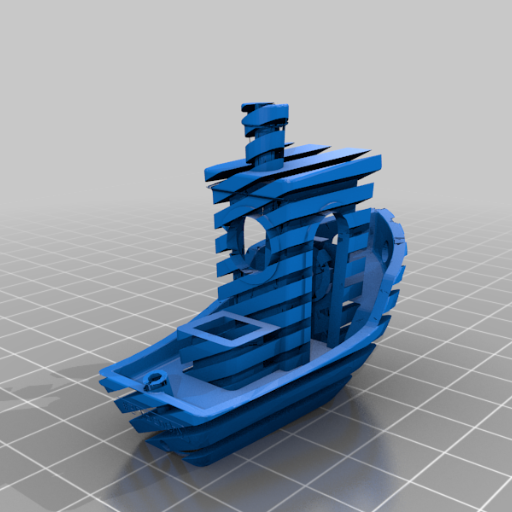
Image source: https://all3dp.com/
Here are some brief instructions on how to create an STL file from a 3D model:
- Model Your Design: Utilize CAD software so as to model your design in 3D. There is Blender, Tinkercad, Fusion 360 among others.
- Error Check: Confirm that your model has no holes or non-manifold edges; these would affect the print.
- Save the File: In your CAD software, go to ‘File’ then choose ‘export’ or ‘save as’. This option will enable you to change it into an STL file.
- Adjust Settings: You can set it to low/high resolution depending on what you want. Also, higher resolutions give more details but have larger sizes while lower ones do vice versa.
- Name and Save: Save the file with any name of your choice and save it at wherever location in your computer.
Now the STL file is ready for 3D printing.
Which Software to Use to Create an STL File?
There are numerous software applications that are commonly recommended for generating an STL file. Tinkercad, Fusion 360, and SketchUp consistently rank among the best according to resources like All3DP.
Tinkercad is a good CAD software for beginners due to its ease of use and simplicity. It has a user-friendly interface that lets you create or modify models quickly before exporting them as STL files.
Fusion 360 is one of the most powerful options available from Autodesk. It’s designed with professionals in mind but can also be used by hobbyists who want more advanced features. The software boasts strong modeling tools and extensive design capabilities which allow users to generate highly detailed STLs easily.
SketchUp is another great choice; it offers robust functionality alongside an intuitive interface. This makes it a popular choice among architects and interior designers who may need to produce complex 3D models or architectural walkthroughs before finalizing their designs. However, these same features also make SketchUp suitable for other common 3D modeling tasks such as creating printable objects or designing game assets – making it useful for anyone interested in working with STL files.
These three options have been selected because each provides different features aimed at various skill levels and design requirements when it comes to producing STL files.
Steps to Export an STL File Correctly
- Prepare Your Design: Make sure that your model is printable in 3D. This implies searching for gaps, non-manifold edges, and faces that intersect each other and could lead to glitches during printing.
- Check Scale and Units: Verify whether the size of your design is suitable or not by using the correct units. Generally measurements should be given in millimeters because it is the most commonly used unit among many 3D printing software.
- Navigate to Export Menu: Find ‘Export’ option from drop-down menu located under “File” or “Save As” on your selected CAD software.
- Select STL Format: In the export file formats available select STL (Standard Tessellation Language).
- Configure Export Settings: Choose settings for STL export like resolution which will decide level of detail; higher resolution indicates more detailed print but heavier file size.
- Save the File: Name your file and locate a folder to save it as an STL file on your computer system.
-
Check STL File: Once exported, open up your newly saved .stl with any viewer (or slicer) program that accepts these files so you can inspect them visually for any errors – this step ensures error free printing.
Follow these steps to properly convert your creation into an .stl format suitable for 3D printers.
Optimizing Your STL File for 3D Printing
Consider these best practices to optimize your STL files for 3D printing:
- Decrease Polygon Count: Reduce the model’s complexity to lower size and speed up slicing while maintaining quality.
- Water-Tightness: Ensure there are no gaps or holes in the model. If not, it might cause printing errors.
- Orientation of Normals: Check that all surface normals face outward. Otherwise, inverted normals can confuse a printer on what should be printed as a surface.
- Overhangs: It is good to minimize overhangs as much as possible because this will require lesser support material hence smoother prints during post-processing.
- Wall Thickness Optimization: Make sure that the thickness of walls is uniform throughout the entire design but still strong enough where needed otherwise you may end up with structures that are easily breakable due to thin sections not printing properly.
- Smoothing Techniques Application: In case required, apply software tools which can smooth surfaces so as to achieve more refined finish after object has been printed out.
Following those points will significantly improve printability and reliability of STL models for 3D printing.
What CAD Software Can I Use to Create and Export STL Files?
You can create and export STL files using various CAD software programs. Here are some of them:
- Tinkercad: Beginner-friendly and web-based.
- Fusion 360: Can be used by hobbyists and professionals alike.
- Blender: Good for complex models and animations, also free and open-source.
- SolidWorks: An industry standard with lots of engineering features.
- SketchUp: Commonly used for architectural models because of its intuitive interface.
- AutoCAD: Widely used and versatile enough to cover many design needs.
These programs allow designing 3D models that can then be saved in the STL format. They differ in terms of complexity, required skill level, feature set, etc., so you can choose the one that suits your needs best.
Popular CAD Softwares for Creating STL Files
Here are some CAD software that can be used to create STL files:
- Tinkercad: Tinkercad is a web-based application known for its simplicity. It’s perfect for beginners. Users can quickly make 3D models using a drag-and-drop feature and export them as STL files for 3D printing.
- Fusion 360: This versatile Autodesk software is popular among hobbyists and professionals alike. With powerful modeling tools, simulation capabilities, and collaboration features all in one place, it offers everything needed to make accurate functional STL files.
- Blender: Blender is free open-source software that has always been appreciated for its ability to do much more than just model in 3D with ease; it also animates and renders too! It may not be as straightforward as other programs but its flexibility allows for detailed complex STL file creation.
These CAD software packages have strong features sets which cater to users of different levels of skill or experience, are easy to use and understand due to their intuitive interfaces so any one of these options will work wonders when creating an exporting an STL file.
Why Use Tinkercad for Simple 3D Modeling?
Tinkercad is different because of its simplicity and availability, this makes it the best choice when it comes to basic 3D modeling. Tinkercad offers a drag-and-drop interface that is intuitive and does not require any previous knowledge which allows novices to easily create shapes and then change them around as much as they like. Since Tinkerdad is web-based there are no downloads or installs required; this means people can get into their project from any device with internet access. Additionally, Tinkercad supports exporting STL files directly so it can be optimized for 3D printing quickly. This ease-of-use combined with accessibility plus seamless integration into 3D printing make it an excellent tool for beginners in modelling.
Using SketchUp to Generate STL Files
SketchUp, a well-liked 3D modeling software program, is liked for being simple and versatile. Here are the steps to creating an STL file using SketchUp:
- Model Creation: Start by designing your 3D model in SketchUp. This can be done easily due to the program’s easy-to-use interface and powerful tools that offer precision as well as creativity.
- STL Export: After you finish creating your 3D model with Sketchup, it may be necessary for you to export an .stl file format so that it becomes possible for printing or sharing purposes. To do this go into File > Export > STL (or choose any other compatible format).
- Settings Configuration: Configure settings according to what suits best; For example, select units of measurement such as meters or inches, specify accuracy levels etc., depending on whether intended use is towards 3D printing or other applications.
- Export And Save: Once all desired changes have been made within Sketchup regarding design elements themselves including scale factor adjustments among others save them first before proceeding further then click on “export” button found at lower-right corner which triggers dialog window giving options where one selects location where saving should happen followed by clicking OK button below.
SketchUp being easy to learn and highly accurate when it comes down to details has won hearts over years making people choose it as their go-to tool in generating stl files.
What Are the Pros and Cons of STL Files?
Pros:
- Simplicity: STL files are simple to create. They can be made by anyone from beginners to experts.
- Compatibility: Most 3D printers and software support STL files, making them compatible with many platforms.
- Efficiency: For simple designs, STL files only need the surface geometry of a model. This simplification makes them easy to process quickly during printing.
Cons:
- Lack of Detail: Surface-only knowledge means that STL files do not include details about color, texture or material properties.
- Precision Limitations: The simplicity of STL files can result in less precise models being printed – especially when dealing with complex or high resolution designs.
- Size Limitations: As models get more complicated, so does their file size; large amounts of data can make handling and processing difficult for an STL format file.
While it may not provide enough intricacy for detailed materials specification needs; this format offers a good compromise between ease-of-use/compatibility and versatility which is well suited towards many different types of 3D Printing applications.
Advantages of Using the STL File Format
- Universality: Most 3D printers and CAD software universally accept STL files which can be used by different users for various applications.
- Simplicity: The simplicity of STL files; they only focus on surface geometry makes them easy to generate and use even in basic or moderately complex designs.
- Efficiency of File Size: Compared to other formats, STL files are smaller because they do not contain color or material information thus this helps in faster processing and handling ease.
- Speed: Slicing and printing take less time with simple designs like those found in an STL file thereby streamlining the workflow for fast prototyping.
-
Compatibility: Being a widely accepted format across devices and software programs, it means that people can share their works without worrying about compatibility issues.
Common Cons of STL Files in 3D Printing
- Lack of Detail: STL files fail to represent detailed surface textures or complicated geometries, thus causing loss in fine features during the final print.
- No Color or Material Information: STL files lack color, texture, and material information storage capability which makes them less appropriate for use where different materials or intricate color patterns are required.
- Mesh Errors: Holes or non-manifold edges may occur when creating an STL file. These mesh errors can lead to printing failures or poor quality prints.
- Resolution Dependency: When it comes to the quality of a print, the resolution used in an STL file matters a lot – low resolution files create visible layers and rough surfaces.
-
Post-Processing Required: In most cases, additional steps must be taken to achieve desired accuracy and finish quality because of its limitations.
How to Open and Edit STL Files?
To start and change stl files, you will want a special software that is made for 3D modeling and mesh manipulation. Below are some of the most popular applications:
- Tinkercad: This beginner-friendly tool runs on your browser and allows you to do quick edits or create simple designs.
- MeshLab: A great open-source software for reviewing and cleaning up STL files.
- Blender: A powerful free application used for more involved modifications that need advanced editing capabilities.
- Fusion 360: If you need a CAD program with CAM and CAE tools then Fusion 360 is worth considering as it enables comprehensive STL file editing at a professional level.
Pick one of these programs or any other based on what suits you best. Import your chosen STL file by clicking on ‘import’ or ‘open’. Use tools provided in the software to make changes required; finally, save it under new name ready for printing when done with everything otherwise export edited version back out again if satisfied.
Choosing the Right Software to Open STL Files
To guarantee rapid sequence of activities and excellent output, one must carefully choose the software to use in opening and editing STL files. Below are the best options from the most authoritative sources:
- Tinkercad: This program is perfect for beginners because it is user-friendly and web-based. It allows for quick and simple editing that only covers basic designs or minor adjustments.
- MeshLab: An open-source platform recommended mainly for those who want to inspect, tidy up, or make specific changes on an STL file. MeshLab deals with mesh errors effectively thus refining them prior to printing.
- Blender: Blender has always been known as a powerful tool when it comes to editing since its features are vast and can handle complex modifications too. With this application being free, people can do advanced 3D modeling using various tools provided by blender itself.
These three have their own strong points so select whichever suits your project’s complexity level best while considering personal skillset.
Steps to Edit STL Files for Improved 3D Printing
- Bring in the STL File: Start the software and import the STL file to be edited. You usually need to go to the file menu and pick “Import” or “Open” and browse for the file.
- Check out and Repair the Mesh: Inspect your mesh using tools for errors such as holes, non-manifold edges, or intersecting faces. Software like Blender or MeshLab have advanced features that can help you find these issues easily before they cause printing problems.
- Modify the Design: Make changes on your model according to what you need. This could be as simple as resizing parts or repositioning them, or more complex such as adding/removing features. For basic edits Tinkercad works well while Blender is best for extensive modification.
- Optimize it for Printing: Prepare your model better for 3D printing by adjusting it accordingly. Some of these adjustments may include adding supports where necessary, ensuring proper wall thicknesses are maintained throughout the design as well checking for stability/printability at different points within its structure etc., most software have built-in features which allow users optimize them during this process too.
- Export Edited STL File: Finalize changes made then save an STL format file . Ensure that all modifications are saved correctly so that it can be loaded into a slicer (a program used by 3D printers) immediately after slicing operations are done in preparation for 3D printing.
If you follow through each of these steps using some highly recommended tools, quality level along with printability factors of any given 3D models will undoubtedly improve greatly henceforth.
What Are the Best Export Settings for STL Files?
When saving STL files, there are a few best practices to keep in mind that can substantially affect the quality of your 3D prints.
- Resolution: Set the number of triangles that make up your model according to how intricate it is; higher resolutions produce smoother surfaces but also bigger files, and for many purposes something between high and medium resolution works just fine.
- Unit of Measurement: Make sure you’re using the same units as your 3D printer software uses when exporting so that everything comes out at the right size.
- Binary vs ASCII: If you want to save space without sacrificing anything else, save in binary instead of ASCII format for STLs.
- Orientation: Properly aligning models within software packages ensures they’ll print as intended and may eliminate or reduce necessary support structures.
- Check for Watertightness: Avoid printing errors caused by non-manifold edges or holes by double-checking that all your meshes are watertight before sending them off.
By following these guidelines, you will be able to create accurate and good-looking three-dimensional models with ease.
Understanding Binary vs ASCII STL Formats
When you are deciding whether to use the binary or ASCII format of the STL for your 3D models, it is vital to consider their pros and cons. While binary STL files are more compact and efficient than ASCII ones, which means they take up less space on disk and can be processed or transferred faster, this achievement also comes with a price. This type of format is known for its performance advantages – especially on complex models that might otherwise produce very large ASCII files. By contrast, although an error occurs in an ASCII file it can still be debugged easily because humans can read them too; however their big sizes may make them impractical for extensive designs with lots of details or small components where many triangles may have to be defined in comparison with binary formats. In conclusion: majority applications will prefer using binary STLs over any other kind due to optimalizing both size (in bytes) as well as processing time required for these kinds of operations.
How to Adjust Tessellation and Deviation Settings
To ensure the quality and efficiency of your 3D prints, it is important that you make changes to the settings of tessellation and deviation. The smoothness or bumpiness in curves of a model is determined by the tesselation which adjusts number of triangles used in a mesh.
- Locate the Settings Panel: In your 3D modeling software, go to export or save as section then find advanced options or anything that concerns tesselation or mesh resolution.
- Set Values for Tessellation: You can set or adjust tesselation by putting the right value on “angle tolerance” or “chord height” as an example. Lesser values add more triangles that result into smoother curves however increases file sizes.
- Change Deviation: Often termed as “maximum deviation” or “distance tolerance”, deviation settings controls how much the mesh surface differs from its original shape. Use smaller numbers to represent details accurately but remember it will generate more complex files.
- Preview and Optimize: Before committing the export, most software offers an option where you can see what these adjustments would look like. Play around with different configurations until you come up with best balance between quality and size.
By following these instructions attentively, one can improve precision and aesthetics in their 3D models without causing unnecessary bloats in terms of file sizes.
Maintaining File Size and Detail Balance
When trying to balance the amount of details and file size in your 3D prints, there are certain tips you should follow. To begin with, employ file formats such as STL, OBJ or glTF which compress well and are compatible. After that, simplify your model by reducing polygon count where possible without losing important details. Decimation or mesh reduction tools supported by most 3D software can be utilized for this purpose. Lastly, use adaptive tessellation and LOD (Level of Detail) optimization features available in some softwares so that only key areas have high level of detail. These techniques will enable you get superior prints that do not occupy too much space.
Frequently Asked Questions (FAQs)
Q: What is the simplest way to create an STL file for 3D printing?
A: The simplest way to create an STL file is to design your 3D model using CAD software that supports STL file export. After designing your model, use the “export as STL” function within the software to generate the STL file suitable for 3D printing.
Q: Which modeling software can export to STL format?
A: Popular modeling software that can export to STL format includes Blender, Tinkercad, FreeCAD, SolidWorks, and Autodesk Fusion 360. These 3D modeling software options provide the necessary tools to design and export 3D printing STL files.
Q: What file types are commonly used for 3D printing?
A: The most common file type used for 3D printing is the STL file (stereolithography). Other file types include OBJ, 3MF, and AMF, but STL remains the standard file type for most 3D printers.
Q: Should I export my STL file in binary or ASCII format?
A: Binary STL files are typically preferred for 3D printing because they are more compact and result in smaller file sizes compared to ASCII format. This can make handling and uploading large files more manageable during the printing process.
Q: How do I ensure my STL file is suitable for 3D printing?
A: To ensure your STL file is suitable for 3d printing, check for and repair any errors such as non-manifold edges, flipped normals, and intersecting triangles. Many 3D modeling software packages have built-in tools to help with these checks.
Q: What is a CAD file, and why is it used in 3D printing?
A: A CAD (Computer-Aided Design) file is a digital file created using CAD software to design complex 3D objects. In 3D printing, CAD files are used to create precise digital models which can then be converted into STL files for the purpose of printing 3D printed parts.
Q: How does the surface of the STL file affect 3D printing?
A: The surface of the STL file is made up of multiple triangles or polygons, known as the “STL mesh.” The quality and precision of this mesh can impact the final 3D printed part, as smoother surfaces generally result in more accurate prints. It is important to ensure the surface mesh is dense enough to capture details but not too dense to create unnecessarily large files.
Q: Why is the size of the STL file important?
A: The size of the STL file can affect both the ease of handling and the printing process. Large STL files can be difficult to upload, manipulate, and process, potentially leading to longer load times and increased chances of errors. Minimizing the size of the file while maintaining detail is important for efficient 3D printing.
Q: How do I convert my CAD model to STL format?
A: To convert your CAD model to STL format, design your model in your preferred CAD program and then locate the “export” or “save as” option. Choose STL as the export file type and adjust any necessary settings related to resolution and units. Finally, save the file, which will now be in STL format ready for 3D printing.


