
The Halloween season is coming up and what’s a better way to get into the spooky mood than by designing your own 3D printed pumpkin? If you are very experienced in using 3D printers or still learning, this book will guide you through from beginning to end. We’ll look at everything you need to know that include where you can download the best pumpkin designs, how to edit and finalize your 3D model, and demonstrating how it can be done step by step during printing. After reading this piece of writing, one will be fully equipped with all the necessary information together with equipment when producing a well-made pumpkin decoration that will awe friends, relatives, or even people who knock at your door for sweets on October 31st. So let’s get started with printing your masterpiece for Halloween!
How to Find the Best 3D Printable Pumpkin Files
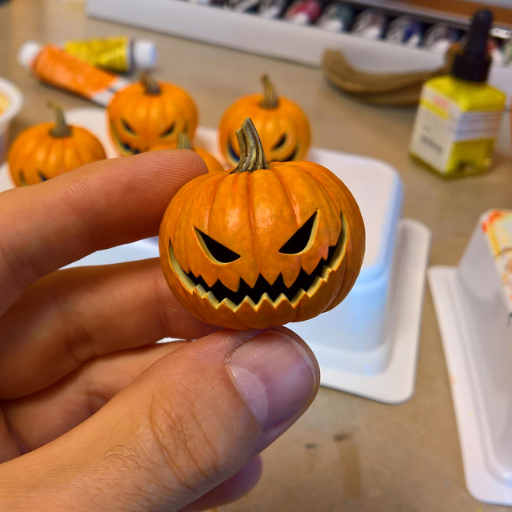
Image source: https://www.myminifactory.com/
It is easier than you would expect finding great 3D printable pumpkin files. Start by checking popular 3D model repositories like Thingiverse, MyMiniFactory, as well as Cults. Various designs submitted by users are available for free downloads or sale on these platforms. Use specific words like “pumpkin”, “jack-o’-lantern” or “Halloween” in the search bar while looking for some designs. User reviews and ratings are helpful in determining file quality and printability before downloading them. Furthermore, some sites such as Tinkercad provide editable pumpkin templates so that you can tailor it to your liking prior to actual printing. By relying on such means therefore, it won’t take long before landing on just the right 3D model suitable for our Halloween Project.
Where to Download Free 3D Print Files Tagged with Keyword Pumpkin
To get free 3D printable pumpkin files, you can check out these excellent resources:
- Thingiverse: This popular platform is famous for its vast user uploaded library of 3D models including many pumpkin designs. Just type “pumpkin” or “jack-o’-lantern” in the search bar to access freely available pages with ratings as well as reviews from other users.
- MyMiniFactory: MyMiniFactory is another great resource that has both professionally designed models and those posted by community members. Look up the words “pumpkin” for a wide range of Halloween-useful free designs.
- Cults: Cults is one such market place where customers can find user friendly 3D printable designs which are either free or can be bought. Search “pumpkin” to easily discover stunningly realistic, free designs that come with downloadable files ready for printing.
These online marketplaces offer numerous free 3D-printable pumpkin files suitable for your Halloween projects.
Top Sites to Explore for 3D Pumpkin Models
Go for the top websites where one can explore various 3D models of pumpkins.
- Thingiverse: It is highly popular and loaded with user uploaded 3D models. By searching “pumpkin” or “jack-o’-lantern,” one can come across a wide range of pumpkin designs on this website, which are mostly free. User ratings and reviews are also provided to you so that you can know the quality as well as printability of each file.
- MyMiniFactory: This is another great place where people will find 3D models that have been curated by professionals alongside contributions from the community. In case you look for a variety of Halloween projects, search for “pumpkin” then there would be several templates that are free of charge to use and this will make sure that your creative needs are met.
- Cults: Cults provides clients with options to choose from; it is an easy-to-use marketplace for purchasing downloadable 3D printable objects. There are good free designs ready to be downloaded and printed by typing in “pumpkin” into their search bar. The platform enables users to filter through multiple models until they get what exactly they want for Halloween decorations.
These sites have all inclusive assortments of freely accessible high quality printable 3D files in pumpkin form just specifically designed to meet your Halloween desires.
How to Ensure File Compatibility with Your 3D Printer
To ensure your 3D printer can work with the files, here are a few things to do:
- Check File Format: The most popular file formats like STL, OBJ and AMF are supported by many printers. These file types are available in the majority of online designs from platforms such as Thingiverse, MyMiniFactory or Cults. Thus, they would be compatible with several people.
- Examine Printer Specifications: This includes information on the 3D printer’s build volume, nozzle size and layer height. It will help you evaluate if the downloaded item is dimensioned and detailed enough for its purpose on your machine.
- Use Slicing Software: 3D software applications like Cura or PrusaSlicer can turn a 3D model into G-code that can be understood by the printer. These programs usually have settings made specifically for each specific type of printer thus making it possible to obtain good printouts.
- See Community Feedback: For example, Thingiverse, MyMiniFactory or Cults have user reviews and ratings. In this case read them so as to find out whether other individuals having similar kind of printers had managed to print it so that you know what could possibly collide during installation.
By doing all this, you will make sure that the pumpkin files you download for printing can be used with your specific 3D printer which guarantees successful and top quality prints being made.
How to Optimize Your 3D Printer for Pumpkin Designs
To improve your pumpkin designs for 3D printing, these are the steps you should take:
- Adjust Printer Settings: Modify your printer’s layup height, speed of work and density of filling. For complicated pumpkin designs, a layup height of 0.1-0.2mm will bring out fine details while using a modest print speed guarantees accuracy.
- Use Quality Filament: Opt for high-grade PLA or PETG filament in autumn shades like orange, yellow or brown. These filaments adhere well to the print bed and produce vibrant results.
- Enable Supports: Support structures are often required for pumpkin designs with overhangs or hollow sections. Enable support generation in your slicing software to prevent sagging and achieve a clean finished product.
- Ensure Bed Adhesion: Proper bed adhesion is crucial to avoid failed prints. If your printer has one, use a heated bed and consider applying glue stick or painter’s tape to enhance first layer adhesion.
- Test Print: Before embarking on full pumpkin design, do a small test print first. This allows you make any necessary changes as well as ensuring optimum quality of printing.
Through these steps, one can upgrade his 3D printer performance and get exquisite and detailed pumpkin designs for Halloween celebrations.
Best 3D Printers for Printing Pumpkin Models
- Ender 3V2: It is pocket-friendly and reliable in performance, making Creality Ender 3 V2 a favorite among hobbyists. Sturdy build, carborundum glass bed for better adherence and a quiet motherboard are the most significant features of this printer. This makes it highly versatile for designs with intricate pumpkin designs.
- Prusa i3 MK3S+: The Prusa i3 MK3S+ is known to have an amazing print quality and ease of use. In addition, its spring steel sheet can be removed easily, it comes with automatic bed leveling capabilities as well as silent stepper drivers. Such features enable the device to offer high precision results continuously throughout its lifespan due to its reliable extruder system and wide temperature range that accommodates multiple filaments including detailed sustainable pumpkin models.
- Original Prusa MINI+: On the other hand, people who would prefer something small yet powerful can choose the Original Prusa MINI+. Among others, it has got a magnetic heatbed together with a replaceable spring steel print sheet; speedy hotend; and user friendly coloured LCD screen thus despite being small in size it still provides high-quality prints that are perfect for complex designs like pumpkins.
These printers are praised for their quality, durability and attributes hence ideal for printing complicated 3D pumpkin models.
Recommended Resin and Filaments for Pumpkin Prints
The ideal resins and filaments for your pumpkin prints can significantly improve the quality and detail of your models. These are some top recommendations from current insights:
- PLA (Polylactic Acid):
- Features: Comes in many colors, is biodegradable and easy to print.
- Best For: It is best suited for beginners as well as complex designs because it has a low printing temperature and almost no warping.
- Brands Example: Hatchbox, Overture, eSUN.
- ABS (Acrylonitrile Butadiene Styrene):
- Properties: It is tough, wear-resistant, and resistant to higher temperatures.
- Best For: It is recommended for experienced users who want strong models with good structural integrity.
- Brands Example: Hatchbox, Polymaker, MG Chemicals.
- PETG (Polyethylene Terephthalate Glycol-Modified):
- Properties: Combines the strength and durability of ABS with the ease of printing PLA.
- Best For: It’s great for functional parts that need flexibility or toughness.
- Brands Example: Prusament, eSUN, AmazonBasics.
- Resin:
- Properties: Very detailed prints with high precision and excellent surface finish
- Best For: Mainly used on SLA/DLP printers especially when making props and intricate components.
- Brands Example: Elegoo, Anycubic, Siraya Tech.
These materials are highly recommended for their ease of use in terms of operation parts that require flexibility or toughness. They are also reliable which makes them perfect choices in order to create such magnificent pumpkin models.
Common Printer Settings for High-Quality Pumpkin Prints
Focus on a few key printer settings to obtain excellent pumpkin printouts. Common recommended settings are listed below:
- Layer Height:
- Recommended Setting: 0.1mm to 0.2mm
- Reason: It gives smooth surfaces and detailed features thus important for the intricate pumpkin designs.
- Printing Speed:
- Recommended Setting: 40mm/s to 60mm/s
- Reason: Slower speeds enable better print quality by reducing potential defects and improving layer adhesion.
- Temperature:
- PLA: Nozzle temperature between 190°C to 220°C, Bed temperature between 50°C to 60°C.
- ABS: Nozzle temperature between 220°C to 250°C, Bed temperature between 80°C to 110° C.
- PETG: Nozzle temperature between 220°C to 250°C, Bed temperature between 70°C to90° C.
- Resin: Follow manufacturer’s recommended curing times and temperatures.
- Reason: By using correct temperatures, we ensure that materials flow properly without warping or layer separation occurring in the printed object.
- Infill Density:
- Recommended Setting: 20% to 40%
- Reasons: It provides enough support while minimizing weight of used material for structural integrity purposes hence striking a balance that is required when creating large volumes that require support columns inside the prints.
- Retraction Settings:
- Recommended Setting: Retraction distance of 1mm to 2mm at a speed of 25mm/s to 40mm/s.
- Reasons : This will help keep stringing and oozing minimal thus yielding cleaner prints.
- Support Structures:
- Recommended Setting: Use Supports for overhangs above45 degrees and intricate features,
- Reason : Prints with complex geometries are ensured stability during printing which make them accurate representations of designed parts on the build platform by use of supports throughout the process till completion of all layers required in their manufacturing processes).
- Bed Adhesion:
- Recommended setting: Apply adhesives like glue stick or hair spray if you do not have a heated bed so as to achieve better bed adhesion.
- Reason: It helps in avoiding print failure and detaching or warping during the process.
By following these settings, you can improve your pumpkin prints so that every detail stands out beautifully.
Tips for Designing Your Own 3D Pumpkin Models
Consider the following tips when designing your own 3D pumpkin models:
- Start with Simple Geometric Shapes: Begin by using basic forms that will serve as a foundation for your pumpkin. This will make it easy to add details later.
- Detail The Surface: Make sure you add textures, ridges and indentations to imitate a real skin of a pumpkin.
- Hollow Out The Inside: This is done in order to save on material and minimize printing time.
- Incorporate A Lid: If you wish to use the pumpkin as a container or lantern, design the upper part as detachable lid.
- Optimize For Printing: Ensure that you have included proper supports and avoided extreme overhangs which will enable smooth printing process
- Test And Iterate: Produce prototypes of this design then refine final model through necessary adjustments based on outcomes.
Through these tips, one can build distinctive and comprehensive 3D models of pumpkins suited for different purposes.
Tools to Design 3D Models of Pumpkins
There are several tools that stand out for their versatility and user-friendly interfaces when designing 3D models of pumpkins.
- Tinkercad: This tool is great for beginners, offering a simple platform that enables one to generate 3D models using basic shapes. Its interface is drag-and-drop making it simple to design, edit and refine your pumpkin models.
- Blender: It offers advanced users a powerful modeling tool as well as detailed texture and shading options which help create realistic pumpkin models. This software contains sculpting tools and modifiers among other features, plus it’s open-source.
- Fusion 360: Fusion 360 is a professional grade tool merging parametric modeling capabilities with advanced design functionality. It supports collaboration and iteration through cloud-based platform which makes it suitable for highly detailed and functional pumpkin models.
These are the tools you need with various functionalities depending on different skills levels and design requirements. Thus, by choosing any of them, you can easily create your own unique ready-to-print 3D pumpkin models.
Step-by-Step Guide to Creating a Custom Pumpkin Shape
- Get Reference Pictures: Start by gathering some reference images for real pumpkins. This helps in capturing the unique shapes and features of pumpkins.
- Sketch Your Design: Before you start with 3D modeling, sketch your pumpkin design. Below is a template to help guide your drawing to scale.
- Choose Your Software: Choose the tool that suits your level of skills. For beginners Tinkercad, intermediate users use Blender and advanced users use Fusion 360.
- Create Base Shape: Commence from scratch or simply build up a basic geometric form such as an ovaled shape or round sphere within your selected program.
- Add Details: You can make grooves in it as well as put on a stem and other specific details that identify it as a pumpkin. In blender you can sculpt using these tools or add modifiers for more realistic textures in fusion 360.
- Refine Model: Keep adjusting shape and adding finer details all along till when you want no more refinement again. Use the edit mode in tinkercad or sculpture mode in blender to change proportion or alter complex detailing.
- Check for Errors: Ensure there are no errors in the mesh or design that could affect 3D printing. Most software has built-in tools to check for and fix common issues.
- Export Model: As soon as you have come up with your custom pumpkin shape which pleases you, export it as an STL or OBJ file suitable for 3D printing purposes.
- Print and Iterate: Print prototypes of your design, then adjust based on them for refining and perfecting of your final pumpkin model.
By following these steps, one can create a unique detailed custom pumpkin shape that serves different purposes.
Best Practices for Adding Details to Your Pumpkin Design
- Use Reference Images: Start gathering some pictures of real pumpkins. This will help you to understand the natural variations and intricate details that make each pumpkin unique. So take a look at things like texture, color, and imperfections so you can add realism to your model.
- Focus on Key Features: Add in noticeable features such as the stem, grooves, and surface textures. In order to give it an organic feel use sculpting tools or even just texture brushes in your 3D software for this part of the process. You’re going to create creases or indentations which will mimic the natural look by doing this – groove detailing.
- Enhance with Realistic Textures: If you want it to look more like a real pumpkin then apply some high-quality texture maps onto your model. Bump maps and normal maps are perfect ways for adding depth and fine details without massively increasing polygon count. It’s all about experimenting with different settings until you find that balance between visual detail and performance which is right for you.
By following these tips not only will you end up with an authentic representation of this popular seasonal vegetable but also something that looks great too.
How to Troubleshoot Common Problems in 3D Printing Pumpkins
- Shift Layers: To see that your pumpkin layers are out of place, look for mechanical problems in the 3D printer such as loose belts or pulleys. Tighten and re-calibrate where necessary.
- Warped Base: Warping may result in a distorted foot on your pumpkin model. Make sure the print bed is levelled and has adequate adhesion. You can also try using a heated bed and applying adhesion aids like glue stick or painter’s tape.
- Stringing: Adjust retraction settings on your printer to minimize stringing between pumpkin details. Unwanted filament drips can be reduced by increasing retraction distance and speed.
- Insufficient Extrusion: Examine why there might be under-extrusion causing rough surfaces on your pumpkin. Nozzle jams or filament feed inconsistency could be responsible for this problem; therefore clean the nozzle and ensure free movement of the filament spool.
- Variable Wall Thickness: Ensure that the desired wall thickness for your pumpkin matches what is set in slicing software options. More uniform results may be achieved by altering layer height as well as wall line count.
You will be able to enhance accuracy alongside quality when printing pumpkins with these common solutions for 3D printers.
Fixing Warping Issues with Pumpkin Prints
The warping of your 3D-printed pumpkin is a common problem that distorts its base. To remedy this, you should make sure that the print bed is level and clean. It would be best if you used a heated bed — just set the bed temperature as per the filament requirements. Bed adhesion can be improved by using adhesion aids like glue stick, painter’s tape or specialized 3D printing adhesive. Also, adding a brim or raft at the bottom of your print will give it more stability and prevent curling up of edges during printing. Lastly, ensure that you keep your printing environment controlled — avoid drafts and sudden temperature changes which may cause further warping.
By following these steps, one can minimize warpings and achieve more accurate and stable pumpkin prints.
Addressing Layer Shifting in Pumpkin Models
Layer shifting is a common obstacle in printing pumpkin models. This makes the prints misaligned or tilted. Below are some brief ways to avoid and fix layer shifting.
- Check Belt Tension: You must see to it that the belts of your printer are tensioned correctly. If they are too loose or too tight, belts might result in layer shifts. Adjust them to the recommended tightness by the manufacturer.
- Secure Mechanical Components: Every screw, pulley, and other mechanical parts should be inspected for any looseness which can cause undesired movement while printing.
- Optimize Print Speed: In slicer settings, lower down print speed. Higher speeds may have problems with inertia leading to layers shifts.
- Inspect Stepper Drivers and Motors: Ensure stepper motors and drivers do not overheat. Provide sufficient cooling or try reducing current settings.
Following these tips will greatly minimize layer shifting as well as create reliable 3D printed pumpkin models.
How to Avoid Stringing in Detailed Pumpkin Prints
Stringing can be a huge problem when printing detailed pumpkin models. Here are some tips that will help you avoid it:
- Retraction Settings: Make sure your retraction distance and speed is set up correctly in the slicer. You can reduce stringing by increasing the retraction distance and speed which helps in pulling the filament back into the nozzle.
- Temperature Optimization: Print at the lowest temperature possible for your filament. Higher temperatures make it easier for filament to ooze out of the nozzle hence causing strings to form.
- Combing Mode: This mode should be enabled within your slicer settings. When activated, it ensures that nozzle remains entirely within print area while moving thereby minimizing travel moves across open spaces which leads to string formation.
- Increase Travel Speeds: Nozzle spends less time over open areas if travel speeds are faster thus reducing chances of getting strings.
- Nozzle Cleaning: Check on regular basis and clean your nozzle so as to remove any filament build-up that may contribute towards causing stringing.
- Filament Selection: Different filaments have different levels of proneness to stringing; therefore try out various brands until you find one with minimal or no issues related to stringing on your specific printer setup.
By following these recommendations, you can achieve neater prints without strings and also improve overall quality of detailed pumpkin models.
Creative Uses for 3D Printed Pumpkins
The creative uses of 3D printed pumpkins do not end with decorativeness. Here are some suggestions:
- Unique Candle Holders: Design pumpkins with hollowed out insides that can be used as candle holders; this will give them a warm glow perfect for Halloween or fall decorations.
- Personalized Presents: Make pumpkins personalized by adding names, dates or specific designs so you can gift them during autumn holidays.
- Educational resources: Create detailed models of different parts of the pumpkin to teach children about art, design, botany and other subjects related to this topic.
- Thematic Containers: Produce containers shaped like jack-o’-lanterns which open up and can be used for storing sweets or small trinkets; alternatively they could also serve as special lunch boxes decorated according to various themes beloved by kids?
- Props for costumes: Print light-weighted props imitating pumpkins which would go well together with stage performances or Halloween disguises.
- Interactive Decorations: Elaborate on the design of decorative elements such as LEDs lights embedded within them triggered by sensors detecting people’s presence around thus making those objects more responsive towards external factors – it creates great atmosphere during festive occasions!
These artistic applications show how versatile and fun 3D printing technology is when applied in creating various forms and shapes of pumpkins which can be utilized differently according to individual needs.
3D Printed Pumpkins as Halloween Decorations
Modernized Halloween decorations are offered by 3D printed pumpkins in various ways than following the traditions. They can be personalized and designed in different ways with infinite creativity possibilities. The pumpkin can be made unique with complex patterns, sizes that fit any space, or even engraved messages using a 3D printer. Here are some popular uses for these types of pumpkins during Halloween:
- Customizable Jack-o’-lanterns: You can give your jack-o’-lantern any face or theme you want it to have making it different from the rest which are usually bought from stores.
- Durable and Reusable Decoration: Being made out of tough materials guarantees that they can last for years without wearing out.
- Environmentally Friendly Options: Unlike real ones that rot away each year creating extra waste; those produced through this method reduce environmental pollution since no replacements need to be done frequently.
- Integrated Lighting: You can easily fix LED lights or any other illumination device into them thereby improving on their spookiness or celebrating atmosphere.
Thus, if you want something special and sustainable for this year’s Halloween celebration try using printed pumpkins instead.
Creating Customizable Pumpkin Gifts for Friends and Family
Using 3D printing technology to create customizable pumpkin gifts for friends and family is an unusual and thoughtful way of honoring the autumn season. Below are some suggestions on how you can make personalized pumpkin presents.
- Names or Messages: Print pumpkins with names of recipients or special messages. This will add sentimentality to it and make it unique.
- Complex Designs And Patterns: Carve intricate designs into your pumpkins using advanced techniques in 3D printing such as multi-color printing or even those that can produce objects within objects which might depict what the person loves most.
- Theme Pumpkin Sets: Create sets of themed pumpkins around things like movies they love animals etcetera so that people can have cohesive displays in their homes based on these categories
- Small Decorative Items: Design smaller pumpkin-themed items like keychains, coasters, ornaments among others which may be used all year round thus giving an everyday object a touch of Halloween spirit
- Pumpkin With Greenery Pots: Making planters for small succulents or herbs by designing them as 3D-printed jack-o’-lanterns combines festivity with a bit more life – literally!
These customisable pumpkin gifts show not only your creativity but also leave behind memories while at the same time being useful for our loved ones.
Innovative Pumpkin Projects for Autumn Celebrations
Autumn parties will be raised through various pumpkin projects which are creative and unique in nature. Here’s a few stellar ideas from some of the most popular online resources:
- Fairy Pumpkin House: A pumpkin can easily be converted into an eccentric fairy house complete with doors, windows, moss decoration as well as tiny accessories like twigs or miniatures creating an enchanted look.
- Pumpkin Ice Bucket: Large hollowed out pumpkins serve as great ice buckets for chilling drinks during gatherings; not only functional but also decorative too!
-
Pumpkin Lanterns: Elegant pumpkin lanterns can be achieved by carving detailed designs or simple shapes then placing tea lights inside them; these illuminated jack-o-lanterns give off a soft warm light which adds ambience to any evening event.
Frequently Asked Questions (FAQs)
Q: How can I download 3D models for 3D printing related to halloween pumpkins?
A: You can find a variety of 3D models for 3D printing related to halloween pumpkins on various websites like Cults. These sites offer designs to download, which can range from scary spider pumpkins to fun and quirky pumpkin characters.
Q: Where is the best place to find top posts about 3D printed halloween pumpkins?
A: A good place where makers often share their top posts about 3D printed halloween pumpkins is on popular 3D printing forums or social media pages dedicated to 3D printing. Check out groups on platforms like Facebook, Reddit, or specialized forums.
Q: How do I scale a downloaded pumpkin 3D model for my printer?
A: Most 3D printing software will allow you to scale your models to fit your printer’s build volume. Simply import the 3D model into your slicer software and use the scale function to adjust the size. If you’re using an FDM printer like Bambu, make sure the pumpkin fits within the x axis and y axis limits.
Q: What type of plastic should I use for printing my halloween pumpkin?
A: PLA is a popular choice for 3D printing halloween decor, including pumpkins. It’s easy to print with and available in a variety of colors. You can choose a traditional orange PLA, or go for something different like green or even glow-in-the-dark plastic for a spooky effect.
Q: How can I ensure the 3D printed pumpkin looks good for my halloween decor?
A: To ensure your 3D printed pumpkin looks great, pay close attention to the print settings. Using a fine layer resolution, adjusting the print speed, and ensuring a good adhesion to the print bed can all contribute to a higher quality print. Adding some finishing touches like sanding, painting, or adding LED lights can also make your pumpkin pop.
Q: Is it possible to print a pumpkin with moving parts like a hinged lid?
A: Yes, it is possible to print a pumpkin with moving parts. Some designers offer 3D models for 3D printing that include hinged lids or other interactive features. Ensure that your printer is capable of handling finer details and moving parts by doing some test prints first.
Q: Where can I find design inspiration or files for halloween pumpkins online?
A: Websites like Cults, Thingiverse, and MyMiniFactory are great resources for finding 3D models for 3D printing. You can browse through various designs to download, ranging from traditional pumpkins to more unique creations like monster-themed pumpkins.
Q: Should I worry about print adhesion when creating large pumpkin models?
A: Yes, print adhesion is crucial, especially for larger models. Make sure your print bed is clean and level. Using a brim or raft can also help with adhesion. It might take a bit of trial and error to find the exact settings that work best for your particular printer and plastic.
Q: What are some of the most popular 3D printing related projects for Halloween?
A: Along with pumpkins, other popular 3D printing projects for Halloween include printing spider decorations, monster faces, and character figurines. These can complement your pumpkin and add a cohesive theme to your halloween decor.
Q: How can I troubleshoot if I’m having trouble with my 3D print?
A: Common issues include poor adhesion, warping, and failed prints. Check that your print bed is level, and the first layer is adhering properly. Adjusting the print speed or temperature settings can also help. If problems persist, consult the support resources available from your printer manufacturer or at places where makers discuss 3D printing, like online forums and social media groups.


