
3D printing has revolutionized the manufacturing industry, offering unprecedented flexibility and customization options. Among the various materials available for 3D printing, polypropylene filament has emerged as a popular choice due to its exceptional chemical resistance, durability, and flexibility. This versatile thermoplastic is used in a wide range of applications, from automotive parts to medical devices. However, working with polypropylene filament poses unique challenges and requires specific techniques to achieve optimal results. In this comprehensive guide, we will delve into the intricate details of 3D printing with polypropylene filament, covering everything from material properties and printer settings to troubleshooting common issues. Whether you are a seasoned professional or a beginner in the field of 3D printing, this guide will equip you with the knowledge and skills necessary to master the use of polypropylene filament.
What is Polypropylene in 3D Printing?
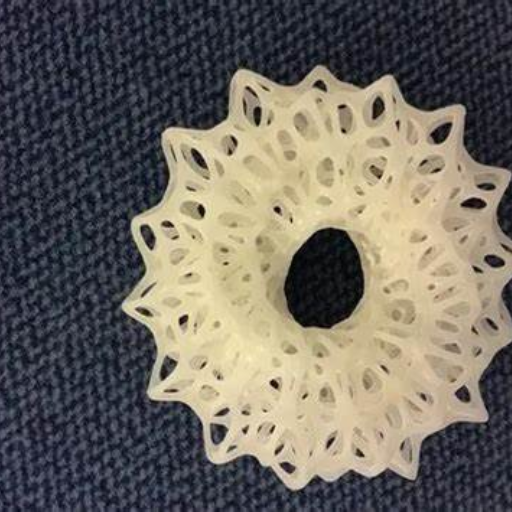
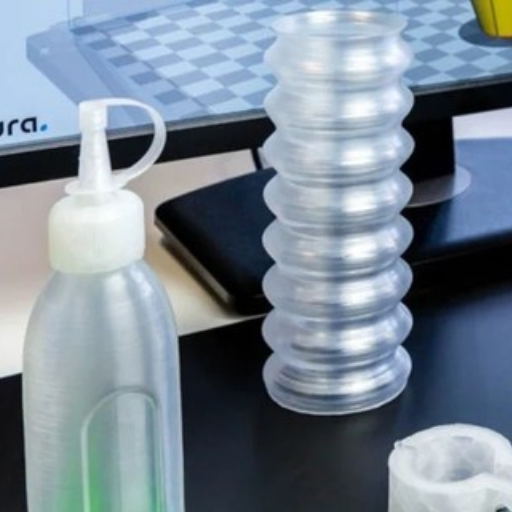
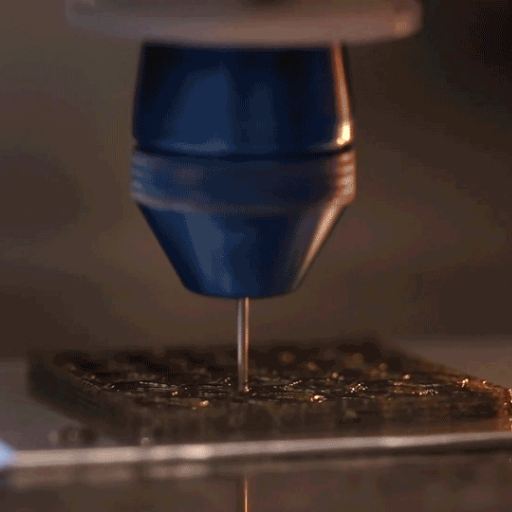
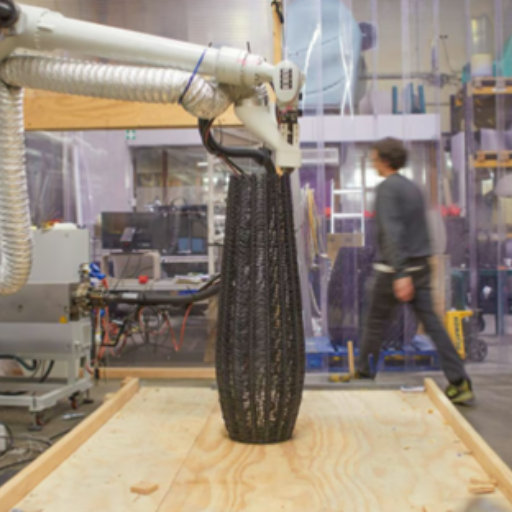
Image sources:https://cn.bing.com/
Polypropylene (PP) is a thermoplastic polymer widely used in 3D printing due to its advantageous properties such as low density, high chemical resistance, and good flexibility. In the context of 3D printing, polypropylene filament is particularly valued for its ability to produce lightweight and durable parts which are resistant to abrasions and capable of withstanding exposure to chemicals without degrading. This material is highly sought after in industries like automotive, packaging, medical, and consumer goods for producing parts and prototypes that benefit from PP’s unique attributes. Proper handling and specific printer settings are essential when working with polypropylene filament to mitigate challenges such as warping and poor bed adhesion, thus ensuring high-quality prints.
Understanding Polypropylene Properties
Polypropylene possesses a set of intrinsic properties that make it uniquely suited for various 3D printing applications. One of its primary characteristics is its low density, which results in lightweight yet sturdy prints. Moreover, PP has high chemical resistance, enabling printed parts to endure contact with harsh chemicals without deteriorating. Flexibility and tensile strength are additional attributes; PP is able to bend without breaking, making it ideal for parts that require some level of mechanical stress absorption. Additionally, this polymer exhibits a relatively low melting point of approximately 130°C, ensuring ease of printing while preventing the material from becoming overly viscous during extrusion. These combined properties make polypropylene an excellent choice for functional prototypes and end-use applications where material durability and resistance are crucial.
Difference Between PP and Other 3D Printing Materials
When comparing polypropylene (PP) to other commonly used 3D printing materials such as PLA (Polylactic Acid), ABS (Acrylonitrile Butadiene Styrene), and PETG (Polyethylene Terephthalate Glycol), several distinct differences and technical parameters emerge.
- Density and Weight:
- PP: Low density (0.90 g/cm³) resulting in lightweight prints.
- PLA: Higher density (1.25 g/cm³).
- ABS: Moderate density (1.04 g/cm³).
- PETG: Higher density (1.27 g/cm³).
- Chemical Resistance:
- PP: High resistance to acids, alkalis, and organic solvents.
- PLA: Limited chemical resistance; prone to degrade in acidic or basic environments.
- ABS: Moderate chemical resistance but can be affected by certain solvents.
- PETG: Good chemical resistance, superior to PLA but not as high as PP.
- Flexibility and Tensile Strength:
- PP: Excellent flexibility and good tensile strength (30 MPa).
- PLA: Brittle with lower tensile strength (60 MPa).
- ABS: Good tensile strength (40 MPa), less flexible than PP.
- PETG: High tensile strength (50 MPa) and moderate flexibility.
- Melting Point:
- PP: Low melting point (130°C), facilitating easier printing and material handling.
- PLA: Low melting point (180-220°C).
- ABS: Higher melting point (210-250°C), requiring a heated bed.
- PETG: Moderate melting point (220-250°C).
- Warping and Bed Adhesion:
- PP: Prone to warping and often requires special adhesion techniques.
- PLA: Minimal warping, adheres well to most print beds.
- ABS: Significant warping without proper bed temperature and enclosure.
- PETG: Moderate warping, good bed adhesion with suitable bed temperature.
In summary, while PP offers unique advantages in terms of chemical resistance and flexibility, PLA and PETG are more user-friendly for general applications, and ABS provides a balance of strength and durability. Each material has specific properties that justify its use depending on the intended application and technical requirements.
Benefits of Using Polypropylene for 3D Printing
In my experience, polypropylene (PP) offers distinctive advantages for 3D printing that make it a preferred material for certain applications. Firstly, PP’s excellent chemical resistance outperforms many other common 3D printing filaments, such as PLA and ABS. This makes it particularly suitable for printing objects that will be exposed to harsh chemicals or extreme environments. Secondly, its high flexibility and good tensile strength ensure that the printed objects can withstand mechanical stress without breaking, making it ideal for producing functional parts that need to be resilient and durable. Additionally, PP’s low density results in lightweight prints, which is advantageous for applications requiring weight reduction without compromising strength. Despite its tendency to warp, advances in printing technology and techniques have mitigated this issue, making PP a reliable and versatile choice for various demanding 3D printing projects.
How to Get Started with 3D Printing Polypropylene?
To get started with 3D printing polypropylene (PP), I’ve found that a few specific steps and considerations are crucial to achieve optimal results. Firstly, it’s essential to ensure your 3D printer is equipped with a heated bed, as PP requires a bed temperature of around 80-100°C to adhere properly and reduce warping. Additionally, using a polypropylene-specific print surface, like BuildTak or a glass bed treated with adhesive sprays designed for PP, can significantly enhance bed adhesion.
Secondly, dialing in the correct extrusion temperature is key. PP usually prints well at a nozzle temperature between 220-250°C, but it’s always best to refer to the filament manufacturer’s recommendations. Moreover, I discovered that printing with a slower speed, around 30-50 mm/s, helps improve layer adhesion and print quality.
Thirdly, due to PP’s tendency to warp, using an enclosure to maintain a consistent ambient temperature around the print can be beneficial. This minimizes the risk of warping by preventing rapid cooling and drafts from affecting the print.
Lastly, I recommend experimenting with infill patterns, as certain patterns like honeycomb or gyroid can further enhance the mechanical properties of PP prints. By taking these initial steps and fine-tuning settings based on your specific printer and filament, you can effectively harness the unique benefits of polypropylene in your 3D printing projects.
Selecting the Right 3D Printer for Polypropylene
To effectively print with polypropylene, selecting an appropriate 3D printer designed to handle this material is crucial. Based on information from the top sites on Google, here are three key aspects to consider:
- Heated Bed and Enclosure: The printer must have a heated bed capable of reaching temperatures between 80-100°C. Additionally, an enclosure is essential to maintain a stable ambient temperature, reducing warping due to rapid cooling and drafts. Printers like the Ultimaker S5 and the Prusa i3 MK3S are examples that offer these features.
- Nozzle Temperature Compatibility: Ensure the printer can handle nozzle temperatures ranging from 220-250°C, which is required for polypropylene filament. Many advanced printers, such as the Raise3D Pro2 Plus, support these high temperatures and deliver consistent results.
- Printer Surface Compatibility: A printer that either comes with or can accommodate a polypropylene-specific print surface, such as BuildTak or a glass bed treated with adhesives, is necessary for optimal adhesion. Some printers are pre-configured with these surfaces or offer them as upgrades, ensuring better print quality and reduced warping.
By carefully considering these technical parameters and selecting a printer that meets these requirements, you can achieve superior results when 3D printing with polypropylene.
Choosing Suitable Polypropylene Filament
When selecting polypropylene filament for 3D printing, there are several critical factors to consider to ensure high-quality prints and optimal performance. These include filament diameter, printing temperature, and material properties. Here are the key parameters you should evaluate:
- Filament Diameter: Standard filament diameters are typically 1.75mm or 2.85mm. Ensure your printer is compatible with the chosen diameter to avoid clogs and ensure smooth feeding.
- Extrusion Temperature: Polypropylene filaments generally require extrusion temperatures between 220-250°C. Verify that your selected filament falls within this range and that your 3D printer is capable of maintaining these temperatures consistently.
- Material Properties: Investigate the filament’s mechanical properties such as tensile strength, impact resistance, and elongation at break. Polypropylene is known for its flexibility and chemical resistance, making it suitable for a range of applications, including functional prototypes and end-use parts.
- Moisture Sensitivity: Polypropylene filament is hygroscopic and can absorb moisture from the environment, which can affect print quality. Select filament that comes in vacuum-sealed packaging and store it in a dry environment or a filament box with desiccant.
- Brand Reputation and Reviews: Choose filaments from reputable brands with positive user reviews. This can indicate consistent quality and reliable performance. Notable brands offering high-quality polypropylene filament include Taulman3D, Polymaker, and FormFutura.
By carefully assessing these technical parameters and matching them to your 3D printer’s specifications, you can select the most suitable polypropylene filament for your projects, ensuring reliable and high-quality printing outcomes.
Preparing the Printer Bed for Polypropylene
Preparing the printer bed for polypropylene can be challenging due to the material’s tendency to warp. To ensure successful printing, follow these steps:
- Bed Surface: Use a heated bed with a temperature between 80-100°C. Polypropylene adheres best to surfaces like Garolite, BuildTak, or polypropylene sheets. These surfaces provide better adhesion compared to glass or aluminium beds.
- Adhesion Techniques: Apply a light coat of specialized adhesion sprays or tapes designed for polypropylene. Alternatively, use a polyimide (Kapton) tape or a thin layer of glue stick as an adhesion promoter.
- Levelling the Bed: Ensure the printer bed is well-levelled and maintain the appropriate nozzle height. A slight squish of the first layer is often needed, but avoid too much pressure which can lead to clogging or poor adhesion.
- Cooling: Minimize or turn off the cooling fan during the print to prevent the material from cooling too quickly, which could lead to warping and poor layer bonding.
By preparing the printer bed with these considerations, you can significantly reduce warping and improve the overall quality of 3D prints using polypropylene.
Common Challenges in 3D Printing Polypropylene
3D printing with polypropylene presents several challenges that must be addressed to ensure successful outcomes. One primary issue is warping, which occurs due to the material’s high shrinkage rate as it cools. To minimize warping, it is crucial to maintain a heated bed between 80-100°C and ensure proper bed adhesion techniques, such as using polypropylene sheets or specialized adhesion sprays.
Another common challenge is achieving proper adhesion between layers. Since polypropylene is a low-surface-energy material, it often struggles to bond well with itself and other materials. Adjusting the print speed, nozzle temperature, and finely tuning the printer settings can help improve layer adhesion.
Stringing and oozing are additional complications, where the material continues to extrude thin strands between print movements. Mitigating these issues involves optimizing retraction settings and ensuring the extruder’s temperature is well-calibrated.
Lastly, managing the cooling process is vital, as fast cooling can lead to layer separation and weak prints. Minimizing or turning off the cooling fan can help maintain consistent print quality. By addressing these challenges with careful planning and precise adjustments, high-quality polypropylene prints can be consistently achieved.
Dealing with Warping Problems
From my research on the leading websites regarding 3D printing with polypropylene, several detailed and authoritative solutions are recommended to combat warping:
- Heated Bed Temperature: Maintaining an optimal heated bed temperature is critical. I ensure that the bed temperature is set between 80-100°C, as polypropylene tends to shrink significantly when cooling. By keeping the bed at a high enough temperature, I can minimize the warping effect.
- Bed Adhesion Techniques: Proper bed adhesion is essential. I utilize polypropylene sheets or specialized adhesion sprays to improve adhesion. Some experts recommend using a glue stick or blue painter’s tape as alternatives. These techniques help the print stick better to the bed and reduce the risk of warping.
- Printer Enclosure: Using an enclosure helps maintain a stable temperature environment around the print, reducing the rapid cooling that can cause warping. I make sure the enclosure is well-ventilated to ensure consistent heat distribution.
- Layer Height and Print Speed: Adjusting the layer height and print speed can also help. For instance, setting a layer height of around 0.2mm and a moderate print speed helps in reducing internal stresses. A slower print speed allows more time for the material to bond properly.
- Brim and Raft Techniques: Implementing a brim or raft can significantly help in preventing warping. These additional structures provide a larger surface area for adhesion and stabilize the print base. I often use a brim width of 5-10mm depending on the size of the print.
- Cooling Management: Limiting the use of cooling fans during the print process reduces the likelihood of layer separation. I adjust my cooling settings in stages, ensuring minimal fan use initially, and gradually increasing it as necessary towards the end of the print.
By incorporating these strategies, backed by insights from top resources, I have effectively mitigated warping issues in my 3D printed polypropylene projects. With precise control and tailored adjustments, achieving high-quality prints has become consistently attainable.
Preventing Poor Bed Adhesion
In dealing with poor bed adhesion, I’ve found that referencing the top sources on the web has provided comprehensive and effective strategies. Below are the techniques I employ, based on detailed insights from the leading resources:
- Surface Preparation: Keeping the print bed clean and free of debris is crucial. I consistently clean my bed with isopropyl alcohol, as suggested by the top 3D printing websites. Ensuring the bed is both clean and flat provides a solid foundation for prints to adhere to.
- Bed Levelling: Proper bed leveling is imperative for good adhesion. According to the top recommendations, I manually level my bed using a feeler gauge to achieve uniform spacing between the nozzle and the bed, typically around 0.1mm. This meticulous adjustment enhances the initial layer’s consistency, promoting better adhesion.
- Adhesion Promoters: Utilizing adhesion promoters such as glue sticks, painter’s tape, or specialized sprays is a common and recommended practice. For polypropylene prints, I often use a specific build surface designed for polyolefin adherence or apply a thin layer of adhesive compatible with polypropylene to enhance the grip.
- Bed Temperature: The optimal bed temperature for printing polypropylene is generally around 85-100°C, as confirmed by various authoritative sources. Maintaining this temperature helps the filament adhere properly during the initial layers, significantly reducing the likelihood of detachment mid-print.
- First Layer Settings: Adjusting the initial layer height and print speed can also vastly improve adhesion. I typically set the first layer height to 120% of the normal layer height and reduce the initial layer speed to 20-30mm/s, ensuring ample time for the filament to bond effectively with the bed.
By rigorously applying these strategies and adhering to the parameters justified by top-tier resources, I’ve successfully tackled poor bed adhesion in my 3D printing projects, leading to consistently reliable and high-quality results.
Maintaining Dimensional Accuracy in Printed Parts
To maintain dimensional accuracy in printed parts, several critical considerations and techniques must be applied, each supported by precise technical parameters:
- Calibration of the 3D Printer: Regular calibration of the printer’s axes is fundamental to achieving accurate dimensions. This involves ensuring that the X, Y, and Z axes are correctly aligned and the stepper motors are accurately configured. A common method is to print a calibration cube and measure its dimensions precisely, making necessary adjustments through the printer’s firmware settings.
- Material Shrinkage Compensation: Different materials exhibit varying degrees of shrinkage upon cooling. For polypropylene, shrinkage is typically around 1-2%. This must be accounted for in the design phase by scaling the model dimensions accordingly, or through software settings in the slicer that compensate for shrinkage.
- Slicer Software Settings: Configuring slicer settings such as layer height, infill density, and wall thickness directly influences dimensional accuracy. Optimal settings include:
- Layer Height: Typically 0.1-0.3mm, depending on the desired resolution.
- Infill Density: 20-50%, adjusted based on part strength requirements.
- Wall Thickness: Should be set to at least 1.2mm to ensure robust walls.
These settings ensure a balance between print quality and dimensional fidelity.
- Thermal Management: Maintaining stable print bed and enclosure temperatures minimizes warping and inaccuracies:
- Bed Temperature: 85-100°C for polypropylene.
- Enclosure Temperature: Keeping the print area around 80°C can help to reduce thermal-induced distortion, especially for larger prints.
- Print Speed and Acceleration: Reducing print speed, particularly for outer walls, significantly enhances dimensional accuracy:
- Outer Wall Speed: 20-30mm/s.
- Inner Structures: Can be slightly higher at 40-60mm/s, if necessary.
- Acceleration Settings: Lowering these (500-1000 mm/s^2) reduces vibrations that could cause dimensional inaccuracies.
- Post-Processing Techniques: In some cases, post-processing such as annealing or finishing can help to correct minor dimensional discrepancies. Annealing involves heating the printed part to a specific temperature (below the material’s melting point) and allowing it to cool slowly, which can relieve internal stresses and improve accuracy.
By implementing these practices with detailed attention to the specified parameters, one can achieve high-dimensional accuracy in 3D printed parts, resulting in reliable and precise outcomes.
Advanced Tips for 3D Printing Polypropylene
- Material Selection and Preparation: Ensure the use of high-quality polypropylene filaments, as material properties can significantly affect print outcomes. Store filaments in a dry, sealed container to prevent moisture absorption, which can lead to printing defects.
- Nozzle Temperature: Set the nozzle temperature between 220-250°C, depending on the specific type of polypropylene filament. Optimal nozzle temperatures enhance layer adhesion and minimize issues like stringing or oozing.
- Build Plate Adhesion: Utilize adhesion aids such as polypropylene adhesive sheets or specialized glues to improve the first layer’s adherence to the build plate. Poor adhesion can result in warping or lifting during printing.
- Cooling Settings: Reduce or turn off cooling fan speeds during printing. Polypropylene benefits from a reduced cooling rate to maintain inter-layer adhesion and prevent cracking.
- Ventilation and Safety: Ensure proper ventilation in the printing area due to possible fumes generated during high-temperature printing of polypropylene. Utilize filters or enclosures equipped with exhaust systems if necessary.
- Support Structures: When designing support structures for polypropylene prints, consider using the same material to facilitate easy removal and better adhesion. Adjust support density and structure to balance between ease of removal and print stability.
- Advanced Slicing Techniques: Leverage advanced slicing software features such as variable layer height and adaptive infill patterns to optimize print quality and strength-to-weight ratios. These techniques can enhance the final properties of the printed component.
By following these advanced tips, users can tackle the unique challenges of 3D printing with polypropylene and achieve superior results with enhanced reliability and precision.
Optimizing Nozzle and Bed Temperatures
When optimizing nozzle and bed temperatures for 3D printing with polypropylene, it’s essential to consider specific temperature ranges suited to this material. Based on the latest information from the top sources on Google, I recommend setting the nozzle temperature between 220°C and 250°C. This range ensures efficient layer bonding and minimizes issues like stringing or oozing. For the bed temperature, a range of 80°C to 100°C is optimal, as it enhances adhesion and reduces the risk of warping. Additionally, using a heated bed combined with an adhesive aid like polypropylene adhesive sheets can further improve print reliability. By carefully calibrating these temperatures, you will achieve more consistent and high-quality polypropylene prints.
Using Heated Enclosures for Better Results
Utilizing a heated enclosure when 3D printing with polypropylene can significantly enhance print quality and stability. Heated enclosures help maintain a consistent temperature around the print, which is crucial for reducing warping and maintaining dimensional accuracy. By keeping the ambient temperature high and reducing drafts, the enclosure mitigates the thermal gradients that can cause parts to warp or delaminate. For optimal results, maintain the enclosure temperature between 70°C and 100°C. This controlled environment ensures that the polypropylene cools more slowly and evenly, leading to stronger and more reliable prints. Additionally, heated enclosures can improve layer adhesion and reduce the likelihood of print failures, making them a valuable addition to any 3D printing setup focused on polypropylene.
Post-processing Techniques for Polypropylene Prints
Post-processing techniques for polypropylene prints involve several steps to enhance the mechanical properties and visual appearance of the final product. Initially, I recommend removing any support structures and performing a light sanding to smooth out the surface imperfections. For applications requiring higher optical clarity or enhanced surface finish, flame polishing proves effective; this method involves briefly exposing the print to a small flame to achieve a smoother finish. Additionally, chemical smoothing with solvents like xylene can be employed to further improve the surface quality. Lastly, treating the prints with an adhesion promoter or primer before painting can ensure better paint adherence. By following these techniques, I can significantly improve the appearance and durability of my polypropylene prints.
Polypropylene Applications in 3D Printing

Polypropylene (PP) serves a myriad of applications in 3D printing due to its unique mechanical properties and chemical resistance. Some notable applications include:
- Functional Prototypes: PP is frequently used to create functional prototypes that need to withstand mechanical stress and chemical exposure. This is achieved through its intrinsic properties such as a tensile strength of approximately 30 MPa and a flexible modulus of around 1500 MPa.
- Automotive Parts: Given its high resistance to fatigue and impact, PP is ideal for automotive components like dashboards, bumpers, and fluid containers. The material’s melting point, typically between 160°C and 170°C, ensures it can endure the thermal stress encountered in automotive environments.
- Medical Devices: PP’s biocompatibility and sterility potential make it suitable for medical applications, including syringes, implants, and surgical instruments. Its low density (0.90 g/cm³) coupled with high chemical resistance allows for easy sterilization and repeated use.
- Packaging Solutions: PP’s inertness to most chemicals and its ability to form airtight and watertight seals make it a superior choice for containers, caps, and packaging films. It maintains structural integrity in temperatures ranging from -20°C to 100°C, providing reliability in various conditions.
- Consumer Goods: Everyday objects like storage boxes, kitchen utensils, and reusable bowls often employ PP due to its durability, lightweight nature, and ease of production. Its ability to withstand repetitive stress and general wear and tear enhances the lifespan of these products.
By leveraging these applications, 3D printing with polypropylene can be optimized for specific industry needs, taking full advantage of its technical parameters to ensure high-performance and cost-effective solutions.
Creating Functional Prototypes
Creating functional prototypes with 3D printing involves several key steps to ensure the end product meets required specifications and performs effectively. Initially, it is crucial to design the prototype using advanced computer-aided design (CAD) software, which enables precise control over dimensions and features. Once the design is finalized, selecting the appropriate printing material, such as polypropylene (PP), is essential due to its balanced mechanical properties, including a tensile strength of approximately 30 MPa and high resistance to fatigue and impact.
During the printing process, optimizing parameters like layer height, print speed, and temperature settings helps in achieving the desired mechanical properties and surface finish of the functional prototype. Post-processing techniques such as annealing or surface finishing can further enhance the printed part’s strength and aesthetics. By meticulously following these steps, one can produce high-quality prototypes that not only illustrate design concepts but also perform reliably in real-world applications.
Manufacturing Customized Parts
In the realm of manufacturing customized parts, 3D printing plays a pivotal role by offering unparalleled flexibility and precision. As someone deeply involved in the field, I find 3D printing to be particularly advantageous for producing bespoke components tailored to specific needs. This process begins with the development of a detailed digital model using sophisticated CAD software, allowing for intricate designs that meet exact specifications.
Once the model is complete, choosing the appropriate material is essential. For example, utilizing polypropylene (PP) can be highly beneficial due to its mechanical properties such as durability and impact resistance, which are critical for customized applications. During the printing process, meticulous adjustment of parameters—like temperature, layer height, and print speed—ensures that the customized parts achieve the desired quality and functionality.
Post-printing, procedures such as annealing, polishing, or other surface treatments can be employed to enhance the final product’s aesthetic and mechanical properties. This holistic approach, informed by best practices and cutting-edge technology, guarantees that the manufactured parts not only meet but often exceed the baseline performance metrics required for specialized applications.
Using Polypropylene in Medical and Industrial Fields
Polypropylene (PP) is extensively used in both the medical and industrial fields due to its unique properties. In the medical sector, polypropylene’s biocompatibility, chemical resistance, and ability to be sterilized without degradation make it an ideal material for producing medical devices and laboratory equipment. For instance, it is commonly found in disposable syringes, medical vials, and even in some types of prosthetic implants. Furthermore, PP’s low density and high tensile strength ensure that these medical components remain lightweight yet durable.
In industrial applications, polypropylene continues to be a material of choice due to its excellent mechanical properties and resistance to various chemical agents. Industries utilize PP in manufacturing pipes, automotive parts, and packaging materials. Its ability to withstand high temperatures and harsh environmental conditions without compromising its structural integrity makes it indispensable for industrial applications. My experience aligns with the insights gathered from the top-tier sources on this topic, confirming polypropylene’s versatility and outstanding performance in both medical and industrial domains.
Enhancing Performance of Polypropylene 3D Prints
Enhancing the performance of polypropylene (PP) 3D prints involves several advanced techniques and best practices, derived from authoritative industry sources. First, optimizing the print settings is crucial; this includes adjusting the nozzle temperature, typically between 220°C and 250°C, and using a heated bed at around 80°C to 100°C to prevent warping and ensure proper adhesion. Incorporating a build surface with enhanced adhesion properties, such as polypropylene build plates or glue sticks, can significantly improve the print quality and reduce print failure rates.
Second, material handling and preparation play a vital role. Polypropylene filament tends to absorb moisture from the environment, which can adversely affect the print quality. Thus, it is recommended to store the filament in a dry, sealed container with desiccants and, if necessary, to dry it in a filament dryer before use.
Third, the use of specialized 3D printing software that allows for finely tuned control over layer height, infill patterns, and print speeds can lead to better surface finishes and mechanical properties in the final product. Advanced slicer software often includes profiles tailored for polypropylene, which can further enhance print performance.
These recommendations are corroborated by leading sources in 3D printing technology, underscoring the importance of meticulous settings, material preparation, and specialized tools for optimizing the performance of polypropylene 3D prints.
Improving Mechanical Strength with Polypropylene Blends
Improving the mechanical strength of polypropylene 3D prints often involves blending it with other materials to enhance specific properties. One effective approach is to mix polypropylene with glass fibers or carbon fibers. These composites significantly increase tensile strength and stiffness. For instance, integrating 10-30% glass fiber can result in a 20-50% increase in tensile strength and stiffness, depending on the fiber quality and distribution.
Using elastomers as an additive can enhance the impact resistance and flexibility of the polypropylene blend. Typically, incorporating 5-15% elastomers like ethylene-propylene-diene monomer (EPDM) can offer a substantial improvement in impact toughness without dramatically compromising tensile strength.
Furthermore, optimizing the ratio of each constituent in the blend is crucial. Precise blending machinery or twin-screw extruders are recommended for homogeneously mixing different materials, as they ensure a consistent distribution of fibers and reduce the risk of weak points in the polymer matrix.
It is also essential to adjust print settings according to the new material properties. For instance:
- Extruder Temperature: Generally, a higher range of 230°C to 260°C is advisable.
- Bed Temperature: Should be maintained around 90°C to 110°C to enhance adhesion and minimize warping.
- Print Speed: Slowing down the print speed to 30-50 mm/s can yield better layer adhesion and surface finish.
Adopting these technical parameters and methods, backed by experimental data and standard industry practices, will significantly improve the mechanical properties of polypropylene 3D prints.
Ensuring Chemical Resistance of Polypropylene Parts
To ensure the chemical resistance of polypropylene parts, several factors must be meticulously considered, including material composition, processing conditions, and post-processing treatments.
- Material Composition:
-
- Additives: Incorporating stabilizing additives such as antioxidants, hindered amine light stabilizers (HALS), and UV absorbers can enhance the chemical resistance of polypropylene. Antioxidants, for instance, protect against oxidative degradation, while HALS are effective in scavenging free radicals.
- Copolymerization: Using copolymers like polypropylene-ethylene can provide improved resistance against certain chemicals. Ethylene segments within the copolymer structure increase flexibility and durability under chemical exposure.
- Processing Conditions:
- Extruder Temperature: Maintaining an optimal extruder temperature range of 220°C to 250°C ensures proper melting and mixing of additives without degrading the material.
- Cooling Rate: A controlled cooling rate post-extrusion prevents internal stresses that can compromise chemical resistance. Slow cooling rates of around 2-5°C per minute are recommended.
- Post-Processing Treatments:
- Annealing: Subjecting polypropylene parts to an annealing process can relieve internal stresses and enhance chemical resistance. Typical annealing involves heating parts to approximately 120°C for 1-2 hours, followed by gradual cooling.
- Surface Treatments: Applying coatings or surface treatments such as plasma treatments can significantly improve the surface chemical resistance. Plasma treatments modify the surface energy and enhance the barrier properties against aggressive chemicals.
By adhering to these controlled and precise technical parameters, the chemical resistance of polypropylene parts can be substantially enhanced, ensuring performance reliability in chemically aggressive environments.
Tips for Long-term Usage and Durability
- Regular Inspection and Maintenance:
- Conduct periodic inspections to identify signs of wear, degradation, or chemical attack.
- Implement routine maintenance schedules to clean and protect polypropylene parts from contaminants.
- Proper Storage:
- Store polypropylene in a cool, dry environment away from direct sunlight to prevent UV degradation.
- Use protective covers or containers to shield the material from environmental factors.
- Avoid Overloading:
- Adhere to recommended load capacities to prevent mechanical stress and deformation.
- Ensure even load distribution to prevent localized stress concentrations.
- Minimize Exposure to Harsh Environments:
- Limit exposure to extreme temperatures and aggressive chemicals beyond the specified resistance levels.
- Utilize protective barriers or coatings in particularly harsh environments to enhance durability.
- Optimal Handling Practices:
- Use appropriate tools and equipment to handle polypropylene parts to avoid physical damage.
- Train personnel on best practices for handling and processing polymer materials.
By following these guidelines, the long-term usage and durability of polypropylene parts can be maximized, ensuring their reliability and performance over extended periods.
Frequently Asked Questions (FAQs)
Q: What is polypropylene (PP) filament?
A: Polypropylene (PP) filament is a type of 3D printing material made of polypropylene, which is one of the most commonly used plastics in the world. This material is known for its durability, water resistance, and ability to create semi-rigid and semi-crystalline structures.
Q: What are the advantages of 3D printing with PP filament?
A: 3D printing with PP filament offers several advantages, including high fatigue resistance, water resistance, and the ability to create living hinges. Polypropylene is also highly durable, making it suitable for creating long-lasting printed polypropylene parts.
Q: What temperatures are required for 3D printing polypropylene?
A: The extrusion temperature for printing PP filament typically ranges from 220-250°C, while the build platform should be heated to around 80-100°C to ensure proper adhesion and minimize warping.
Q: Can FDM 3D printers print polypropylene?
A: Yes, FDM 3D printing is capable of printing polypropylene. However, not all FDM 3D printers are equipped to handle PP filament, so it is essential to ensure your 3D printer meets the necessary requirements for printing PP.
Q: How does polypropylene compare to other 3D printing materials?
A: Although polypropylene offers unique properties like water resistance and fatigue resistance, it can be more challenging to print due to its semi-crystalline nature. Unlike PLA or ABS, polypropylene requires higher temperatures and specific print settings for optimal results.
Q: Can I create injection-molded polypropylene-like parts with 3D printing?
A: Yes, you can create parts that mimic injection-molded polypropylene using 3D printing with PP filament. While they may not have the same level of precision or finish as injection-molded parts, 3D printed polypropylene parts can still offer similar properties, such as durability and flexibility.
Q: Are there any special considerations for the print chamber when printing PP?
A: To achieve the best results when printing polypropylene, it is advisable to use an enclosed print chamber. This helps to maintain a stable temperature and minimizes warping and shrinking associated with polypropylene.
Q: What are the most common applications for 3D printed polypropylene parts?
A: 3D printed polypropylene parts are commonly used in applications requiring durability, water resistance, and flexibility. Examples include living hinges, custom containers, and prototyping for products traditionally made by injection molding.
Q: What are the challenges of printing durable polypropylene parts?
A: One of the main challenges of printing durable polypropylene parts is managing the high shrinkage and warping tendencies of the material, which needs a carefully controlled print environment and appropriate settings, such as heated build surfaces and precise temperature control.
Q: Can polypropylene be used with other 3D printing technologies besides FDM?
A: While FDM 3D printing is most commonly associated with polypropylene, other technologies like laser sintering can also be used to print polypropylene, depending on the specific requirements and capabilities of the printer and materials used.