
What is Conductive Filament and How Does It Work?
Introduction to Conductive Filament
Understanding the Basics of 3D Print Materials and Methods
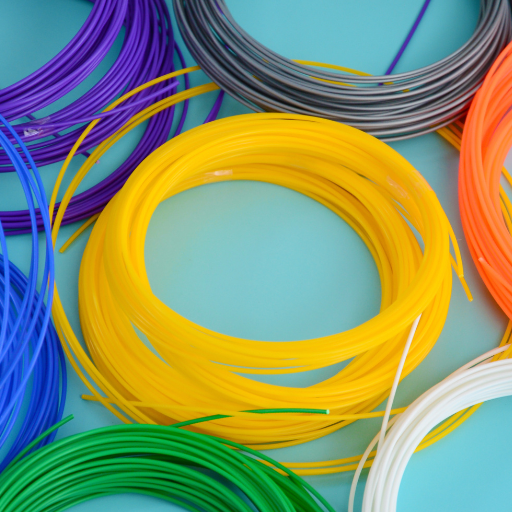
A variety of 3D printing materials are available, each with its own characteristics and printing methods for various tasks. Some examples of common materials used in FDM printers include thermoplastics like PLA (Polylactic Acid) and ABS (Acrylonitrile Butadiene Styrene). While PLA is loved for its user friendliness as well as biodegradability, ABS comes out on top because it is incredibly strong and can handle high temperatures without breaking down. Other important materials, are PETG (Polyethylene Terephthalate Glycol) which combines PLA’s ease of use with the durability and flexibility of ABS, and Nylon which has become famous for its resilience against pressure.
On the other hand, Stereolithography (SLA) machines use UV light to cure resin-based materials. These resins provide higher resolution and smoother surfaces that make them appropriate for intricate prototypes and models as per Formlabs. Similarly, there are specialty resins that can be used with SLA machines such as flexible ones or those able to withstand high temperatures.
Materials like nylon powder are employed in powder-based techniques such as Selective Laser Sintering (SLS), where they are selectively fused by a laser into solid shapes; this results in structures that consist of tiny particles evenly distributed within a matrix. A good example of this method is SLS which allows you to have very complicated structures without any supporting material; thus making it ideal for functional parts & prototypes.
Finally, the best results from each three types – FDM, SLA & SLS necessitate fine adjustments as well as printer settings tuning. The preferred layer thicknesses, print speeds and temperature levels should be optimized depending on the material being used together with the desired product quality. This helps users unlock the true potential of 3D printing by understanding what each material can do while appreciating the different techniques to employ for making functional and innovative objects.
Applications for Conductive 3D Printing Filament
Which 3D Printers Can Use Conductive PLA Filament?
Compatibility of Conductive Filaments with Popular 3D Printers
Setting Up Your 3D Printer for Conductive Filament
Optimizing Print Settings for Conductive PLA
How to Print Flexible and Electrically Conductive Parts?
Best Practices for Printing Flexible Circuits
Adjusting Print Speed for Conductive Filament
Ensuring Good Adhesion and Surface Finish
To make sure that the conductive filament adheres well and produces a high-quality surface after printing, you should start by adequately preparing the print bed. Make sure that dust or residues are cleaned from the bed’s surface and apply an appropriate adhesion promoter like blue painter’s tape, PEI sheet or glue stick. Preheat the bed to within a temperature range of 50°C to 60°C advisedly, ensuring its level with regards to which calibration tool you use or doing it manually adjusting leveling screws.
Next, consider the first layer as it determines how much bonding occurs in between layers. Increase the initial layer height slightly more than usual and slow down the first layer print speed so as to increase adhesion. Adjust your extrusion multiplier if necessary for strong and homogeneous initial layers.
For a fine surface finish, retract settings should be managed so that stringing is minimized as is oozing during retraction. The flow rate may also be fine-tuned to avoid over or under-extrusion which could impact on uniformity of layers. Moreover, employ cooling fan for fast solidification of layers thereby preventing warping and enhancing overall surface quality.
Lastly, test prints should be done while making careful adjustments along each step based on outcome achieved before changing another parameter. By meticulously aligning these variables, you will be able to achieve consistent bonding and superior finishes in your electrically conductive filament work.
What are the Properties of Conductive 3D Printing Filament?
Understanding Resistivity and Conductivity
What determines how good a material is at carrying electrical current are the resistivity and conductivity, which are part of its core properties. The quantity of electrical current that can pass through it is referred to as conductivity measured in siemens per meter (S/m). Conductivity depends on the structure and composition of the material; for example, metals conduct electricity well. Unlike conductivity, resistivity refers to the resistance a substance gives to current flow measured in ohm meters (Ω·m). It is essentially the reciprocal of conductivity; insulators such as high resistive materials do not conduct electric current.
This understanding is important for users of conductive 3D printing filaments. Low resistivity and high conductivity are required by manufacturers for this type of filament so that they can form functional electric circuits. For instance, specific values for resistivity or conductivity depend on what additive is used among other things; like carbon black or graphene within the polymer matrix. When these additives are rightly blended together by manufacturers, filaments with desired electrical performance characteristics can be obtained which can be used in producing different applications including touch sensors, wearable electronics or embedded circuits among others.
Comparing Different Conductive Filaments
Several critical parameters have to be considered when comparing different conductive filaments, which are; printability, mechanical properties, conductivity and cost. The three common conductive filaments include:
1. Proto-pasta Conductive PLA:
Proto-pasta’s Conductive PLA is known for its ease of use and moderate electrical conductivity. Generally, this filament is selected for teaching purposes and small electronics projects. It has a good balance between how easy it prints and conducts electricity thus suitable for building touch sensors as well as simple circuits. However, its mechanical properties tend to be weak as compared to other alternatives because it cannot be used in places that might bear loads.
2. Graphene 3D Lab Conductive Graphene Filament:
Conductive Graphene Filament by Graphene 3D Lab has great conductivity due to the presence of graphene additives. With these features it combines high mechanical strength with excellent electrical properties hence can be used in more complex tasks such as EMI shielding or advanced sensing systems. These improved properties come at higher printing requirements like tighter control over the process temperature.
3. BlackMagic3D Conductive Graphite PLA:
For its affordability and reliable conduction, BlackMagic3D’s Conductive Graphite PLA is another favourite option. This material lies between Proto-Pasta and Grahene 3D lab regarding how well it conducts electricity or its strength respectively. It is the go-to filament for prototyping needs where low level electric performance suffices. Moreover, blackmagic’s conductible graphite pla is a little bit easier to print than most others making it inclusive across usership ranges.
Analyzing the Mechanical and Electrical Properties
Analyzing the mechanical and electrical properties of these filaments, we shall consider their strengths as well as limitations.
1. Proto-pasta Conductive PLA:
- Mechanical Properties: It should be noted that Proto-pasta Conductive PLA is good for light weight applications which are non-load bearing in nature. However, comparatively speaking it has lower tensile strength than other filaments and is more brittle.
- Electrical Properties: With moderate conductivity, this filament can be used in low power circuits as well as capacitive touch sensors. The filament has got a satisfactory electrical performance for basic electronic applications but may not be competent enough when it comes to more sophisticated tasks.
2. Graphene 3D Lab Conductive Graphene Filament:
- Mechanical Properties: Mechanical property of this filament is its strong point due to the addition of graphene. With high tensile strength and durability, it is an ideal option for robust materials required in certain applications.
- Electrical Properties: This filament boasts high conductivity that suits advanced electronics such as EMI shielding and high-performance sensors. Its remarkable electrical performances, however, come at a higher cost with more demanding printing conditions.
3. BlackMagic3D Conductive Graphite PLA:
- Mechanical Properties: BlackMagic3D’s Conductive Graphite PLA strikes a balance in terms of mechanical toughness that is better than Proto-pasta but not as good as Graphene 3D Lab’s material. For general prototyping or functional parts, one can always rely on it.
- Electrical Properties: On the scale of conductivity, this filament lies somewhere between two extremes hence making it a pocket friendly choice for modest electrical performance requirements. It suits multiple prototypes and functional components demanding less conductance capability.
Can You Use Conductive Filament to Create Circuits?
Designing Simple Circuits with Conductive PLA
To design simple circuits using Conductive PLA, follow a few necessary steps to ensure their functionality and reliability. Make a well-designed layout on CAD software that allows for accuracy and circuit paths planning. After the finalization of the design, one can proceed by loading conductive filament in 3D printer before starting to print.
For maximum efficiency, it is advisable to utilize a dual-extrusion 3D printer. This kind of printer encourages the combination of both conducting and non-conducting substances thereby allowing insulated pathways and strong structures to be made. Consistent extrusion temperature during printing process as well as an accurately adjusted 3D printer will result in optimal conductivity.
After printing, it is important to measure how conductive the circuit is and its general performance. A multimeter can be employed to test continuity and assess resistance across printed circuit boards so that they meet specifications demanded. Sometimes more than one layer of conductive filaments will need to be used to get sufficient electrical conductivity for any application.
However, it should be noted that while Conductive PLA may be suitable for low-power applications or prototypes, it may not handle high current loads or complex circuit designs well. Therefore, it’s ideal for educational projects where there are sensor integrations as well as basic electronic devices which do not require precision or power requirements
Integrating Conductive Filament with Arduino
You can enhance your prototyping capabilities by integrating conductive filaments with an Arduino. Therefore, here are some key steps and websites where I sourced for tips:
- Design and Print the Circuit: Start your circuit design using a CAD software that can fit in the pin layout of the Arduino. With a dual extrusion 3D printer, print the circuit with both conductive and insulating materials. Adafruit is one of these websites that recommend conductive PLA for those looking at simple circuits or educational projects.
- Connecting Components: Now solder components like resistors, LEDs or sensors to the 3D printed circuit’s conductive paths once it has been printed. Confirm continuity through a multimeter test and correct any problems identified.
- Interfacing with Arduino: Link the 3D-printed circuit to the Arduino board using jumper wires. Make sure that there is proper alignment between your connections especially GPIO pins as noted. Using a breadboard to test connections before permanent connection is made.
- Testing and Troubleshooting: To test your circuit upload a simple code onto Arduino.For example Instructables site stresses incremental testing as being crucial in rapidly isolating and remedying potential challenges. Using Multimeter or oscilloscope measure its performance to make sure it meets project requirements.
Testing and Troubleshooting 3D Printed Circuits
Testing and troubleshooting 3D printed circuits entails following a number of detailed steps to guarantee their functionality and efficiency. The top websites claim that:
- Visual Inspection: Begin by closely examining the 3D printed circuit visually so as to identify any obvious faults such as missing lines or gaps in the conductor. Ensure that all components are soldered properly, and there is no short-circuiting.
- Continuity Check: Use a multimeter to check if the traces have continuity. This helps confirm that the connections are complete with no open circuits in between them. Also, it’s advisable by Adafruit to go through each trace one after another in a systematic manner.
- Incremental Testing: As stated on SparkFun, program Arduino with a basic test, then progressively carry out tests for different parts of your system. This can help you narrow down any problems and simplify debugging. For example; when testing your circuit consisting of LEDs, try out each LED separately before moving on to more complex parts.
- Functional Testing: Once you have passed simple continuity checks the next thing to do is perform functional tests using a program that uses all components of your circuit. An oscilloscope or logic analyzer should be used to monitor signal integrity which according to Instructables ensures that the circuitry works properly under real-life conditions.
Reference sources
-
Nikko Industries – Getting Started with Conductive Filament
- This source outlines the basics of conductive filaments, detailing their composition and usage in 3D printing applications. It emphasizes the mixture of carbon with standard 3D printing thermoplastics like PLA, ABS, and TPU.
- Source: Nikko Industries
-
Hackaday – Conductive Filament
- Hackaday discusses the challenges and considerations when using conductive filament for 3D printing, particularly focusing on the limitations regarding electrical resistance and practical implementations in creating circuits.
- Source: Hackaday
-
Instructables – 3D Printing Circuit Boards and Components
- This resource provides an in-depth guide on the process of 3D printing circuit boards and components, highlighting the issues related to higher resistance in conductive materials and offering solutions for effective use.
- Source: Instructables
Frequently Asked Questions (FAQs)
Q: What types of filaments can be used for 3D printing conductive circuits?
A: There are several types of filaments that can be used for 3D printing conductive circuits, including 3D printing conductive PLA, Protopasta conductive PLA, Electrifi, and conductive ABS filament. Each filament type has its own unique properties such as resistivity of the material.
Q: What is the benefit of using Protopasta conductive PLA?
A: Protopasta conductive PLA is popular among hobbyists and professionals because of its relatively low resistivity, which makes it suitable for powering an LED or other low-power applications. Additionally, it is easier to print compared to other conductive filaments due to its properties similar to normal PLA.
Q: At what temperature should I print conductive filaments?
A: The temperature for printing conductive filaments can vary. For example, Protopasta conductive PLA typically prints well at around 190-210°C. It’s important to refer to the manufacturer’s specifications for each specific filament type to achieve the best results.
Q: How does the resistivity of the material affect my 3D printed circuit?
A: The resistivity of the material will determine how conductive your 3D printed circuit is. Materials with lower resistivity will be more conductive. For precise applications, it is crucial to choose a filament with a suitable resistivity that meets the requirements of your project.
Q: What considerations should I keep in mind while 3D printing conductive PLA?
A: When 3D printing conductive PLA, you should consider the printing temperature, the printing speed, and layer height. Additionally, make sure your 3D printer filament is stored properly to prevent moisture absorption, and ensure your printer is well-calibrated.
Q: Can different filaments be used together in a single project?
A: Yes, different filaments can be used together in a single project to achieve varied functional and aesthetic results. For instance, you may use a combination of electrically conductive PLA and normal PLA. However, it’s important to note the compatibility and adhesive properties of different filaments.
Q: What is the best way to store conductive filaments?
A: Conductive filaments should be stored in a cool, dry place, ideally in a sealed bag with desiccant to prevent moisture absorption. Storing filaments in this manner ensures that the 3D printing filament is made of quality material and maintains its properties.
Q: What kind of maintenance does a CNC machine require when 3D printing with conductive filaments?
A: Regular maintenance of the CNC machine includes cleaning the nozzle and print bed to avoid clogging and ensuring the correct calibration of the machine. This helps maintain the quality of 3D prints, especially when using materials like conductive filaments.
Q: Where can I buy high-quality conductive filaments?
A: High-quality conductive filaments can be purchased from various online and physical retailers specializing in 3D printing supplies. Brands like Protopasta offer conductive PLA, and Electrifi is another popular option. Many retailers provide detailed product information, ensuring customers earn from qualifying purchases.
Q: Can the results and discussion section in my research on conductive filaments be enhanced?
A: Yes, the results and discussion section can be enhanced by thoroughly documenting the 3D printing process, including the types of filaments used, printing temperatures, and any issues encountered. Comparing resistivity values and showcasing functional applications such as powering an LED with your 3D printed circuits adds depth to your analysis.


